
Food
The Food of Taiwan Review 2026
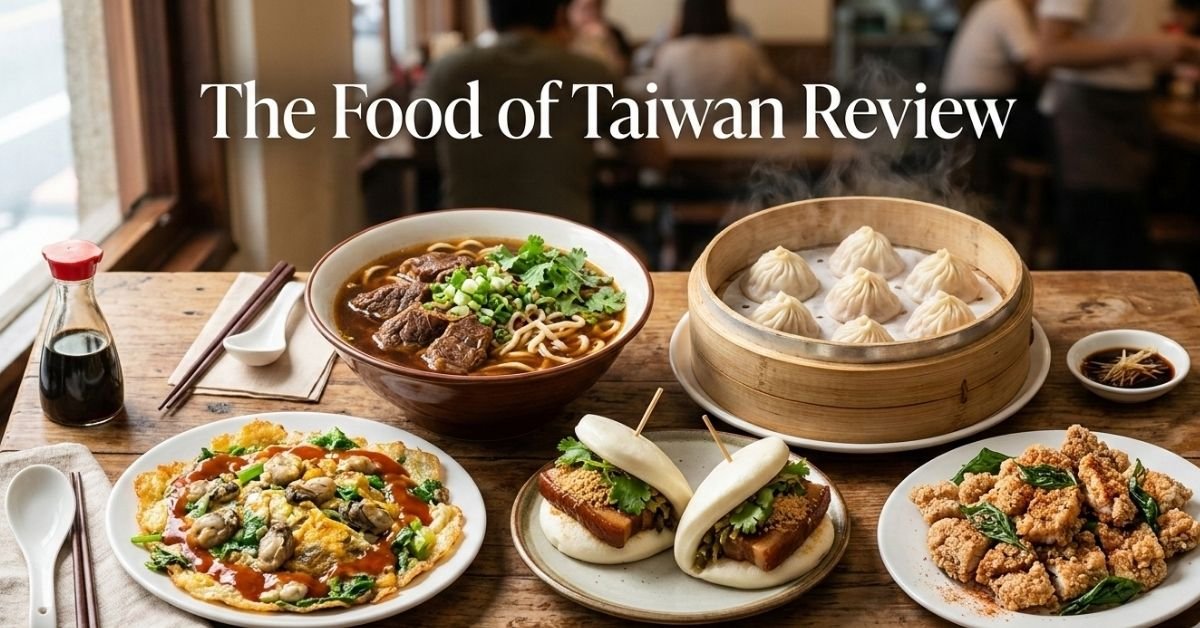
The Food of Taiwan Review is a mix of bold flavors, fresh ingredients, and street-side creativity. From bustling night markets to quiet local eateries, every dish tells a story of culture and history. Travelers and food lovers often find themselves exploring Taiwan not just for the sights but for the smells and tastes that fill its streets. Street foods, local specialties, and modern twists on traditional recipes make Taiwan a must-visit for anyone who loves food.
The island’s culinary landscape is vast, ranging from quick snacks to hearty meals. Each city offers unique dishes shaped by history and local ingredients. This guide will take you city by city, dish by dish, covering must-try foods, their prices in USD, night market locations, and options for different diets including vegan and vegetarian.
Read also: Peruvian Recipe Chicken: Pollo a la Brasa 15 Ways
Taipei Night Market Staples
Taipei is known for its lively night markets, packed with an array of foods. The Shilin and Raohe markets are the most famous, but each neighborhood has its own culinary surprises.
Beef Noodle Soup
Beef noodle soup is considered the food of taiwan review comfort food. A rich broth with tender beef chunks and chewy noodles makes it unforgettable. Popular spots include Yong Kang Street and Master Jim Beef Noodle. Prices typically range from $4–$6 USD per bowl.
Oyster Omelet
A must-try dish that blends fresh oysters with a savory egg batter and a slightly sweet sauce. Lee Chi Oyster Omelets at Raohe Night Market is a favorite among locals.
Taiwanese Fried Chicken
Juicy, crispy, and packed with spices, fried chicken is available at almost every night market. Hot Star Fried Chicken is famous for its huge portions and flavorful seasoning. Expect around $2–$3 USD for a piece.
Gua Bao (Taiwanese Burger)
Soft steamed buns filled with braised pork belly, pickled vegetables, and cilantro. Lan Jia Gua Bao is a local favorite in Taipei.
Xiao Long Bao
These soup-filled dumplings are delicate yet rich in flavor. Din Tai Fung remains the iconic spot, though many smaller stalls offer excellent alternatives at lower prices.
Kaohsiung’s Local Flavors
While Taipei dominates tourist attention, southern cities like Kaohsiung bring their own specialties.
Seafood Delights
Being a port city, Kaohsiung offers fresh seafood at night markets. Grilled squid, shrimp skewers, and oyster pancakes are popular, with prices around $2–$5 USD.
Lu Rou Fan (Braised Pork Rice)
A simple but savory dish of minced pork over rice. Easy to find in street stalls, this dish costs about $1.50–$3 USD.
Vegetarian Options
Temples often have nearby vegetarian stalls. Dishes such as stir-fried vegetables, tofu, and rice bowls are widely available for around $2–$4 USD.
Vegan and Vegetarian-Friendly Taiwan
The food of taiwan reviewhas a growing vegetarian culture, partly influenced by Buddhist practices. Many night markets and restaurants offer plant-based options.
- Vegetable Dumplings: Steamed or fried, filled with cabbage, mushrooms, and carrots.
- Sweet Potato Balls: Chewy snacks made from mashed sweet potatoes, lightly sweetened.
- Tofu Dishes: From deep-fried to braised, tofu is versatile and delicious.
For travelers with allergies, note that seafood, nuts, and soy are commonly used, so always ask vendors for ingredients.
Bubble Tea Origins and Must-Try Drinks
Taiwan is the birthplace of bubble tea, a drink now famous worldwide. Classic milk tea with tapioca pearls remains a favorite, but modern variations include fruit teas, cheese foam, and flavored syrups.
- Recommended Shops: Chun Shui Tang and Tiger Sugar.
- Price: Around $2–$4 USD per drink.
- Tip: Ask for half sugar or less if you prefer lighter sweetness.
Other local beverages include herbal teas, winter melon tea, and shaved ice drinks, perfect for cooling off while exploring markets.
Street Snacks You Can’t Miss
Beyond full meals, Taiwan’s snack culture is vibrant.
- Stinky Tofu: Strong-smelling but tasty fried tofu with pickled cabbage.
- Mochi: Soft rice cakes filled with sweet beans or peanut paste.
- Fried Sweet Potatoes: Crispy outside, soft inside, often served in paper cones.
- Pepper Buns (Hu Jiao Bing): Crispy baked buns with peppered pork filling.
Most snacks range from $1–$3 USD, making them perfect for tasting multiple items in one night.
Regional Differences Across Taiwan
Northern Taiwan, including Taipei, focuses on night markets and urban food trends. Southern Taiwan, like Kaohsiung and Tainan, emphasizes seafood, traditional flavors, and local street eats. Eastern regions are less crowded but have unique ingredients such as fresh mountain vegetables and indigenous recipes.
Price comparison: Northern street foods tend to be slightly higher than southern counterparts, but quality and portion sizes balance the cost.
Planning Your Taiwan Food Tour
To enjoy Taiwan fully, planning helps.
Tips for Travelers
- Use interactive night market maps to locate dishes.
- Set a daily budget, roughly $15–$25 USD for food per person.
- Mix street foods with restaurant experiences for variety.
- Check for vegan, vegetarian, and allergy-friendly options.
- Try regional specialties in each city.
Best Time to Visit
Evening visits are ideal for night markets. Weekend nights are busiest, so consider weekday evenings for a calmer experience.
Home Cooking Taiwanese Dishes
For those wanting to recreate Taiwanese food at home:
Beef Noodle Soup
- Ingredients: beef shank, ginger, garlic, soy sauce, noodles, bok choy.
- Steps: Braise beef in soy-ginger broth for 2–3 hours, cook noodles separately, assemble with broth and vegetables.
Lu Rou Fan
- Ingredients: minced pork, soy sauce, rice, star anise, shallots.
- Steps: Fry shallots, add pork and seasonings, simmer until tender, serve over rice.
Tips
- Use fresh ingredients for authentic taste.
- Adjust seasoning to suit personal preference.
- Serve with pickled vegetables to balance flavors.
Health Notes
While most Taiwanese street foods are safe, some dishes are fried or high in sodium. Balance with vegetable dishes, fruits, and plenty of water. For travelers with dietary restrictions, pre-checking ingredients can prevent allergies or discomfort.
Must-Visit Food Destinations
Taipei Night Markets
- Shilin: Fried chicken, bubble tea, oyster omelets.
- Raohe: Gua bao, pepper buns, stinky tofu.
Kaohsiung Markets
- Liuhe: Seafood skewers, shaved ice desserts.
- Ruifeng: Variety of local snacks and drinks.
Tainan Highlights
- Old streets: Traditional braised pork dishes, rice cakes, local sweets.
- Food heritage: Explore ancient recipes still popular today.
Comparing Street Foods to Michelin Spots
Some street foods are as good as Michelin-rated dishes. The advantage is price: street dishes cost $1–$6 USD, while restaurants can exceed $15 USD per dish. Both offer great taste, but street food is more casual and allows sampling many flavors in one night.
Seasonal and Regional Recommendations
The food of taiwan review ingredients vary with seasons:
- Summer: Mango shaved ice, tropical fruits, iced teas.
- Winter: Hot soups, braised meats, warm desserts.
- Spring/Fall: Fresh vegetables, seafood, night market snacks.
Local fruits and vegetables make dishes lighter and more refreshing depending on the season.
Interactive Tools for Food Planning
Use interactive maps and budget calculators for planning trips:
- Mark must-visit night markets in each city.
- Allocate USD budget per dish and per day.
- Include vegan/vegetarian and allergy-safe options.
- Track seasonal specialties to ensure you try the freshest foods.
These tools make touring easier, especially for first-time travelers.
Conclusion
The food of taiwan review offers a food experience unlike any other. From bustling night markets to traditional regional dishes, every bite tells a story. With street eats, Michelin-level options, and vegan alternatives, there’s something for everyone. This guide to “The Food of Taiwan Review” covers cities, dishes, prices, and tips to help plan an unforgettable culinary adventure. Exploring Taiwan through its food is the perfect way to connect with its culture, flavors, and people.
FAQs
What are the must-try street foods in Taiwan?
Beef noodle soup, xiao long bao, oyster omelet, fried chicken, gua bao, stinky tofu.
Where can I find the best night markets?
Shilin and Raohe in Taipei, Liuhe and Ruifeng in Kaohsiung, and Tainan old streets.
Are there vegan or vegetarian options?
Yes, many night markets and restaurants offer vegetable dumplings, tofu dishes, and sweet potato snacks.
How much should I budget for food per day?
Around $15–$25 USD per person is sufficient for street food and small meals.
What drinks should I try?
Classic bubble tea, winter melon tea, herbal teas, and shaved ice drinks.
Is the food of taiwan review safe for allergies?
Check ingredients carefully for seafood, nuts, or soy. Many vendors can guide you.

Many home cooks struggle to recreate restaurant-quality flavor without complex techniques or rare ingredients. Dishes often taste flat, even when the recipe seems correct. This is especially true when trying to achieve rich, earthy depth in simple meals. Truffle sauce solves this problem by delivering a concentrated, savory flavor that instantly enhances everyday dishes.
Whether used in pasta, meats, or vegetables, truffle sauce adds a refined touch without requiring advanced skills. With the right ingredients and approach, it can be made at home or selected carefully from store options. This guide explains what truffle sauce is, how to use it properly, and how to make it taste balanced rather than overpowering. You will learn practical ways to integrate it into real meals while maintaining control over flavor, texture, and cost.
What Is Truffle Sauce and Why It Matters
Truffle sauce is a condiment made from truffles, mushrooms, oil, and seasonings. It captures the distinct aroma of truffles, which are prized fungi known for their deep, earthy flavor. Unlike whole truffles, which are expensive and perishable, truffle sauce offers a more accessible way to enjoy that signature taste.
Most commercial versions blend mushrooms with truffle flavoring, sometimes using truffle oil or small pieces of real truffle. This combination creates a balanced product that is easier to store and use regularly. The result is a sauce that can be spooned directly onto dishes without preparation.
The reason it matters is simple. Truffle sauce can transform basic meals into something more refined. Plain pasta, a grilled chicken breast, or even scrambled eggs can gain complexity with a small amount. This makes it valuable for both everyday cooking and special occasions.
Read also: Plancha Cooking Made Easy: Complete Beginner Guide
Understanding the Flavor Profile of Truffle Sauce
The flavor of truffle sauce is often described as earthy, umami-rich, and slightly garlicky. It has a deep aroma that stands out immediately, which is why it should be used carefully. A small amount is usually enough to influence an entire dish.
Different types of truffles produce slightly different flavors. Black truffles tend to be more robust and subtle, while white truffles are sharper and more aromatic. Most sauces on the market use black truffles because they are easier to work with and more stable in processed form.
The mushroom base in the sauce plays an important role. It softens the intensity of the truffle while adding body and texture. This balance ensures that the sauce enhances food rather than overwhelming it, which is a common mistake when using strong ingredients.
Types of Truffle Sauce Available
There are several types of truffle sauce, and understanding the differences helps you choose the right one. Some sauces are creamy, while others are oil-based or paste-like. Each works best in different dishes.
Cream-based truffle sauces are often used in pasta and risotto. They provide a smooth texture and blend easily with other ingredients. These sauces are ideal for creating rich, comforting meals.
Oil-based or paste-style sauces are more concentrated. They are better suited for finishing dishes, such as spreading on bread or adding to cooked meats. These versions offer more control because you can adjust the amount precisely.
Quality varies widely between brands. Some rely heavily on artificial flavoring, while others include real truffle pieces. Reading ingredient labels helps you identify products that deliver a more authentic taste.
How to Make Truffle Sauce at Home
Making truffle sauce at home gives you full control over ingredients and flavor. It also allows you to adjust intensity based on your preference. The process is straightforward and does not require professional skills.
Start with a base of finely chopped mushrooms, such as cremini or button mushrooms. Cook them slowly in butter or olive oil until they release moisture and become soft. This step builds the foundation of the sauce.
Add garlic, salt, and a small amount of cream if you want a richer texture. Finally, incorporate truffle oil or finely shaved truffle. Mix thoroughly and let the flavors combine over low heat. The key is to avoid high heat after adding truffle, as it can weaken the aroma.
Homemade truffle sauce can be stored in the refrigerator for a few days. Keeping it in an airtight container helps preserve its flavor.
Best Dishes to Pair with Truffle Sauce
Truffle sauce works best with foods that have a mild base flavor. This allows the sauce to stand out without competition. Pasta is one of the most common pairings because it absorbs the sauce evenly.
It also pairs well with meats such as chicken, beef, and even lamb. A small spoonful over a freshly cooked steak can add depth without masking the natural flavor of the meat. The key is to apply it after cooking rather than during high heat.
Vegetables benefit from truffle sauce as well. Roasted potatoes, mushrooms, and cauliflower become more complex when combined with it. Even simple dishes like mashed potatoes can gain a noticeable upgrade.
Egg-based dishes are another strong match. Scrambled eggs, omelets, or even fried eggs can carry truffle flavor effectively because of their neutral taste.
Common Mistakes When Using Truffle Sauce
One of the most common mistakes is using too much. Truffle sauce is highly concentrated, and overuse can make a dish taste artificial or overpowering. Starting with a small amount and adjusting gradually is the best approach.
Another mistake is applying it during high-heat cooking. Truffle aroma is delicate and can fade when exposed to excessive heat. It is better to add the sauce at the end of cooking or just before serving.
Combining truffle sauce with strong flavors can also reduce its impact. Ingredients like heavy spices, strong cheeses, or acidic sauces can clash with it. Keeping the rest of the dish simple allows the truffle flavor to shine.
Finally, storing it improperly can affect quality. Exposure to air and light can reduce its aroma over time, so proper storage is essential.
Choosing the Best Store-Bought Truffle Sauce
Selecting a good store-bought truffle sauce requires attention to detail. Many products use synthetic flavoring, which can taste harsh or overly strong. Looking for sauces that include real truffle pieces is a better option.
Ingredient lists should be simple and clear. A high-quality sauce typically includes mushrooms, oil, truffle, and basic seasonings. Avoid products with excessive additives or artificial enhancers.
Price can be an indicator, but it is not always reliable. Some mid-range products offer good balance without being overly expensive. Reading reviews and trying small quantities first can help you find a suitable option.
Packaging also matters. Glass jars are preferable because they preserve flavor better than plastic. Proper sealing ensures the sauce maintains its quality over time.
Health and Nutritional Considerations
Truffle sauce is generally used in small amounts, so its nutritional impact is limited. However, the base ingredients can influence its overall profile. Cream-based sauces tend to be higher in fat and calories, while oil-based versions may be lighter.
Truffles themselves contain antioxidants and beneficial compounds, but the quantity in most sauces is relatively small. The main benefit comes from enhancing flavor without requiring large amounts of salt or heavy seasoning.
For those watching their diet, moderation is key. Using truffle sauce to replace heavier sauces can sometimes reduce overall calorie intake while maintaining taste. Checking labels for sodium and fat content is still important.
Allergy considerations should also be noted. Some sauces may include dairy or specific additives that are not suitable for everyone.
How to Store and Preserve Truffle Sauce
Proper storage extends the life and quality of truffle sauce. Once opened, it should be kept in the refrigerator. Sealing the jar tightly prevents air from degrading the aroma.
Using clean utensils each time helps avoid contamination. Even small amounts of moisture or food particles can affect freshness. Keeping the surface of the sauce clean maintains its quality longer.
Most sauces last several days to a few weeks after opening, depending on ingredients. Homemade versions typically have a shorter shelf life than commercial ones due to the absence of preservatives.
Freezing is possible but not always ideal. The texture may change, especially in cream-based sauces. If freezing is necessary, use small portions to make thawing easier.
Conclusion
Truffle sauce is a practical way to introduce rich, earthy flavor into everyday cooking without relying on expensive fresh truffles. It works best when used sparingly and paired with simple ingredients that allow its aroma to stand out. Understanding the different types, proper usage, and storage methods helps maintain both flavor and quality.
Making it at home offers control and freshness, while store-bought options provide convenience when chosen carefully. Avoiding common mistakes such as overheating or overuse ensures better results. When handled correctly, truffle sauce can elevate a wide range of dishes from basic to refined with minimal effort.
FAQs
What is truffle sauce made of?
Truffle sauce is typically made from mushrooms, oil or cream, seasonings, and truffle or truffle flavoring.
Can I use truffle sauce every day?
Yes, but in small amounts. Its strong flavor is best used sparingly to avoid overpowering meals.
Is truffle sauce expensive?
It varies. Homemade versions are affordable, while high-quality store options with real truffle can cost more.
Does truffle sauce need to be refrigerated?
Yes, once opened it should be stored in the refrigerator to maintain freshness.
Can I cook truffle sauce at high heat?
It is better to add it at low heat or after cooking to preserve its aroma.
What dishes work best with truffle sauce?
Pasta, eggs, meats, and roasted vegetables pair well with truffle sauce.
Pistachio cream often looks easy to make, but small mistakes quickly affect the result. Many homemade versions turn out grainy, overly thick, or lacking real pistachio flavor because the balance of ingredients and blending technique is off. Without understanding how fats, sugar, and pistachios work together, it is difficult to achieve that smooth, spreadable consistency found in high-quality versions. This guide breaks down the process in a clear and practical way. You will learn what pistachio cream is, how to choose the right ingredients, and how to control texture for consistent results. It also covers how to use it in different recipes, how it compares to store-bought options, and how to store it properly so it stays fresh and stable.
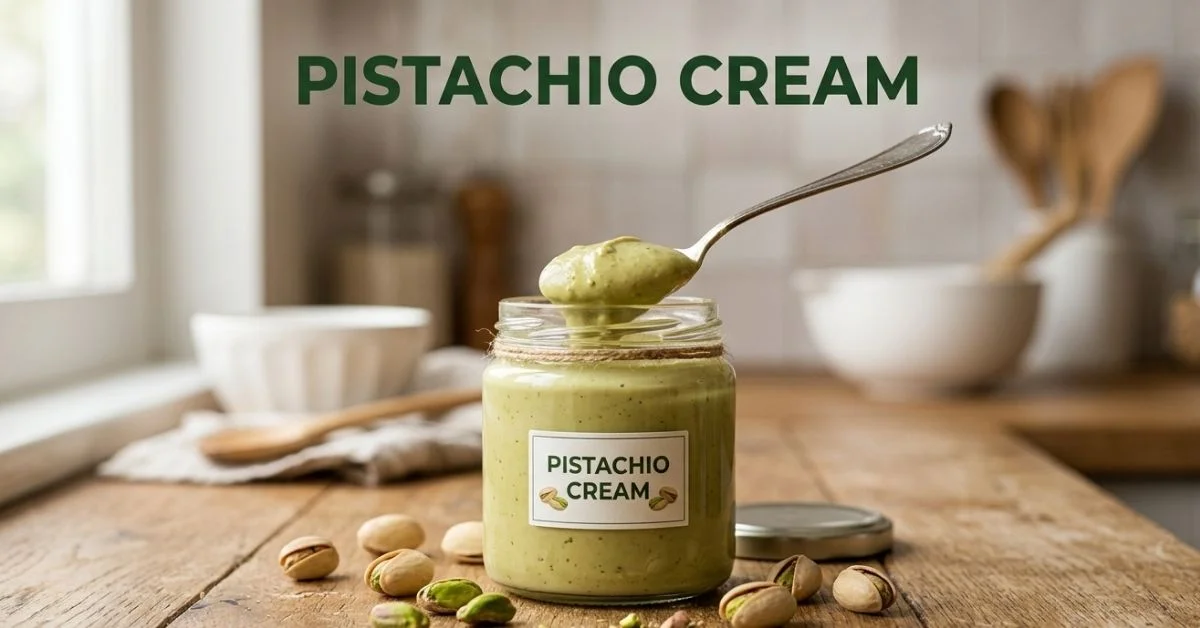
What Is Pistachio Cream?
Pistachio cream is a sweet, smooth spread made primarily from pistachios, sugar, and fats that help create a soft, creamy texture. Unlike plain nut butter, it’s designed to be indulgent, closer to a dessert filling than a healthy spread. In Italian kitchens, especially in Sicily, it’s treated almost like a luxury ingredient.
The flavor is naturally rich and slightly sweet, with a subtle roasted nuttiness. When made properly, the pistachio taste stays clean and not overly sugary. Good pistachio cream should feel silky on the tongue, not gritty or oily, and it should spread easily without breaking.
Its popularity comes from versatility. You’ll find it in croissants, cakes, gelato, and even simple breakfast toast. It sits in the same category as chocolate spreads, but with a more refined, nut-forward flavor that stands out in both sweet and gourmet dishes.
Read also: Plancha Cooking Made Easy: Complete Beginner Guide
Pistachio Cream vs Pistachio Butter
The main difference comes down to composition. Pistachio butter is usually just ground pistachios, sometimes with a pinch of salt. It’s dense, slightly oily, and closer to peanut butter in texture. Pistachio cream, on the other hand, includes sugar, fats like white chocolate or oil, and sometimes milk powder.
This changes how it behaves in recipes. Pistachio butter works well in savory dishes or as a protein-rich spread. Pistachio cream is softer, sweeter, and designed for desserts. It blends more easily into fillings and frostings without needing extra sugar or fat.
If you’re baking or making desserts, pistachio cream is the better choice. If you want something simpler and less sweet, pistachio butter makes more sense. Knowing the difference helps avoid common mistakes where the wrong texture ruins the final result.
Ingredients You Need (Explained)
Choosing the Right Pistachios
The quality of pistachios decides everything. Raw or lightly roasted pistachios give the best flavor and color. Sicilian pistachios, especially those from Bronte, are known for their deep green color and intense taste, but any high-quality pistachio will work if it’s fresh.
Avoid heavily salted or overly roasted pistachios. They can overpower the cream and give it a dull brown color. If you’re using roasted nuts, keep them lightly toasted so the natural oils remain balanced.
Peeling the skins is optional but recommended for a smoother finish. It improves both texture and appearance, especially if you want that bright green, premium look.
Sweeteners and Fats
Sugar adds sweetness, but it also affects texture. Fine sugar or powdered sugar blends more easily, preventing graininess. White chocolate is often used because it adds fat and helps create a creamy consistency without overpowering the pistachio flavor.
Neutral oils like sunflower oil or mild butter help loosen the mixture. This is where many recipes fail. Without enough fat, the cream stays thick and pasty. With too much, it turns oily. Balance matters more than exact measurements.
Milk powder can also be added for a richer, slightly milky flavor. It gives the cream a dessert-like profile that feels closer to what you’d find in Italian pastry shops.
Optional Flavor Enhancers
A small amount of vanilla extract can round out the flavor without masking the pistachios. It adds depth rather than sweetness. Some people also add a pinch of salt to sharpen the overall taste.
For a more authentic Italian-style pistachio cream, keep it simple. Too many add-ins dilute the main flavor. The goal is to highlight the pistachio, not hide it.
If you want variations, you can experiment later. But for a base recipe, clean and minimal ingredients work best.
Easy Pistachio Cream Recipe (Step-by-Step)
Equipment Needed
A high-speed blender or a strong food processor is essential. Pistachios need time and power to release their oils and turn smooth. A weak machine will leave you with a grainy paste no matter how long you blend.
A spatula helps scrape down the sides, which is important during blending. A fine sieve is optional if you want an ultra-smooth finish, but most home versions skip this step.
Make sure your equipment is dry. Even a small amount of water can affect texture and cause the mixture to seize.
Preparation Steps
Start by blanching and peeling the pistachios if you want a smoother texture and brighter color. Dry them completely before blending. Any moisture will interfere with the process.
Blend the pistachios first on their own until they start releasing oils. This can take several minutes. At first, it will look like crumbs, then a thick paste, and finally something smoother.
Once the pistachios break down, add sugar, melted white chocolate, and a small amount of oil. Blend again until everything combines into a smooth, spreadable cream.
Blending and Texture Tips
Blend longer than you think. Most people stop too early. Pistachio cream becomes smoother with time as the natural oils fully release. Pause occasionally to prevent overheating.
If the mixture feels too thick, add a small amount of oil gradually. Don’t add too much at once. It’s easier to loosen the cream than to fix an oily texture.
Let the cream rest after blending. It thickens slightly as it cools, especially if white chocolate is used. The final texture settles after 20 to 30 minutes.
How to Get a Smooth, Creamy Texture
Texture comes down to emulsification. This means combining fats and solids in a way that creates a stable, smooth mixture. Pistachios contain natural oils, but they need help from added fats like chocolate or oil to reach a creamy consistency.
A powerful blender makes a big difference. It breaks down the pistachio fibers more effectively, reducing graininess. Lower-end machines often leave tiny particles that you can feel in the final product.
Temperature also plays a role. Slight warmth helps fats blend better, but overheating can separate the mixture. Blend in short intervals and let the machine rest if needed to maintain control.
Common Mistakes (And How to Fix Them)
Grainy texture usually comes from under-blending or using coarse sugar. The fix is simple. Blend longer and use finer sugar next time. If already made, reheating slightly and blending again can help smooth it out.
If the cream is too thick, it likely needs more fat. Add a small amount of neutral oil and blend again. If it’s too runny, chill it. White chocolate-based versions firm up naturally when cooled.
Flavor imbalance happens when sugar overpowers the pistachios. This often comes from low-quality nuts. Use better pistachios and keep sweeteners controlled. A pinch of salt can also help balance the flavor.
Delicious Ways to Use Pistachio Cream
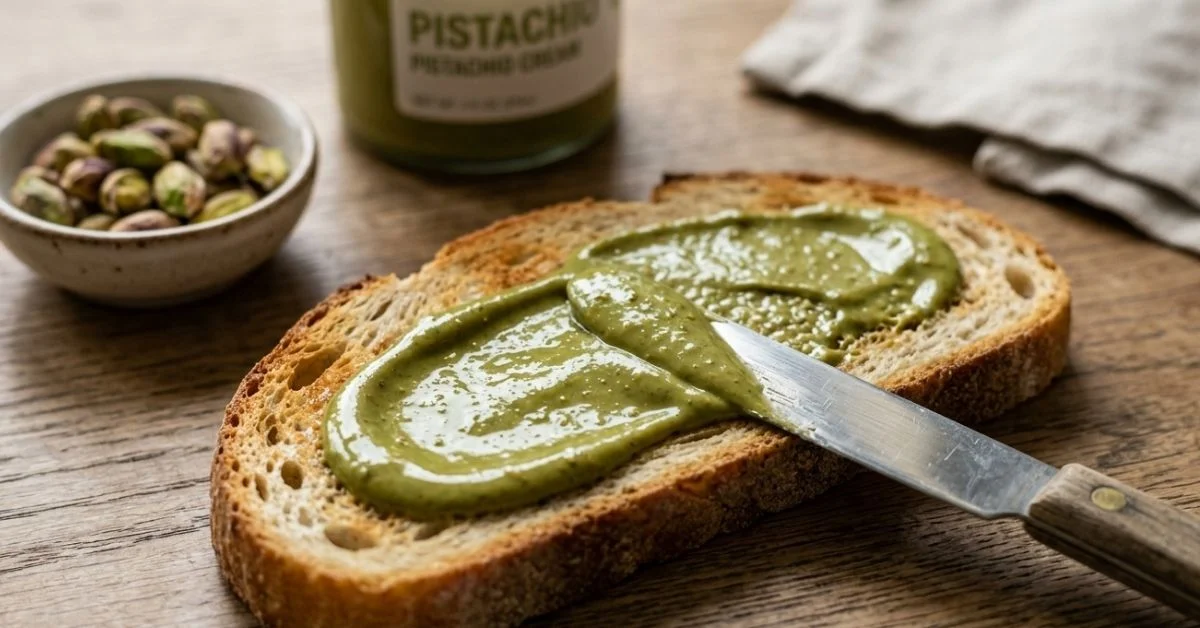
Breakfast Ideas
Spread pistachio cream on toast, pancakes, or waffles for a simple but rich breakfast. It pairs well with fruits like bananas or berries, which cut through the richness.
It also works well in croissants. Fill a warm croissant with a spoonful of pistachio cream and it melts slightly inside, creating a soft, dessert-like center.
For a quick option, swirls it into yogurt. It adds flavor and texture without needing extra toppings.
Desserts and Baking
Pistachio cream shines in desserts. Use it as a filling for cakes, cupcakes, or even cheesecakes. It blends well into frostings and adds a unique flavor that stands out from common chocolate or vanilla.
It’s also perfect for cannoli or layered desserts. The creamy texture holds well and doesn’t leak, making it practical for baking.
You can also drizzle it over ice cream or mix it into gelato for a richer pistachio flavor.
Gourmet Uses
In more refined dishes, pistachio cream can be used as a plating element. A small spread on a dessert plate adds both flavor and visual appeal.
It also works in fusion recipes. Some chefs pair it with savory elements like soft cheeses or even use it in sauces for a subtle nutty note.
Used carefully, it can elevate simple dishes into something more interesting without much effort.
Homemade vs Store-Bought Pistachio Cream
Store-bought options like premium Italian pistachio spreads often use high-quality nuts and controlled processing. They offer consistent texture and flavor, which can be hard to replicate at home without experience.
Homemade pistachio cream gives you control. You decide the sweetness, ingredient quality, and texture. It can taste fresher and more natural, especially if you use good pistachios.
Cost is another factor. High-end pistachio cream can be expensive. Making it at home is usually cheaper, though the price depends on the quality of pistachios you choose.
Storage, Shelf Life, and Safety
Pistachio cream should be stored in an airtight container in the refrigerator. This keeps the fats stable and prevents spoilage. Always use a clean spoon to avoid contamination.
Homemade versions typically last about two to three weeks. Without preservatives, they don’t have the same shelf life as commercial products.
If the smell changes or the texture separates badly, it’s best to discard it. Natural oil separation is normal, but rancid odors are not.
Variations You Can Try
A vegan version replaces white chocolate and milk powder with plant-based alternatives. Coconut cream or dairy-free chocolate works well without changing the core texture too much.
For a sugar-free option, use alternative sweeteners like erythritol or stevia blends. Keep in mind that texture may change slightly depending on the sweetener used.
An Italian-style version focuses on simplicity and high-quality pistachios. Less sugar, fewer additives, and a stronger pistachio flavor define this approach.
Nutrition Overview
Pistachio cream is calorie-dense because of its fat and sugar content. It’s not meant to be a health food, but it does contain healthy fats from pistachios.
Pistachios themselves provide nutrients like protein, fiber, and antioxidants. However, once turned into cream, the added sugar increases the overall calorie count.
It’s best enjoyed in moderation. A small amount goes a long way in both flavor and richness.
Conclusion
Pistachio cream is simple in concept but depends on small details to get right. The quality of pistachios, the balance of fats and sweetness, and proper blending all shape the final result. Once you understand how texture and emulsification work, the process becomes consistent and reliable. This guide gives you more than a recipe by showing how to adjust and fix common issues. It also opens up practical ways to use pistachio cream in everyday meals and desserts. With the right approach, homemade versions can match or even exceed store-bought quality. Try it once with attention to detail, and it quickly becomes a staple worth repeating.
FAQs
What is pistachio cream made of?
It’s typically made from pistachios, sugar, fats like oil or white chocolate, and sometimes milk powder or vanilla for added flavor.
Is pistachio cream the same as pistachio butter?
No, pistachio butter is just ground nuts, while pistachio cream includes sweeteners and fats for a softer, dessert-like texture.
How do you make pistachio cream smooth?
Use a strong blender, blend longer than expected, and add enough fat to help emulsify the mixture properly.
Can I make pistachio cream without white chocolate?
Yes, you can replace it with oil or plant-based fats, though the texture and flavor will be slightly different.
How long does pistachio cream last?
Homemade pistachio cream usually lasts two to three weeks in the refrigerator when stored properly.
What can I use pistachio cream for?
It works well as a spread, dessert filling, topping for pancakes or ice cream, and even in gourmet dishes.
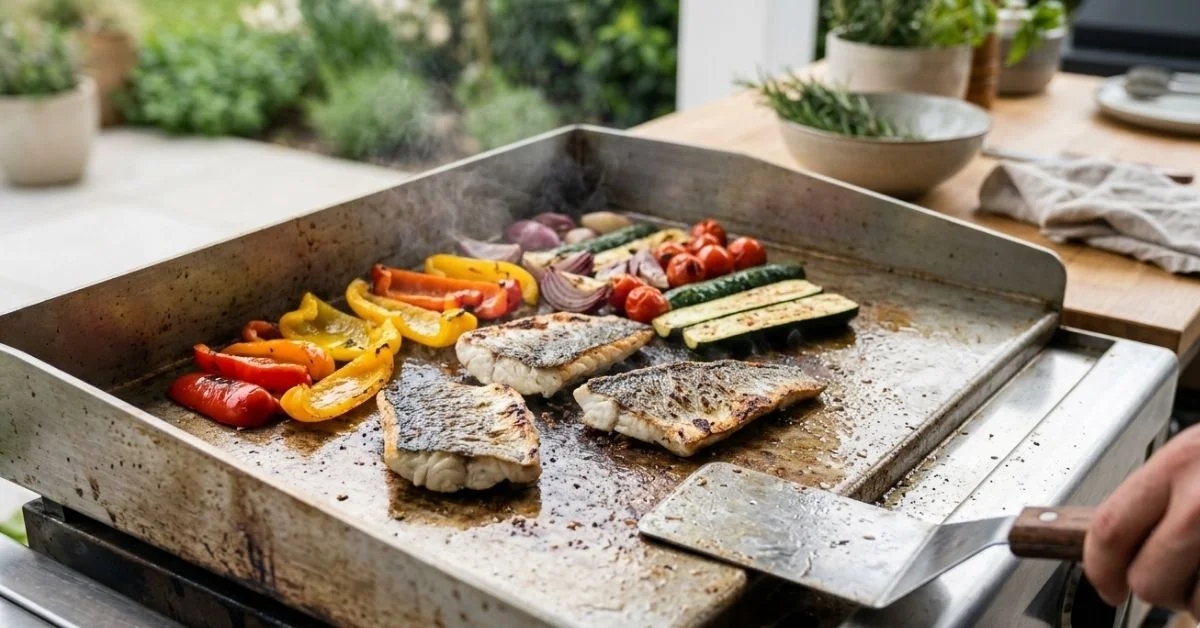
Many people are curious about plancha cooking but feel unsure where to start. They see it mentioned alongside grills and barbecues, yet the differences are not always clear. Without understanding how a plancha works, it is easy to overcook food, use the wrong temperature, or miss out on the flavor that makes this method special.
This guide breaks everything down in a simple, practical way. You will learn what a plancha is, how it works, and how to cook confidently on it. From choosing the right type to mastering heat control and avoiding common mistakes, this article covers the full picture so you can actually use a plancha, not just understand it.
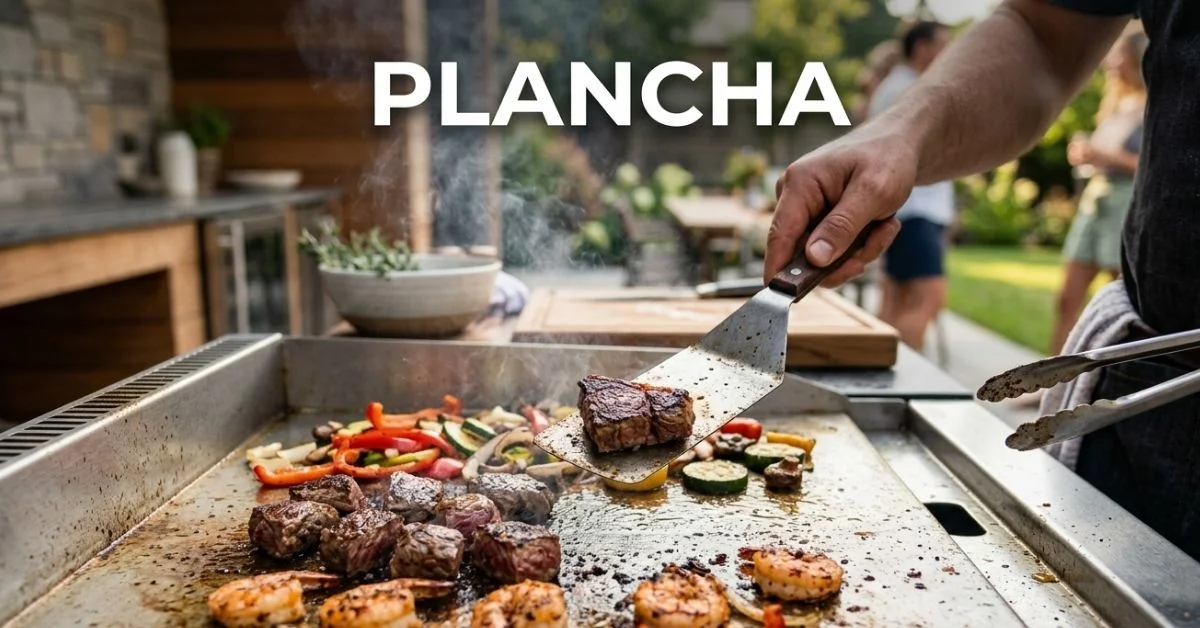
What Is a Plancha?
A plancha is a flat cooking surface made from materials like cast iron or stainless steel, designed to cook food at high, even heat. Unlike traditional grills, it has no grates, so food sits directly on a smooth surface. This allows for consistent contact and better control over cooking.
The concept comes from Spanish cuisine and has strong roots in French cooking as well. Originally used in restaurants, it has become popular in home kitchens because it combines simplicity with professional-level results. You can cook everything from steak to eggs on the same surface.
Today, plancha cooking is gaining attention because it is versatile and efficient. It works indoors and outdoors, produces less smoke than many grills, and makes it easier for beginners to get consistent results without complicated setups.
Read also: Wagyu Beef Price per Pound: Complete Cost Guide
How Plancha Cooking Works
Plancha cooking relies on direct contact between food and a hot, flat surface. The heat spreads evenly across the plate, which helps cook food uniformly without hot spots. This is especially useful when preparing multiple items at once.
One key element is high-heat searing. When the surface is hot enough, it triggers the Maillard reaction, which creates a rich, browned crust on foods like steak or fish. This is what gives plancha-cooked food its distinct flavor.
Another advantage is control. Because the surface is flat, you can easily move food between hotter and cooler zones. This allows you to manage cooking speed without constantly adjusting the heat source, which is a common challenge with traditional grills.
Types of Plancha Grills
Gas Plancha
Gas planchas are the most common choice for outdoor cooking. They heat up quickly and allow precise temperature control through adjustable burners. This makes them ideal for cooking different foods at the same time.
Many well-known brands offer gas models designed for home use. They often include multiple heat zones, which help you manage cooking more efficiently. For beginners, this setup feels familiar if they have used a gas grill before.
Gas planchas are best for people who want consistent performance and quick results. They are especially useful for cooking large meals where timing and heat control matter.
Electric Plancha
Electric planchas are designed for indoor use or smaller spaces. They plug into a standard outlet and provide a steady heat source without requiring gas. This makes them convenient for apartments or kitchens without outdoor access.
The heat is usually more uniform across the surface, but maximum temperatures may be slightly lower than gas models. This means they are excellent for vegetables, eggs, and seafood, though they may take longer for thick cuts of meat.
For beginners, electric planchas are easy to manage. You simply set the temperature and start cooking, which removes some of the guesswork involved in heat control.
Portable vs Built-in
Portable planchas are compact and easy to move, making them ideal for small gatherings or travel. They are simple to set up and store, which suits people with limited space.
Built-in planchas are designed for permanent outdoor kitchens. They offer more cooking space and often include advanced features like multiple burners and thicker cooking plates.
Choosing between the two depends on how often you plan to cook and the space you have available. For most beginners, a portable model is a practical starting point.
Plancha vs Grill vs BBQ
A plancha differs from a grill mainly in its surface. Grills use grates, which allow fat to drip down, while a plancha keeps everything on a flat plate. This results in better contact and more even cooking.
Compared to a barbecue, a plancha produces less smoke and cooks food faster. Barbecues rely on indirect heat and often require longer cooking times. A plancha is more direct and efficient.
Each method has its place. A plancha is best for quick, high-heat cooking and delicate foods. Grills are useful for achieving char marks, while barbecues are ideal for slow cooking. Understanding these differences helps you choose the right tool for each situation.
Benefits of Plancha Cooking
One of the biggest advantages of plancha cooking is even heat distribution. The flat surface ensures that food cooks consistently, reducing the risk of undercooked or overcooked areas.
It also produces less smoke than traditional grilling. Because there are no open flames beneath dripping fat, flare-ups are minimal. This makes it suitable for indoor use or areas where smoke is a concern.
Another benefit is versatility. You can cook meat, seafood, vegetables, and even breakfast items on the same surface. This flexibility makes a plancha a practical addition to any kitchen setup.
Best Foods to Cook on a Plancha
Meat (steak, chicken)
Meat cooks exceptionally well on a plancha because of the direct contact with the hot surface. Steak develops a strong sear while staying juicy inside. Chicken cooks evenly without drying out.
The key is to preheat the surface properly. Once hot, place the meat down and let it cook without moving it too much. This helps form a proper crust.
Using the right amount of oil also matters. A light coating is enough to prevent sticking and enhance flavor without making the surface greasy.
Seafood (fish, shrimp)
Seafood benefits from the even heat and smooth surface of a plancha. Fish fillets do not stick as easily, and shrimp cook quickly without losing moisture.
Because seafood cooks fast, timing is important. It is easy to overcook if the heat is too high or if you leave it on the surface for too long.
A simple approach works best. Light seasoning, proper heat, and careful timing bring out the natural flavors without complication.
Vegetables
Vegetables develop a rich flavor when cooked on a plancha. The high heat helps caramelize natural sugars, creating a slightly crispy texture on the outside.
Cutting vegetables evenly ensures consistent cooking. This is especially important when preparing mixed vegetables on the same surface.
A small amount of oil and proper spacing help avoid steaming. When vegetables are overcrowded, they release moisture and lose their texture.
Breakfast foods (eggs, pancakes)
A plancha is not limited to lunch or dinner. It works equally well for breakfast items like eggs and pancakes. The flat surface makes flipping and cooking easier.
Eggs cook evenly without spreading too much, and pancakes develop a consistent golden color. This makes the plancha useful for family meals.
Using a lower heat setting is important here. High heat can burn delicate foods quickly, so adjusting temperature is key.
Essential Plancha Cooking Techniques
Searing is one of the most important techniques. When cooking steak, I noticed that letting the surface fully heat before adding the meat makes a huge difference. The result is a better crust and more flavor.
Temperature control is another critical skill. Beginners often struggle with this because the surface heats quickly. Learning to move food between hotter and cooler areas helps manage cooking without turning the heat up and down constantly.
Oil usage should be minimal but intentional. A thin layer helps prevent sticking and improves browning. Too much oil can lead to uneven cooking and unnecessary smoke.
Step-by-Step Beginner Guide
Start by preheating the planch’a . Give it enough time to reach the desired temperature before adding any food. This step is often overlooked but makes a noticeable difference.
Next, add a small amount of cooking oil and spread it evenly. Place your food on the surface and let it cook without constant movement. This allows proper searing to develop.
Flip the food at the right time and cook until done. Once finished, remove it promptly to avoid overcooking. With practice, this process becomes second nature.
Common Plancha Cooking Mistakes
One common mistake is overcrowding the surface. When too much food is placed at once, it lowers the temperature and causes uneven cooking.
Another issue is using the wrong temperature. Beginners often cook at either too high or too low heat. Finding the right balance is essential for good results.
Not preheating the plancha is also a frequent problem. Without proper heat, food sticks and lacks the desired texture. Taking a few extra minutes to preheat solves this issue.
Cleaning and Maintenance Tips
Cleaning a planch’a after each use keeps it in good condition. While the surface is still warm, use a scraper to remove food residue. This makes the process easier.
For deeper cleaning, a small amount of water can help loosen stubborn bits. Avoid harsh chemicals, as they can damage the cooking surface.
Regular maintenance, including light oiling, helps prevent rust and extends the lifespan of the plancha. This simple routine keeps it ready for future use.
Must-Have Plancha Accessories
A good spatula is essential for flipping and moving food. It should be sturdy enough to handle different types of ingredients without bending.
A scraper is useful for cleaning and maintaining the surface. It helps remove residue quickly and keeps the planch’a in good shape.
Heat-resistant gloves and oil bottles add convenience and safety. These small tools make cooking easier and reduce the risk of accidents.
Safety Tips for Beginners
Heat safety is important when using a planch’a . The surface can reach very high temperatures, so always handle it with care.
Oil splatter can occur if the surface is too hot or if too much oil is used. Keeping a safe distance and using the right amount of oil helps prevent this.
Proper setup is also essential. Make sure the planch’a is placed on a stable surface and used in a well-ventilated area, especially when cooking indoors.
Is a Plancha Worth It?
A plancha is worth considering if you enjoy versatile cooking. It allows you to prepare a wide range of foods on a single surface with consistent results.
In terms of cost, there are options for different budgets. Entry-level models are affordable, while premium versions offer more features and durability.
For beginners, a planch’a is a practical tool that simplifies cooking. It combines ease of use with high-quality results, making it a valuable addition to any kitchen.
Conclusion
Plancha cooking offers a simple and effective way to prepare a wide range of meals with consistent results. From understanding how the flat surface works to mastering heat control and choosing the right foods, the basics are easy to learn and apply. It stands out for its versatility, whether you are cooking steak, seafood, or even breakfast. By avoiding common mistakes and maintaining your plancha properly, you can improve both flavor and efficiency over time. For beginners, it removes much of the guesswork found in traditional grilling. If you want a reliable and practical cooking method, a planch’a is worth trying. Start with simple dishes, practice your technique, and build confidence with every meal.
FAQs
What is a plancha used for?
A plancha is used for cooking food on a flat, heated surface, ideal for meat, seafood, vegetables, and breakfast items.
Is a plancha better than a grill?
It depends on your needs. A planch’a offers even cooking and versatility, while a grill is better for smoky flavor and char marks.
Can you cook steak on a plancha?
Yes, steak cooks very well on a plancha, especially when the surface is properly preheated for a good sear.
Do you need oil on a plancha?
A small amount of oil is recommended to prevent sticking and improve browning, but too much should be avoided.
How do you clean a plancha?
Clean it while warm using a scraper, then wipe it down. For deeper cleaning, use water and avoid harsh chemicals.
Is plancha cooking healthy?
Yes, it can be healthier since it requires less oil and allows excess fat to cook off while retaining flavor.
-
 Food2 weeks ago
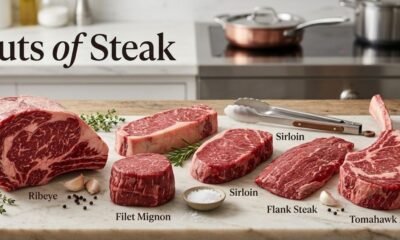
Cuts of Steak: Complete Guide to Beef Cuts
-

 Food2 weeks ago
What Is Andouille Sausage? Complete Guide
-

 Food2 weeks ago
Black Pudding Guide: History, Recipe & Nutrition
-

 Drinks2 weeks ago
Easy Lychee Martini Recipe Sweet & Floral Cocktail
-

 Food3 weeks ago
Shirleys Coffee Shop Guam Locations Menu and Guide
-

 Food2 weeks ago
Ultimate Tripas Recipe and Cooking Guide
-

 Food2 weeks ago
Italian Ice Flavoring Guide: Flavors, Bases, and Recipes
-
 Blog2 weeks ago
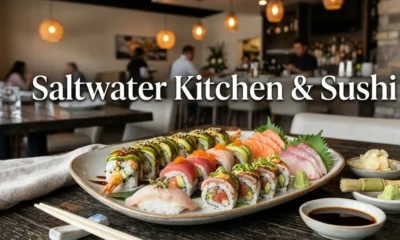
Saltwater Kitchen & Sushi: Menu, Reviews, and Visitor Guide