
Food
Black Pudding Guide: History, Recipe & Nutrition
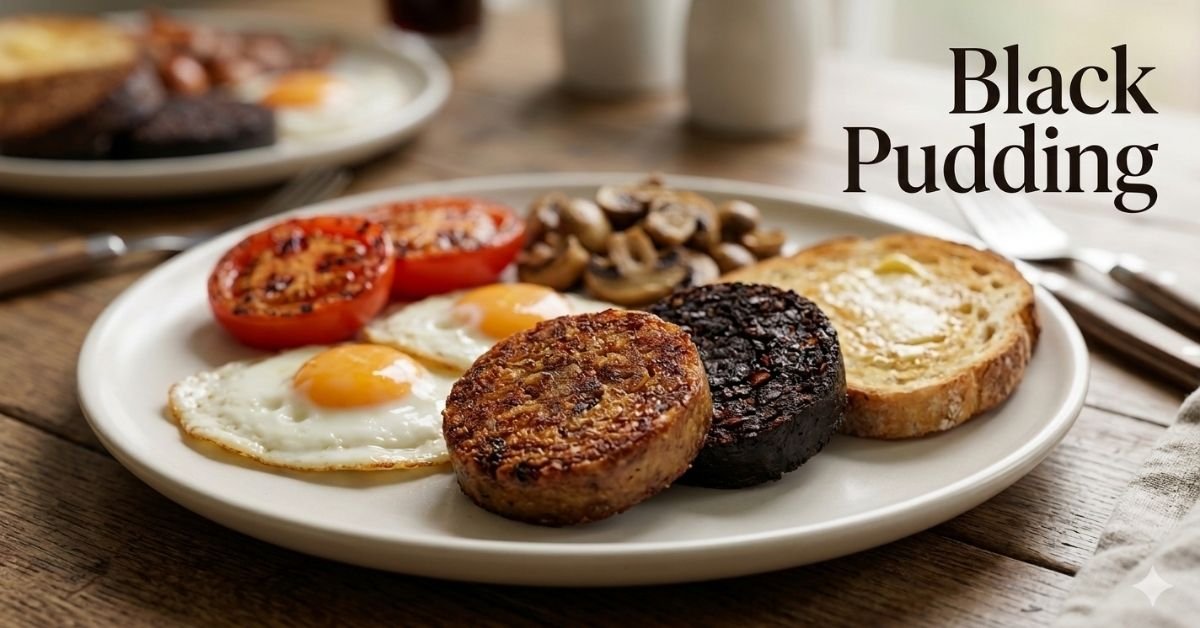
Black pudding is a type of blood sausage that is very popular in the United Kingdom and Ireland. It is made by mixing pork blood with fat, oats or barley, and simple spices. The mixture is filled into a casing and then cooked until firm. After that, it is usually sliced and fried before eating. Many people first try it as part of a full English breakfast.
Even though the name sounds like a dessert, it is not sweet like chocolate pudding. The word pudding in old British cooking often meant something that was boiled in a cloth or casing. That is why this sausage carries the name. It has a dark color because of the blood, and it has a rich, savory taste.
People who have never seen it may feel unsure at first. But once cooked properly, it tastes mild, slightly earthy, and full of flavor. The oats give it a soft texture inside, while frying makes the outside crisp. It is simple food with a long history behind it.
Read also: Sweet Martabak Sweet Cakes Bakery Guide
Where Did Black Pudding Come From?
The idea of using animal blood in cooking goes back thousands of years. Many old cultures believed in using every part of the animal so nothing was wasted. In Britain and Ireland, black pudding became common during farm slaughter seasons. Families would mix fresh blood with grains and fat to make something filling and long lasting.
Over time, different regions created their own styles. In England, towns like Bury became famous for their version. In Scotland, Stornoway black pudding even received protected status because of its strong local tradition. Each place uses slightly different spice blends and grain types, but the basic method stays the same.
Today, it is still part of traditional breakfasts, but chefs also use it in modern dishes. You can find it in fine restaurants, pubs, and even food festivals. Its long history shows how simple ingredients can turn into something loved for generations.
What Is Black Pudding Made Of?
The ingredients are simple and easy to understand. The main parts usually include:
- Fresh pork blood
- Pork fat or suet
- Oats or barley
- Onion
- Salt
- Black pepper
- Simple herbs or spices
The blood gives color and richness. The fat keeps it moist and soft. Oats or barley help bind everything together and make it filling. Onions add sweetness, and spices bring gentle warmth. Some regions may add nutmeg or other herbs, but the flavor is never too strong.
All ingredients are mixed well, poured into natural casings, and gently boiled until firm. After cooling, it is ready to slice and cook again. This simple mix is why black pudding has stayed popular for so long.
Black Pudding vs Blood Sausage
Many people ask if black pudding and blood sausage is the same thing. The simple answer is yes and no. Black pudding is a type of blood sausage, but not all blood sausages are black pudding.
In France, there is boudin noir. In Spain, there is morcilla. In Germany, there are other blood sausages with different spices. What makes black pudding special is the use of oats or barley as filler. Some other blood sausages use rice instead.
The taste also changes depending on the country. Some versions are spicier, some are sweeter, and some include garlic. Black pudding is usually mild and balanced. It fits well with eggs, bacon, and toast, which is why it became linked to breakfast.
How to Cook Black Pudding Properly
Cooking black pudding is easy if you follow a few simple steps. Most people fry it, but you can also grill or bake it. The key is gentle heat so it does not break apart.
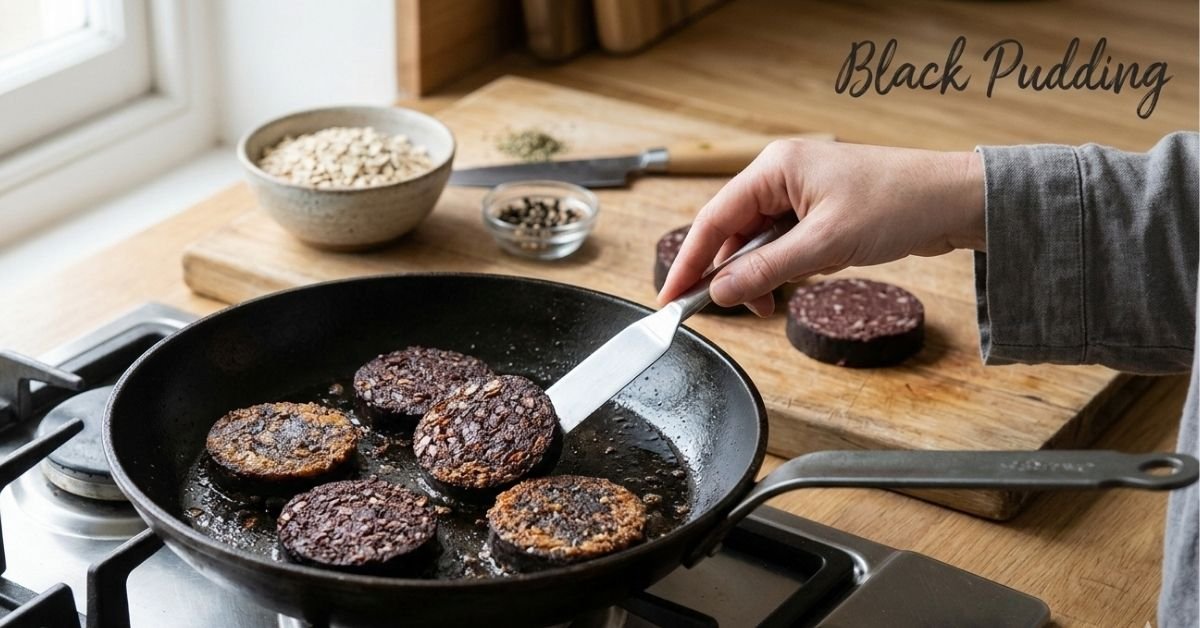
Follow these steps for pan frying:
- Slice it into rounds about one centimeter thick
- Heat a small amount of oil in a pan
- Place slices gently in the pan
- Cook on medium heat for 3 to 4 minutes per side
- Turn carefully to keep shape
- Remove when the outside is crisp
You do not need high heat. Too much heat can make it dry or crumbly. When done right, the outside becomes slightly crispy and the inside stays soft. Serve it hot for best flavor.
Easy Homemade Black Pudding Recipe
Making black pudding at home takes care and fresh ingredients. It is important to get blood from a trusted butcher and keep everything clean. If done properly, it can taste even better than store bought versions.
Here is a simple method:
Ingredients:
- 1 liter fresh pork blood
- 250 grams pork fat, finely chopped
- 200 grams oats
- 1 large onion, finely chopped
- 1 teaspoon salt
- 1 teaspoon black pepper
- A pinch of nutmeg
Steps:
- Mix blood and oats in a large bowl
- Add fat, onion, and spices
- Stir until fully combined
- Pour into sausage casings
- Tie ends tightly
- Simmer gently in water for about 20 minutes
- Cool completely before slicing
After cooling, it is ready to fry or freeze. Always store in the fridge and use within a few days for safety.
Is Black Pudding Healthy?
Many people are surprised to learn that black pudding has some health benefits. It is high in protein and very rich in iron. Iron helps carry oxygen in the blood and prevents tiredness. This is why some call it a superfood, though it should still be eaten in balance.
It also contains zinc and other minerals from the blood and meat. However, it can be high in fat and salt. This means it is best enjoyed as part of a balanced diet, not every day. Portion control is important.
If someone has high blood pressure or needs to limit salt, they should check labels carefully. Like many traditional foods, it can be healthy when eaten in moderation and cooked in a simple way without too much oil.
Nutrition Facts for Black Pudding
The exact values depend on the recipe, but an average 100 gram serving may include:
- Calories: around 250 to 300
- Protein: 13 to 15 grams
- Fat: 20 to 25 grams
- Iron: very high percentage of daily needs
- Zinc: moderate amount
- Carbohydrates: small amount from oats
Because it contains blood, it naturally has high iron levels compared to many other sausages. That can be helpful for people with low iron levels. Still, it is not low calorie food, so balance is key.
Always check product labels for exact numbers. Homemade versions can change depending on how much fat or oats are added.
How Do People Eat Black Pudding?
The most common way is as part of a full English breakfast with eggs, bacon, sausage, beans, mushrooms, and toast. The rich flavor balances well with fried eggs and grilled tomatoes.
But it is not only for breakfast. Some chefs crumble it into mashed potatoes for extra flavor. Others use it in salads with apples for a sweet and savory mix. It also pairs well with scallops in modern British cooking.
Because it has a deep taste, small portions are enough to add richness to a dish. It can turn simple meals into something special without needing many extra ingredients.
Regional Variations and Special Types
Different regions have their own styles. Stornoway black pudding from Scotland is known for its high meat content and special spice mix. In Bury, England, the texture is often softer and smoother.
In some Nordic countries, versions are slightly sweet and served with jam. Other European countries may add rice instead of oats. These small changes create new flavors while keeping the same basic idea.
Exploring regional types can be fun if you enjoy traditional foods. Each one tells a story about local farming and culture. That is part of what makes black pudding more than just a sausage.
Storage, Safety, and Buying Tips
When buying black pudding, choose products from trusted butchers or brands. It should smell fresh and look firm. If it feels too soft or smells sour, avoid it. Always keep it refrigerated.
Unopened packs usually last several days in the fridge. Once opened, try to use within two or three days. You can also freeze slices for later use. Wrap them tightly to prevent freezer burn.
It must be cooked before eating unless the label clearly says it is fully cooked and ready to eat. Never eat raw mixture at home. Safe handling keeps this traditional food enjoyable and risk free.
Conclusion
Black pudding is a traditional blood sausage made with simple ingredients like pork blood, oats, fat, and spices. It has a long history in the United Kingdom and beyond, and it remains popular in breakfasts and modern dishes. When cooked gently, it becomes crispy outside and soft inside. It offers protein and iron but should be eaten in balance because of its fat and salt content. With the right cooking method and good quality ingredients, black pudding can be both tasty and satisfying.
FAQs
What is black pudding made of?
It is made from pork blood, fat, oats or barley, onion, and simple spices.
Is black pudding sweet or salty?
It is mostly savory with a mild earthy taste, not sweet like dessert pudding.
Can you eat black pudding raw?
No, it should always be cooked properly before eating unless fully precooked.
How do you cook black pudding?
Slice it and fry on medium heat for a few minutes on each side until crisp.
Is black pudding healthy?
It is rich in iron and protein but can be high in fat and salt, so eat in moderation.
Pistachio cream often looks easy to make, but small mistakes quickly affect the result. Many homemade versions turn out grainy, overly thick, or lacking real pistachio flavor because the balance of ingredients and blending technique is off. Without understanding how fats, sugar, and pistachios work together, it is difficult to achieve that smooth, spreadable consistency found in high-quality versions. This guide breaks down the process in a clear and practical way. You will learn what pistachio cream is, how to choose the right ingredients, and how to control texture for consistent results. It also covers how to use it in different recipes, how it compares to store-bought options, and how to store it properly so it stays fresh and stable.
What Is Pistachio Cream?
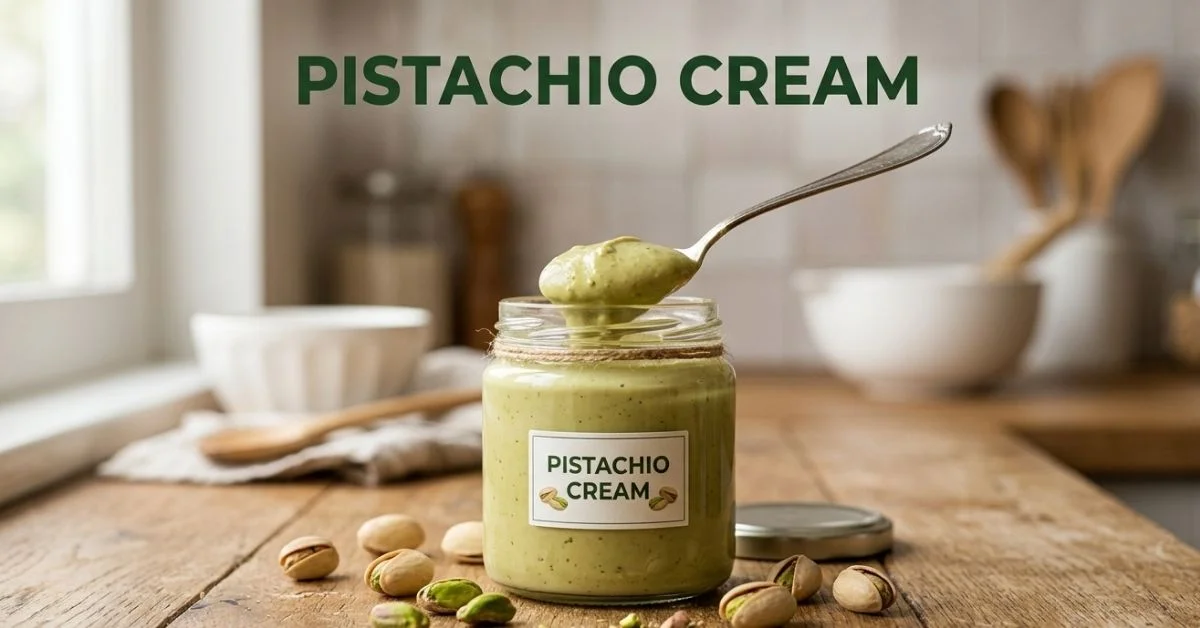
Pistachio cream is a sweet, smooth spread made primarily from pistachios, sugar, and fats that help create a soft, creamy texture. Unlike plain nut butter, it’s designed to be indulgent, closer to a dessert filling than a healthy spread. In Italian kitchens, especially in Sicily, it’s treated almost like a luxury ingredient.
The flavor is naturally rich and slightly sweet, with a subtle roasted nuttiness. When made properly, the pistachio taste stays clean and not overly sugary. Good pistachio cream should feel silky on the tongue, not gritty or oily, and it should spread easily without breaking.
Its popularity comes from versatility. You’ll find it in croissants, cakes, gelato, and even simple breakfast toast. It sits in the same category as chocolate spreads, but with a more refined, nut-forward flavor that stands out in both sweet and gourmet dishes.
Read also: Plancha Cooking Made Easy: Complete Beginner Guide
Pistachio Cream vs Pistachio Butter
The main difference comes down to composition. Pistachio butter is usually just ground pistachios, sometimes with a pinch of salt. It’s dense, slightly oily, and closer to peanut butter in texture. Pistachio cream, on the other hand, includes sugar, fats like white chocolate or oil, and sometimes milk powder.
This changes how it behaves in recipes. Pistachio butter works well in savory dishes or as a protein-rich spread. Pistachio cream is softer, sweeter, and designed for desserts. It blends more easily into fillings and frostings without needing extra sugar or fat.
If you’re baking or making desserts, pistachio cream is the better choice. If you want something simpler and less sweet, pistachio butter makes more sense. Knowing the difference helps avoid common mistakes where the wrong texture ruins the final result.
Ingredients You Need (Explained)
Choosing the Right Pistachios
The quality of pistachios decides everything. Raw or lightly roasted pistachios give the best flavor and color. Sicilian pistachios, especially those from Bronte, are known for their deep green color and intense taste, but any high-quality pistachio will work if it’s fresh.
Avoid heavily salted or overly roasted pistachios. They can overpower the cream and give it a dull brown color. If you’re using roasted nuts, keep them lightly toasted so the natural oils remain balanced.
Peeling the skins is optional but recommended for a smoother finish. It improves both texture and appearance, especially if you want that bright green, premium look.
Sweeteners and Fats
Sugar adds sweetness, but it also affects texture. Fine sugar or powdered sugar blends more easily, preventing graininess. White chocolate is often used because it adds fat and helps create a creamy consistency without overpowering the pistachio flavor.
Neutral oils like sunflower oil or mild butter help loosen the mixture. This is where many recipes fail. Without enough fat, the cream stays thick and pasty. With too much, it turns oily. Balance matters more than exact measurements.
Milk powder can also be added for a richer, slightly milky flavor. It gives the cream a dessert-like profile that feels closer to what you’d find in Italian pastry shops.
Optional Flavor Enhancers
A small amount of vanilla extract can round out the flavor without masking the pistachios. It adds depth rather than sweetness. Some people also add a pinch of salt to sharpen the overall taste.
For a more authentic Italian-style pistachio cream, keep it simple. Too many add-ins dilute the main flavor. The goal is to highlight the pistachio, not hide it.
If you want variations, you can experiment later. But for a base recipe, clean and minimal ingredients work best.
Easy Pistachio Cream Recipe (Step-by-Step)
Equipment Needed
A high-speed blender or a strong food processor is essential. Pistachios need time and power to release their oils and turn smooth. A weak machine will leave you with a grainy paste no matter how long you blend.
A spatula helps scrape down the sides, which is important during blending. A fine sieve is optional if you want an ultra-smooth finish, but most home versions skip this step.
Make sure your equipment is dry. Even a small amount of water can affect texture and cause the mixture to seize.
Preparation Steps
Start by blanching and peeling the pistachios if you want a smoother texture and brighter color. Dry them completely before blending. Any moisture will interfere with the process.
Blend the pistachios first on their own until they start releasing oils. This can take several minutes. At first, it will look like crumbs, then a thick paste, and finally something smoother.
Once the pistachios break down, add sugar, melted white chocolate, and a small amount of oil. Blend again until everything combines into a smooth, spreadable cream.
Blending and Texture Tips
Blend longer than you think. Most people stop too early. Pistachio cream becomes smoother with time as the natural oils fully release. Pause occasionally to prevent overheating.
If the mixture feels too thick, add a small amount of oil gradually. Don’t add too much at once. It’s easier to loosen the cream than to fix an oily texture.
Let the cream rest after blending. It thickens slightly as it cools, especially if white chocolate is used. The final texture settles after 20 to 30 minutes.
How to Get a Smooth, Creamy Texture
Texture comes down to emulsification. This means combining fats and solids in a way that creates a stable, smooth mixture. Pistachios contain natural oils, but they need help from added fats like chocolate or oil to reach a creamy consistency.
A powerful blender makes a big difference. It breaks down the pistachio fibers more effectively, reducing graininess. Lower-end machines often leave tiny particles that you can feel in the final product.
Temperature also plays a role. Slight warmth helps fats blend better, but overheating can separate the mixture. Blend in short intervals and let the machine rest if needed to maintain control.
Common Mistakes (And How to Fix Them)
Grainy texture usually comes from under-blending or using coarse sugar. The fix is simple. Blend longer and use finer sugar next time. If already made, reheating slightly and blending again can help smooth it out.
If the cream is too thick, it likely needs more fat. Add a small amount of neutral oil and blend again. If it’s too runny, chill it. White chocolate-based versions firm up naturally when cooled.
Flavor imbalance happens when sugar overpowers the pistachios. This often comes from low-quality nuts. Use better pistachios and keep sweeteners controlled. A pinch of salt can also help balance the flavor.
Delicious Ways to Use Pistachio Cream
Breakfast Ideas
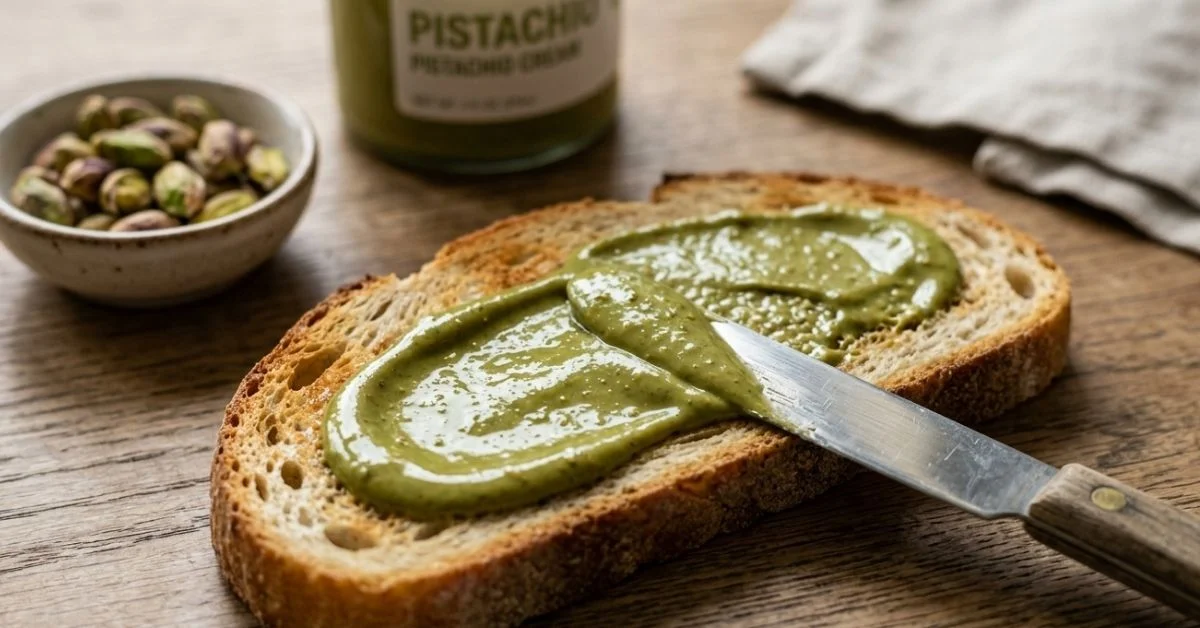
Spread pistachio cream on toast, pancakes, or waffles for a simple but rich breakfast. It pairs well with fruits like bananas or berries, which cut through the richness.
It also works well in croissants. Fill a warm croissant with a spoonful of pistachio cream and it melts slightly inside, creating a soft, dessert-like center.
For a quick option, swirls it into yogurt. It adds flavor and texture without needing extra toppings.
Desserts and Baking
Pistachio cream shines in desserts. Use it as a filling for cakes, cupcakes, or even cheesecakes. It blends well into frostings and adds a unique flavor that stands out from common chocolate or vanilla.
It’s also perfect for cannoli or layered desserts. The creamy texture holds well and doesn’t leak, making it practical for baking.
You can also drizzle it over ice cream or mix it into gelato for a richer pistachio flavor.
Gourmet Uses
In more refined dishes, pistachio cream can be used as a plating element. A small spread on a dessert plate adds both flavor and visual appeal.
It also works in fusion recipes. Some chefs pair it with savory elements like soft cheeses or even use it in sauces for a subtle nutty note.
Used carefully, it can elevate simple dishes into something more interesting without much effort.
Homemade vs Store-Bought Pistachio Cream
Store-bought options like premium Italian pistachio spreads often use high-quality nuts and controlled processing. They offer consistent texture and flavor, which can be hard to replicate at home without experience.
Homemade pistachio cream gives you control. You decide the sweetness, ingredient quality, and texture. It can taste fresher and more natural, especially if you use good pistachios.
Cost is another factor. High-end pistachio cream can be expensive. Making it at home is usually cheaper, though the price depends on the quality of pistachios you choose.
Storage, Shelf Life, and Safety
Pistachio cream should be stored in an airtight container in the refrigerator. This keeps the fats stable and prevents spoilage. Always use a clean spoon to avoid contamination.
Homemade versions typically last about two to three weeks. Without preservatives, they don’t have the same shelf life as commercial products.
If the smell changes or the texture separates badly, it’s best to discard it. Natural oil separation is normal, but rancid odors are not.
Variations You Can Try
A vegan version replaces white chocolate and milk powder with plant-based alternatives. Coconut cream or dairy-free chocolate works well without changing the core texture too much.
For a sugar-free option, use alternative sweeteners like erythritol or stevia blends. Keep in mind that texture may change slightly depending on the sweetener used.
An Italian-style version focuses on simplicity and high-quality pistachios. Less sugar, fewer additives, and a stronger pistachio flavor define this approach.
Nutrition Overview
Pistachio cream is calorie-dense because of its fat and sugar content. It’s not meant to be a health food, but it does contain healthy fats from pistachios.
Pistachios themselves provide nutrients like protein, fiber, and antioxidants. However, once turned into cream, the added sugar increases the overall calorie count.
It’s best enjoyed in moderation. A small amount goes a long way in both flavor and richness.
Conclusion
Pistachio cream is simple in concept but depends on small details to get right. The quality of pistachios, the balance of fats and sweetness, and proper blending all shape the final result. Once you understand how texture and emulsification work, the process becomes consistent and reliable. This guide gives you more than a recipe by showing how to adjust and fix common issues. It also opens up practical ways to use pistachio cream in everyday meals and desserts. With the right approach, homemade versions can match or even exceed store-bought quality. Try it once with attention to detail, and it quickly becomes a staple worth repeating.
FAQs
What is pistachio cream made of?
It’s typically made from pistachios, sugar, fats like oil or white chocolate, and sometimes milk powder or vanilla for added flavor.
Is pistachio cream the same as pistachio butter?
No, pistachio butter is just ground nuts, while pistachio cream includes sweeteners and fats for a softer, dessert-like texture.
How do you make pistachio cream smooth?
Use a strong blender, blend longer than expected, and add enough fat to help emulsify the mixture properly.
Can I make pistachio cream without white chocolate?
Yes, you can replace it with oil or plant-based fats, though the texture and flavor will be slightly different.
How long does pistachio cream last?
Homemade pistachio cream usually lasts two to three weeks in the refrigerator when stored properly.
What can I use pistachio cream for?
It works well as a spread, dessert filling, topping for pancakes or ice cream, and even in gourmet dishes.

Many people are curious about plancha cooking but feel unsure where to start. They see it mentioned alongside grills and barbecues, yet the differences are not always clear. Without understanding how a plancha works, it is easy to overcook food, use the wrong temperature, or miss out on the flavor that makes this method special.
This guide breaks everything down in a simple, practical way. You will learn what a plancha is, how it works, and how to cook confidently on it. From choosing the right type to mastering heat control and avoiding common mistakes, this article covers the full picture so you can actually use a plancha, not just understand it.
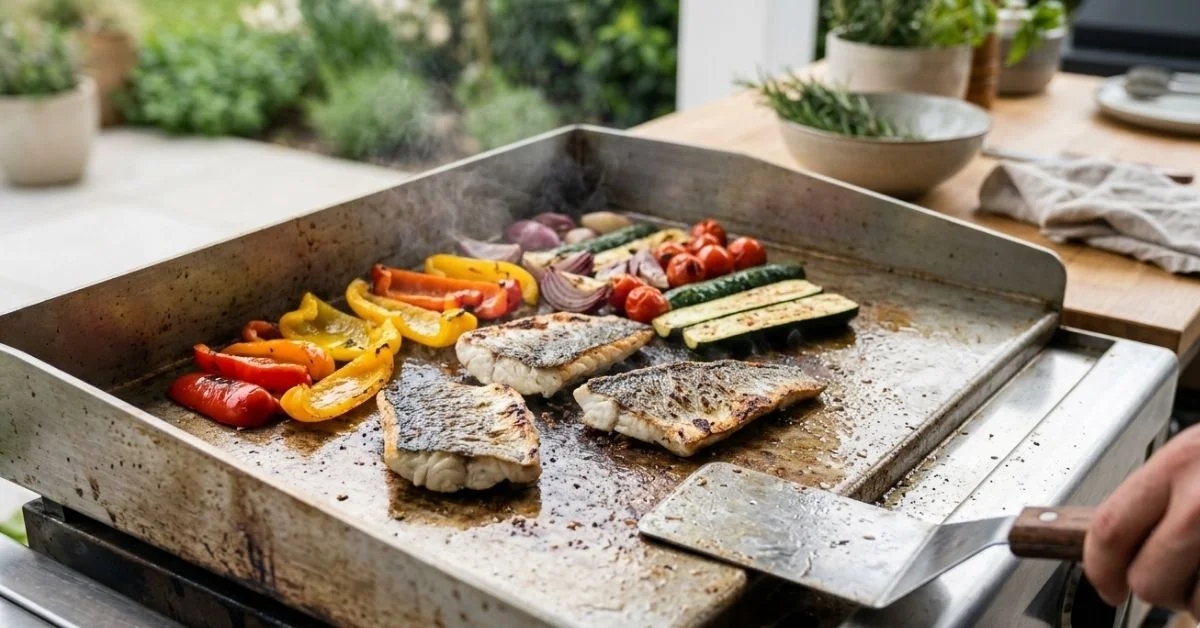
What Is a Plancha?
A plancha is a flat cooking surface made from materials like cast iron or stainless steel, designed to cook food at high, even heat. Unlike traditional grills, it has no grates, so food sits directly on a smooth surface. This allows for consistent contact and better control over cooking.
The concept comes from Spanish cuisine and has strong roots in French cooking as well. Originally used in restaurants, it has become popular in home kitchens because it combines simplicity with professional-level results. You can cook everything from steak to eggs on the same surface.
Today, plancha cooking is gaining attention because it is versatile and efficient. It works indoors and outdoors, produces less smoke than many grills, and makes it easier for beginners to get consistent results without complicated setups.
Read also: Wagyu Beef Price per Pound: Complete Cost Guide
How Plancha Cooking Works
Plancha cooking relies on direct contact between food and a hot, flat surface. The heat spreads evenly across the plate, which helps cook food uniformly without hot spots. This is especially useful when preparing multiple items at once.
One key element is high-heat searing. When the surface is hot enough, it triggers the Maillard reaction, which creates a rich, browned crust on foods like steak or fish. This is what gives plancha-cooked food its distinct flavor.
Another advantage is control. Because the surface is flat, you can easily move food between hotter and cooler zones. This allows you to manage cooking speed without constantly adjusting the heat source, which is a common challenge with traditional grills.
Types of Plancha Grills
Gas Plancha
Gas planchas are the most common choice for outdoor cooking. They heat up quickly and allow precise temperature control through adjustable burners. This makes them ideal for cooking different foods at the same time.
Many well-known brands offer gas models designed for home use. They often include multiple heat zones, which help you manage cooking more efficiently. For beginners, this setup feels familiar if they have used a gas grill before.
Gas planchas are best for people who want consistent performance and quick results. They are especially useful for cooking large meals where timing and heat control matter.
Electric Plancha
Electric planchas are designed for indoor use or smaller spaces. They plug into a standard outlet and provide a steady heat source without requiring gas. This makes them convenient for apartments or kitchens without outdoor access.
The heat is usually more uniform across the surface, but maximum temperatures may be slightly lower than gas models. This means they are excellent for vegetables, eggs, and seafood, though they may take longer for thick cuts of meat.
For beginners, electric planchas are easy to manage. You simply set the temperature and start cooking, which removes some of the guesswork involved in heat control.
Portable vs Built-in
Portable planchas are compact and easy to move, making them ideal for small gatherings or travel. They are simple to set up and store, which suits people with limited space.
Built-in planchas are designed for permanent outdoor kitchens. They offer more cooking space and often include advanced features like multiple burners and thicker cooking plates.
Choosing between the two depends on how often you plan to cook and the space you have available. For most beginners, a portable model is a practical starting point.
Plancha vs Grill vs BBQ
A plancha differs from a grill mainly in its surface. Grills use grates, which allow fat to drip down, while a plancha keeps everything on a flat plate. This results in better contact and more even cooking.
Compared to a barbecue, a plancha produces less smoke and cooks food faster. Barbecues rely on indirect heat and often require longer cooking times. A plancha is more direct and efficient.
Each method has its place. A plancha is best for quick, high-heat cooking and delicate foods. Grills are useful for achieving char marks, while barbecues are ideal for slow cooking. Understanding these differences helps you choose the right tool for each situation.
Benefits of Plancha Cooking
One of the biggest advantages of plancha cooking is even heat distribution. The flat surface ensures that food cooks consistently, reducing the risk of undercooked or overcooked areas.
It also produces less smoke than traditional grilling. Because there are no open flames beneath dripping fat, flare-ups are minimal. This makes it suitable for indoor use or areas where smoke is a concern.
Another benefit is versatility. You can cook meat, seafood, vegetables, and even breakfast items on the same surface. This flexibility makes a plancha a practical addition to any kitchen setup.
Best Foods to Cook on a Plancha
Meat (steak, chicken)
Meat cooks exceptionally well on a plancha because of the direct contact with the hot surface. Steak develops a strong sear while staying juicy inside. Chicken cooks evenly without drying out.
The key is to preheat the surface properly. Once hot, place the meat down and let it cook without moving it too much. This helps form a proper crust.
Using the right amount of oil also matters. A light coating is enough to prevent sticking and enhance flavor without making the surface greasy.
Seafood (fish, shrimp)
Seafood benefits from the even heat and smooth surface of a plancha. Fish fillets do not stick as easily, and shrimp cook quickly without losing moisture.
Because seafood cooks fast, timing is important. It is easy to overcook if the heat is too high or if you leave it on the surface for too long.
A simple approach works best. Light seasoning, proper heat, and careful timing bring out the natural flavors without complication.
Vegetables
Vegetables develop a rich flavor when cooked on a plancha. The high heat helps caramelize natural sugars, creating a slightly crispy texture on the outside.
Cutting vegetables evenly ensures consistent cooking. This is especially important when preparing mixed vegetables on the same surface.
A small amount of oil and proper spacing help avoid steaming. When vegetables are overcrowded, they release moisture and lose their texture.
Breakfast foods (eggs, pancakes)
A plancha is not limited to lunch or dinner. It works equally well for breakfast items like eggs and pancakes. The flat surface makes flipping and cooking easier.
Eggs cook evenly without spreading too much, and pancakes develop a consistent golden color. This makes the plancha useful for family meals.
Using a lower heat setting is important here. High heat can burn delicate foods quickly, so adjusting temperature is key.
Essential Plancha Cooking Techniques
Searing is one of the most important techniques. When cooking steak, I noticed that letting the surface fully heat before adding the meat makes a huge difference. The result is a better crust and more flavor.
Temperature control is another critical skill. Beginners often struggle with this because the surface heats quickly. Learning to move food between hotter and cooler areas helps manage cooking without turning the heat up and down constantly.
Oil usage should be minimal but intentional. A thin layer helps prevent sticking and improves browning. Too much oil can lead to uneven cooking and unnecessary smoke.
Step-by-Step Beginner Guide
Start by preheating the planch’a . Give it enough time to reach the desired temperature before adding any food. This step is often overlooked but makes a noticeable difference.
Next, add a small amount of cooking oil and spread it evenly. Place your food on the surface and let it cook without constant movement. This allows proper searing to develop.
Flip the food at the right time and cook until done. Once finished, remove it promptly to avoid overcooking. With practice, this process becomes second nature.
Common Plancha Cooking Mistakes
One common mistake is overcrowding the surface. When too much food is placed at once, it lowers the temperature and causes uneven cooking.
Another issue is using the wrong temperature. Beginners often cook at either too high or too low heat. Finding the right balance is essential for good results.
Not preheating the plancha is also a frequent problem. Without proper heat, food sticks and lacks the desired texture. Taking a few extra minutes to preheat solves this issue.
Cleaning and Maintenance Tips
Cleaning a planch’a after each use keeps it in good condition. While the surface is still warm, use a scraper to remove food residue. This makes the process easier.
For deeper cleaning, a small amount of water can help loosen stubborn bits. Avoid harsh chemicals, as they can damage the cooking surface.
Regular maintenance, including light oiling, helps prevent rust and extends the lifespan of the plancha. This simple routine keeps it ready for future use.
Must-Have Plancha Accessories
A good spatula is essential for flipping and moving food. It should be sturdy enough to handle different types of ingredients without bending.
A scraper is useful for cleaning and maintaining the surface. It helps remove residue quickly and keeps the planch’a in good shape.
Heat-resistant gloves and oil bottles add convenience and safety. These small tools make cooking easier and reduce the risk of accidents.
Safety Tips for Beginners
Heat safety is important when using a planch’a . The surface can reach very high temperatures, so always handle it with care.
Oil splatter can occur if the surface is too hot or if too much oil is used. Keeping a safe distance and using the right amount of oil helps prevent this.
Proper setup is also essential. Make sure the planch’a is placed on a stable surface and used in a well-ventilated area, especially when cooking indoors.
Is a Plancha Worth It?
A plancha is worth considering if you enjoy versatile cooking. It allows you to prepare a wide range of foods on a single surface with consistent results.
In terms of cost, there are options for different budgets. Entry-level models are affordable, while premium versions offer more features and durability.
For beginners, a planch’a is a practical tool that simplifies cooking. It combines ease of use with high-quality results, making it a valuable addition to any kitchen.
Conclusion
Plancha cooking offers a simple and effective way to prepare a wide range of meals with consistent results. From understanding how the flat surface works to mastering heat control and choosing the right foods, the basics are easy to learn and apply. It stands out for its versatility, whether you are cooking steak, seafood, or even breakfast. By avoiding common mistakes and maintaining your plancha properly, you can improve both flavor and efficiency over time. For beginners, it removes much of the guesswork found in traditional grilling. If you want a reliable and practical cooking method, a planch’a is worth trying. Start with simple dishes, practice your technique, and build confidence with every meal.
FAQs
What is a plancha used for?
A plancha is used for cooking food on a flat, heated surface, ideal for meat, seafood, vegetables, and breakfast items.
Is a plancha better than a grill?
It depends on your needs. A planch’a offers even cooking and versatility, while a grill is better for smoky flavor and char marks.
Can you cook steak on a plancha?
Yes, steak cooks very well on a plancha, especially when the surface is properly preheated for a good sear.
Do you need oil on a plancha?
A small amount of oil is recommended to prevent sticking and improve browning, but too much should be avoided.
How do you clean a plancha?
Clean it while warm using a scraper, then wipe it down. For deeper cleaning, use water and avoid harsh chemicals.
Is plancha cooking healthy?
Yes, it can be healthier since it requires less oil and allows excess fat to cook off while retaining flavor.
Understanding Wagyu beef price per pound can be confusing, especially with huge differences between Japanese, American, and Australian varieties. Many buyers see prices ranging from affordable to extremely expensive without knowing what actually justifies the cost. This often leads to overpaying or buying lower-quality “Wagyu-style” beef instead of authentic cuts.
This guide breaks everything down clearly. You’ll see real 2026 price ranges, how grading systems like A5 work, and what impacts cost the most. It also explains how to compare Wagyu with regular beef, where to buy it, and how to avoid common mistakes. Whether you’re planning a special dinner or just exploring premium meat options, this guide helps you make informed decisions without wasting money.
What Is Wagyu Beef?
Origin and meaning of Wagyu
Wagyu beef literally means “Japanese cow,” but the term represents much more than geography. It refers to specific cattle breeds in Japan known for their genetic ability to produce intense marbling. These cattle have been carefully bred for centuries to enhance fat distribution and meat quality.
In Japan, Wagyu production follows strict standards. Regions like Kobe beef and Miyazaki Wagyu are known worldwide for producing some of the highest-quality beef available. Each region maintains traceability, ensuring authenticity.
Outside Japan, Wagyu beef price per pound cattle have been crossbred with local breeds. This creates American and Australian Wagyu, which still offer good marbling but differ in taste, texture, and price.
Read also: Crandall Menus Breakdown: Essential Features You Need
Why Wagyu is different from regular beef
The biggest difference between Wagyu Beef Price per Pound and standard beef is marbling. Wagyu contains fine streaks of intramuscular fat that melt during cooking, creating a buttery texture. This is very different from typical beef, which has less consistent fat distribution.
Another key factor is how the cattle are raised. Wagyu cattle are often fed specialized diets and raised in low-stress environments. This contributes to the tenderness and flavor that justify the higher Wagyu beef price per pound.
Regular beef, even high-quality cuts, cannot replicate the same level of richness. That’s why Wagyu sits in the luxury food category rather than everyday consumption.
Average Wagyu Beef Price Per Pound (2026)
Typical price ranges by category
In 2026, Wagyu beef price per pound varies widely depending on origin and grade. Japanese A5 Wagyu sits at the top, often ranging between $150 to $300 per pound. This reflects its rarity, import costs, and strict grading system.
American Wagyu Beef Price per Pound typically ranges from $30 to $80 per pound. It offers a balance between affordability and premium quality, making it popular for home cooks and restaurants alike.
Australian Wagyu usually falls between $40 and $120 per pound. It often delivers strong marbling at a lower cost than Japanese imports, making it a practical middle-ground option.
Quick comparison table
| Type | Price Per Pound (2026) | Quality Level |
| Japanese A5 Wagyu | $150 – $300+ | Ultra premium |
| American Wagyu | $30 – $80 | High |
| Australian Wagyu | $40 – $120 | High to premium |
These ranges give a realistic view of the market. Prices fluctuate depending on cut, supplier, and demand within the luxury food market.
Japanese A5 Wagyu Price Per Pound
What A5 grade means
A5 grade Wagyu Beef Price per Pound is the highest rating in the Japanese beef grading system. It evaluates yield and meat quality, including marbling, color, texture, and fat quality. A5 represents the best possible combination of these factors.
The grading system runs from A1 to A5, but only a small percentage of beef reaches A5. This exclusivity significantly impacts Wagyu beef price per pound.
When you see authentic A5 Wagyu, it usually comes with certification and traceability. This ensures you’re buying genuine Japanese beef rather than a substitute.
Current price range and examples
Japanese A5 Wagyu beef price per pound typically costs between $150 and $300 per pound in 2026. Certain cuts like ribeye or striploin can exceed this range due to demand and limited availability.
Imported Wagyu also includes additional costs such as shipping, refrigeration, and import regulations. These factors push prices higher in international markets.
In real-world terms, a single A5 steak for a home dinner can easily cost over $100. This is why many people reserve it for special occasions rather than everyday meals.
American Wagyu Price Per Pound
How it differs from Japanese Wagyu
American Wagyu comes from crossbreeding Japanese cattle with breeds like Angus. This creates beef that combines strong marbling with a more traditional steak texture.
It tends to be less rich than Japanese Wagyu, making it easier to eat in larger portions. This is one reason why it’s widely used in the steakhouse industry.
The production process is also less restrictive compared to Japan, which helps keep prices more accessible.
Price range and quality levels
American Wagyu beef price per pound typically falls between $30 and $80. Higher-end cuts or specialty producers may charge more, especially for ribeye or filet.
Quality varies depending on breeding and feeding practices. Some producers aim for near-Japanese levels of marbling, while others focus on balanced flavor.
For most buyers, American Wagyu offers the best entry point into premium beef without the extreme cost of imported Japanese options.
Australian Wagyu Price per Pound
Why it’s more affordable
Australian Wagyu beef price per pound benefits from large-scale farming and fewer export restrictions. This helps reduce overall production and distribution costs.
The climate and feeding systems in Australia also support efficient Wagyu production. As a result, supply is more stable compared to Japanese Wagyu.
Even though it’s more affordable, it still maintains strong marbling and quality, making it a popular alternative.
Price comparison with other types
Australian Wagyu typically costs between $40 and $120 per pound. It sits between American and Japanese Wagyu in both price and quality.
Compared to Japanese Wagyu, it’s less intense in flavor but still significantly better than standard beef. Compared to American Wagyu, it often offers slightly higher marbling at a similar price point.
For many buyers, Australian Wagyu provides the best balance between cost and premium experience.
Wagyu Price by Cut (Ribeye, Strip, Filet)
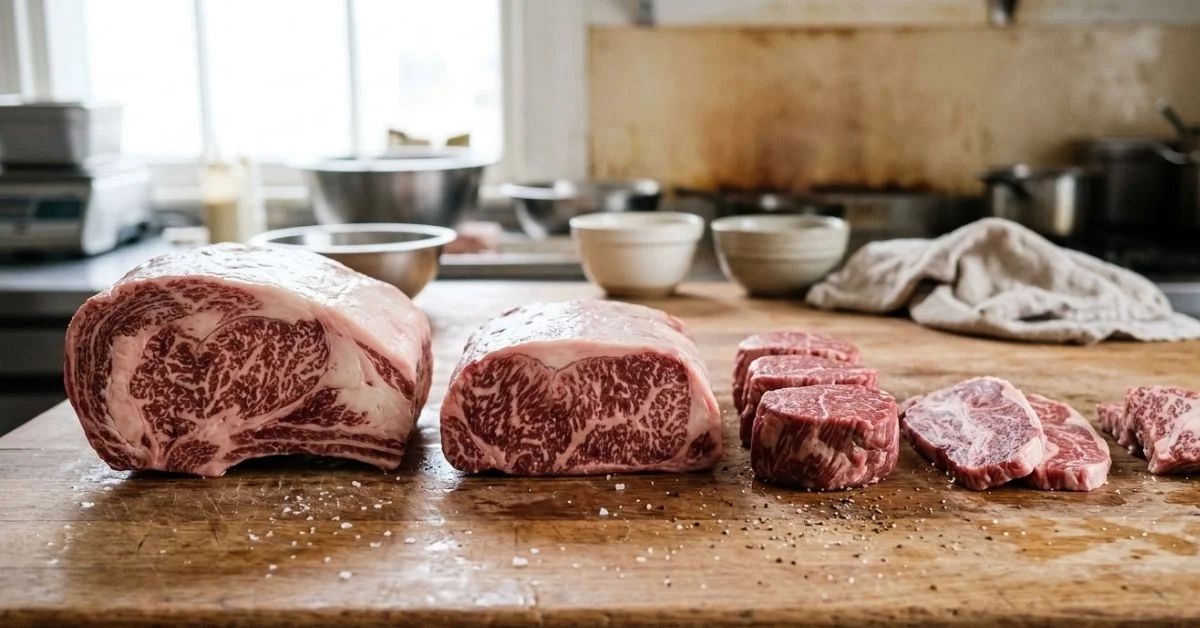
Most expensive cuts explained
Cuts like ribeye and striploin are among the most expensive because they contain the highest marbling. Ribeye steak is especially valued for its rich fat content and flavor.
Filet is also expensive, though it has slightly less marbling. Its tenderness makes it popular despite the higher cost.
These cuts are often featured in high-end restaurants, where presentation and texture matter as much as taste.
Cheapest Wagyu cuts available
More affordable Wagyu cuts include flank, chuck, and ground Wagyu. These still offer improved flavor compared to regular beef but at a lower price per pound.
Ground Wagyu is often used for burgers, giving a premium taste without the cost of steaks. This is a common entry point for first-time buyers.
Choosing less popular cuts can significantly reduce your overall cost while still delivering a Wagyu experience.
Why Is Wagyu Beef So Expensive?
Breeding and feeding process
Wagyu cattle require specialized breeding and long feeding periods. Farmers invest significant time and resources to achieve the desired marbling.
The diet often includes high-quality grains and controlled feeding schedules. This level of care increases production costs.
Unlike mass-produced beef, Wagyu is raised with a focus on quality rather than quantity.
Limited supply and import costs
Authentic Japanese Wagyu beef price per pound is produced in limited quantities. Strict export regulations further restrict global supply.
Importing Wagyu adds costs such as transportation, refrigeration, and compliance with international standards. These factors directly impact Wagyu beef price per pound.
This scarcity is a major reason why prices remain high worldwide.
High marbling and quality
Marbling is not just about appearance. It directly affects flavor, tenderness, and cooking performance.
Higher marbling requires precise genetics and farming techniques. Achieving this consistently is difficult and expensive.
This combination of rarity and quality keeps Wagyu at the top of the premium beef market.
Wagyu Grading System Explained
A1 to A5 grading system
Japan uses a grading system that evaluates both yield (A–C) and quality (1–5). A5 represents the highest possible rating.
The system considers marbling, meat color, firmness, and fat quality. Only a small percentage of beef reaches A5.
This grading system is widely recognized as one of the most strict and reliable in the world.
How grading affects price
Higher grades mean better marbling and overall quality, which increases demand. As a result, A5 Wagyu commands the highest prices.
Lower grades like A3 or A4 are still high quality but more affordable. These can be good options for buyers who want quality without extreme cost.
Understanding grading helps avoid overpaying and ensures you get the value you expect.
Wagyu vs Regular Beef Price Comparison
Cost differences
Regular beef typically costs between $5 and $15 per pound, depending on the cut and quality. In comparison, Wagyu beef price per pound is significantly higher across all categories.
Even entry-level Wagyu can cost several times more than premium regular beef. This price gap reflects differences in production and quality.
For many buyers, the decision comes down to occasion rather than everyday use.
Taste and value comparison
Wagyu offers a richer, more buttery flavor due to its marbling. Regular beef has a firmer texture and less fat content.
Some people prefer Wagyu for special meals, while others find it too rich for large portions. Value depends on personal preference and how the meat is used.
In practical terms, Wagyu is about experience, not just nutrition.
Where to Buy Wagyu Beef
Online stores vs local markets
Online meat retailers offer a wide selection of Wagyu, including imported Japanese cuts. They often provide certifications and detailed product descriptions.
Local butchers may carry American or Australian Wagyu. This allows you to inspect the meat before buying.
Both options have advantages, but online stores typically offer more variety.
How to verify authenticity
Authentic Japanese Wagyu beef price per pound comes with certification and traceability. Look for official documentation and origin details.
Be cautious of labels like “Wagyu-style” or “Wagyu-inspired,” which may not be genuine. These products are often crossbred and priced lower.
Understanding labeling helps ensure you’re paying for real quality.
Tips to Buy Wagyu at a Lower Price
Best cuts for budget buyers
Choosing less popular cuts can reduce costs significantly. Flank, chuck, and ground Wagyu are good starting points.
These cuts still deliver improved flavor without the high price of premium steaks. They are also more versatile for everyday cooking.
This approach allows you to enjoy Wagyu without overspending.
When and where to find deals
Seasonal sales and bulk purchases can lower the price per pound. Some online retailers offer discounts during holidays.
Restaurants sometimes sell surplus inventory at reduced prices. This can be a good opportunity for buyers.
Planning ahead can make a noticeable difference in cost.
Is Wagyu Beef Worth the Price?
Who should buy it
Wagyu is best suited for people who value premium food experiences. It’s ideal for special occasions or fine dining at home.
For everyday meals, the cost may not justify the difference for some buyers. It depends on personal priorities and budget.
Understanding your purpose helps determine if it’s worth it.
When it makes sense
Buying Wagyu beef price per pound makes sense for events like celebrations or when trying something unique. A small portion can still deliver a memorable experience.
For example, cooking a Wagyu steak at home can be more affordable than ordering it at a restaurant.
This balance between cost and experience is key.
Common Mistakes When Buying Wagyu
Confusing Wagyu types
Many buyers assume all Wagyu is the same. In reality, Japanese, American, and Australian Wagyu differ significantly.
Misunderstanding these differences can lead to unrealistic expectations. It’s important to know what you’re buying.
Clear labeling and research can prevent confusion.
Overpaying for lower grades
Some sellers charge premium prices for lower-grade Wagyu beef price per pound. Without understanding grading, buyers may overpay.
Always check grade, origin, and certification before purchasing. This ensures you get fair value.
A little knowledge goes a long way in avoiding costly mistakes.
Conclusion
Wagyu beef price per pound depends heavily on origin, grading, and cut, with Japanese A5 at the highest end and American and Australian options offering more flexibility. Knowing how marbling, grading systems, and sourcing work helps you avoid overpaying and choose the right quality for your needs. Whether you are buying for a special dinner or trying Wagyu for the first time, understanding real price ranges makes a big difference. It is not just about cost but about the experience and value you expect from premium beef. For most people, smart buying comes down to choosing the right cut and trusted source. If you plan carefully, you can enjoy Wagyu without overspending. Use this guide as a reference before your next purchase to get the best value.
FAQs
What is the average Wagyu beef price per pound in 2026?
It ranges from about $30 for American Wagyu to over $300 for premium Japanese A5 Wagyu.
Why is Japanese A5 Wagyu so expensive?
It has strict grading, limited supply, high marbling, and additional import costs.
Is American Wagyu real Wagyu?
Yes, but it is usually crossbred, so it differs in taste and texture from Japanese Wagyu.
Which Wagyu cut is the cheapest?
Ground Wagyu and cuts like chuck or flank are usually the most affordable.
How can I tell if Wagyu is authentic?
Look for certification, origin details, and avoid labels like “Wagyu-style.”
Is Wagyu better than regular beef?
It offers richer flavor and tenderness, but whether it’s better depends on personal preference and budget.
-

 Food2 weeks ago
Cuts of Steak: Complete Guide to Beef Cuts
-

 Food2 weeks ago
What Is Andouille Sausage? Complete Guide
-

 Drinks2 weeks ago
Easy Lychee Martini Recipe Sweet & Floral Cocktail
-

 Food2 weeks ago
Ultimate Tripas Recipe and Cooking Guide
-

 Food2 weeks ago
Shirleys Coffee Shop Guam Locations Menu and Guide
-

 Food2 weeks ago
Italian Ice Flavoring Guide: Flavors, Bases, and Recipes
-

 Blog1 week ago
Saltwater Kitchen & Sushi: Menu, Reviews, and Visitor Guide
-

 Tech2 weeks ago
DemonScans Review: Is It Safe for Manga Readers?