
Food
How to Make Dover Sole Meunière Perfectly

Many home cooks struggle to prepare delicate fish without overcooking it or losing its natural flavor. Dover sole meunière looks simple on paper, yet small mistakes with heat, timing, or butter can quickly ruin the dish. The result is often soggy, greasy, or lacking the clean, balanced taste that defines classic French cooking. The solution lies in understanding both technique and detail. Dover sole meunière is not just a recipe but a method built on precise pan control, light flour coating, and properly browned butter. When done correctly, it delivers a crisp exterior, tender flesh, and a bright lemon finish. This guide breaks down each step clearly, from choosing the right fish to mastering beurre noisette. You will learn how to control texture, avoid common errors, and cook this classic dish with confidence at home.
What Is Dover Sole Meunière?
Meaning of “Meunière”
The term “meunière” comes from French culinary language and translates roughly to “miller’s style.” It refers to fish that is lightly coated in flour before cooking. This simple step creates a delicate crust that enhances both texture and flavor.
In practice, the meunière method involves dredging the fish in flour, pan-frying it in butter, and finishing with lemon juice and parsley. The flour plays a functional role by helping the fish brown evenly while protecting its surface.
Unlike heavy batters or breading, this coating is intentionally minimal. It allows the natural flavor of Dover sole to remain the focus while adding just enough crispness to elevate the dish.
Read also: Anasazi Beans: Benefits, Recipes, and Cooking Tips
French culinary origins
Dover sole meunière is deeply rooted in France, particularly in regions like Normandy where butter-based cooking is central. It became a hallmark of refined yet simple French cuisine.
Classic chefs like Augusta Escoffier helped formalize this technique in professional kitchens. Later, Julia Child introduced it to home cooks, emphasizing its accessibility.
Despite its elegance, the dish remains grounded in simplicity. It reflects the French approach of using a few high-quality ingredients and precise technique to create something exceptional.
Ingredients You’ll Need
Essential ingredients
At its core, Dover sole meunière relies on a short list of ingredients: Dover sole fillets, all-purpose flour, butter, lemon juice, salt, and fresh parsley. Each component plays a specific role in building flavor and texture.
The fish itself is the centerpiece. Dover sole is prized for its mild, slightly sweet taste and fine texture. Butter provides richness, while lemon cuts through that richness with acidity.
Flour creates the signature crust, and parsley adds freshness. When these elements are balanced correctly, the dish feels light rather than heavy despite the use of butter.
Optional enhancements
While the classic version is minimal, small additions can refine the result. Clarified butter is often used because it resists burning and allows better control over heat.
Some cooks add capers for a slight briny contrast. Others incorporate a splash of white wine to deepen the sauce without overpowering the fish.
These variations should remain subtle. The goal is to support the natural flavor of the Dover sole, not compete with it.
Choosing the Best Dover Sole
Fresh vs frozen
Fresh Dover Sole Meunière is always preferred when available. It has a cleaner aroma, firmer texture, and cooks more evenly. Look for fillets that smell like the sea, not fishy or sour.
Frozen options can still work well if handled properly. Thaw them slowly in the refrigerator and pat them completely dry before cooking to prevent excess moisture.
What matters most is moisture control. Too much water on the surface will interfere with browning and lead to steaming instead of crisping.
How to identify quality fish
High-quality Dover sole should have a smooth, slightly translucent appearance. The flesh should feel firm and spring back when touched.
If buying whole fish, clear eyes and bright skin are key indicators of freshness. Many fishmongers will fillet and debone it for you, which simplify preparation.
Pay attention to thickness as well. Even fillets cook more consistently, reducing the risk of undercooked centers or overcooked edges.
Step-by-Step Cooking Method

Preparing the fish
Start by patting the Dover Sole Meunière sole completely dry with paper towels. This step is critical for achieving a proper crust during pan-frying.
Season lightly with salt on both sides. Keep seasoning simple so the natural flavor remains the focus.
What I noticed while cooking is that even slight moisture can ruin texture. Drying the fish thoroughly makes a visible difference once it hits the pan.
Dredging in flour
Lightly coat the fish in all-purpose flour, then shake off the excess. The coating should be barely visible, not thick or clumpy.
Flour helps create a thin crust and promotes even browning. It also protects the delicate flesh from direct heat.
Too much flour is a common mistake. It leads to a heavy coating that absorbs butter and becomes greasy instead of crisp.
Pan-frying technique
Heat a non-stick or stainless steel pan over medium heat and add butter. Once it begins to foam, place the fish gently into the pan.
Cook for about 2 to 3 minutes per side, depending on thickness. Avoid moving the fish too early, as this prevents proper browning.
Use a fish spatula to flip carefully. The surface should be golden and slightly crisp, with a subtle nutty aroma developing.
Making brown butter sauce
After removing the fish, continue heating the butter until it turns golden brown. This is known as beurre noisette, where milk solids caramelize and release a nutty aroma.
Add fresh lemon juice immediately to stop the cooking process. The reaction creates a balanced sauce with richness and acidity.
This step requires attention. Butter can go from perfect to burnt in seconds, so watch both color and smell closely.
Final plating
Place the fish on a warm plate and spoon the brown butter sauce over the top. Finish with chopped parsley for color and freshness.
The dish should look simple and clean. Avoid overloading it with garnish or sauce.
Serve immediately while the texture is at its best. Dover sole meunière is meant to be enjoyed fresh from the pan.
Key Tips for Perfect Results
Getting crispy texture
A crisp exterior depends on dry fish, light flour coating, and proper pan temperature. If any of these are off, the texture suffers.
The pan should be hot enough to sizzle but not smoke excessively. Butter should foam gently, not burn.
From experience, patience matters most. Let the fish cook undisturbed so the crust can form naturally.
Avoiding overcooking
Dover Sole Meunière sole cooks quickly due to its thin fillets. Overcooking leads to dryness and loss of flavor.
The flesh should turn opaque and flake easily when done. Remove it from heat as soon as it reaches this stage.
Residual heat will continue cooking slightly, so timing is important. It is better to slightly undercook than overcook.
Balancing lemon and butter
The key to Dover Sole Meunière sauce is balance. Too much butter feels heavy, while too much lemon becomes sharp and overpowering.
Add lemon gradually and taste if needed. The final flavor should feel bright but still rich.
This balance defines the dish. When done right, neither element dominates.
Common Mistakes to Avoid
Overcrowding the pan is one of the most frequent errors. When too many fillets are added, the temperature drops and the fish steams instead of browning.
Burning the butter is another issue. Butter contains milk solids that can scorch quickly if heat is too high or left unattended.
Using too much flour creates a thick, pasty coating. The goal is a light dusting that enhances texture without masking the fish.
Best Substitutes for Dover Sole
If Dover sole is unavailable, other flatfish like lemon sole or flounder can be used. These alternatives have a similar texture and mild flavor.
The cooking method remains the same, though timing may vary slightly depending on thickness. Adjust carefully to avoid overcooking.
While substitutes work, true Dover Sole Meunière offers a finer texture and more delicate taste. It remains the preferred choice for authenticity.
Serving Suggestions
Dover sole meunière pairs well with simple sides that do not compete with its flavor. Light vegetables, potatoes, or a fresh salad are ideal.
Keep presentation clean and minimal. A well-cooked fillet with glossy sauce and fresh parsley is visually appealing on its own.
This dish is often served in fine dining settings, but it adapts easily to home cooking. The key is restraint and balance.
Wine Pairings
A crisp white wine complements Dover sole meunière best. Options like Sauvignon Blanc or Chardonnay work well due to their acidity and freshness.
The wine should enhance the lemon and butter notes without overpowering them. Avoid overly sweet or heavy wines.
Pairing thoughtfully elevates the overall experience, turning a simple dish into a refined meal.
Nutritional Value
Dover Sole Meunière is a lean source of protein with low fat content. It provides essential nutrients like vitamin B12 and selenium.
The butter sauce adds richness and calories, so portion control matters. Using moderate amounts keeps the dish balanced.
Overall, it can fit into a healthy diet when prepared with attention to quantity and cooking method.
Conclusion
Dover sole meunière proves that simple ingredients can deliver refined results when handled with care. From selecting quality fish to controlling heat and mastering brown butter, every step plays a role in the final dish. The light flour coating, gentle pan-frying, and balanced lemon butter sauce define its signature flavor and texture. When you focus on technique rather than complexity, the dish becomes approachable even for home cooks. Small details like drying the fish properly or timing the butter make a noticeable difference. These are the elements that turn an average result into something truly polished. With practice, Dover sole meunière becomes less about following a recipe and more about understanding the process. Try it in your own kitchen, refine your timing, and you will start to see consistent, restaurant-quality results.
FAQs
What is Dover sole meunière?
It is a classic French dish where Dover Sole Meunière is lightly floured, pan-fried in butter, and finished with lemon and parsley.
Can I use another fish instead of Dover sole?
Yes, flounder or lemon sole can work, though the texture and flavor may be slightly different.
How do you make brown butter sauce?
Cook butter until it turns golden and smells nutty, then add lemon juice to balance the flavor.
Why is my sole soggy?
This usually happens when the fish is too wet or the pan temperature is too low.
What pan is best for cooking sole?
A non-stick or stainless steel pan works best for even heat and easy flipping.
Can you bake instead of fry it?
You can, but pan-frying gives the signature crisp texture that defines the dish.
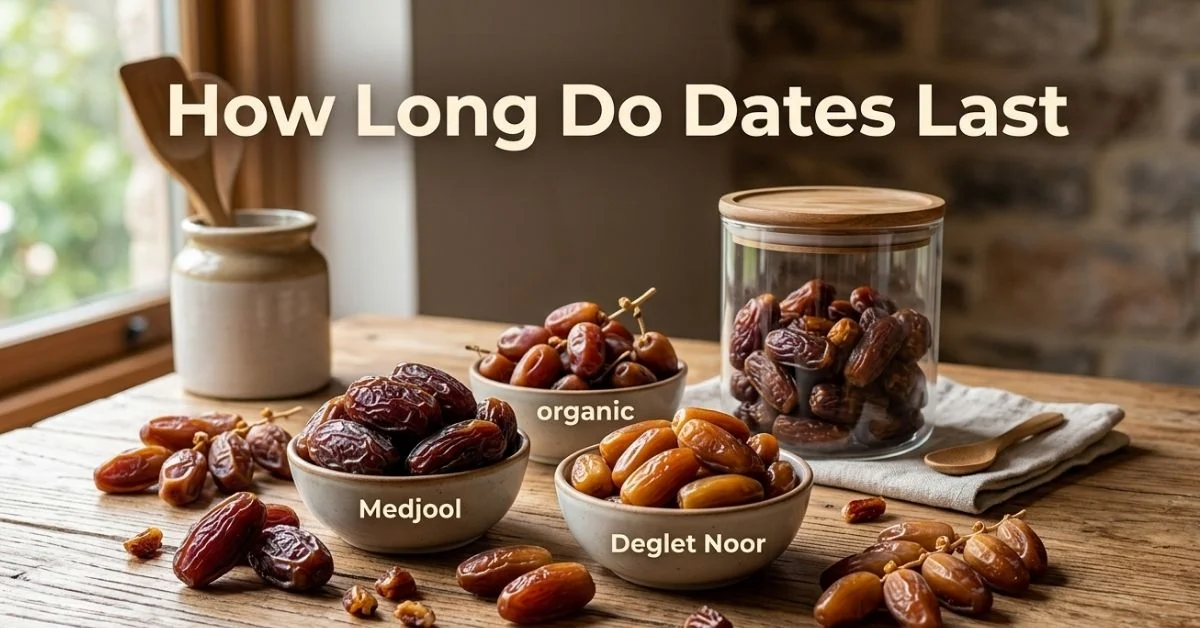
How long do dates last? Dates are one of those foods people assume last forever, yet they don’t always know when they’ve actually gone bad. You might leave a pack in the pantry for months or find an old container in the fridge and wonder if it’s still safe to eat. The confusion usually comes from the fact that dates are naturally preserved by sugar, which makes their shelf life longer than most fruits. The real answer to how long dates last depends on how they’re stored, whether they are fresh or dried, and how they’re handled after opening. Without proper storage, even dried dates can spoil, develop mold, or ferment over time. This guide breaks everything down clearly. You’ll learn exact storage timelines, how to keep dates fresh longer, and how to tell when they’re no longer safe to eat.
What Are Dates? Fresh vs Dried Explained
Fresh dates vs dried dates
Dates come in two main forms, fresh and dried, and the difference matters when it comes to shelf life. Fresh dates have higher moisture content, which makes them softer and more perishable. They behave more like other fruits and need careful storage.
Dried dates, on the other hand, have much less moisture. This is why they last longer and are often stored at room temperature. The drying process naturally extends their shelf life without needing preservatives.
If you’re trying to figure out how long dates last, always check whether you’re dealing with fresh or dried ones. Fresh dates may last weeks, while dried dates can last months or even longer with proper storage.
Read also: Groundnut in Shell: Nutrition, Storage and Uses Guide
Common varieties (Medjool, Deglet Noor)
Not all dates are the same. Medjool dates are soft, large, and rich, with higher moisture content. Because of this, they tend to have a slightly shorter shelf life compared to firmer varieties.
Deglet Noor dates are drier and more firm. They’re often used in cooking and tend to last longer in pantry storage. Their lower moisture makes them less prone to quick spoilage.
Understanding the type of dates you have helps you store them better. Softer dates benefit more from refrigeration, while firmer ones can often stay in the pantry longer without issues.
How Long Do Dates Last in Different Conditions
Pantry shelf life
When stored in a cool, dry pantry, dried dates can last anywhere from 3 to 6 months. If the packaging is unopened and kept away from heat and humidity, they may last even longer.
Fresh dates don’t do well in pantry conditions. At room temperature, they may last only a few days to a couple of weeks before they begin to spoil.
The key factor here is moisture and temperature. Warm environments speed up food spoilage, especially for softer varieties like Medjool dates.
Refrigerator shelf life

Refrigeration significantly extends how long dates last. Dried dates can stay fresh in the fridge for 6 to 12 months when stored properly in airtight containers.
Fresh dates benefit even more from refrigeration. They can last several weeks, sometimes up to a couple of months, depending on their initial freshness.
If you live in a warm or humid climate, refrigeration is often the better choice. It slows down mold growth and prevents fermentation.
Freezer shelf life
Freezing dates is one of the best ways to extend their shelf life long-term. Both fresh and dried dates can last up to a year or more in the freezer without losing much quality.
The texture may change slightly after thawing, especially for softer dates. However, they remain safe to eat and are still great for baking or smoothies.
To freeze properly, store dates in airtight containers or freezer-safe bags to prevent moisture buildup and freezer burn.
After opening
Once opened, dates are exposed to air and moisture, which shortens their shelf life. Dried dates usually last a few months if stored properly after opening.
Fresh dates should be refrigerated immediately after opening and consumed within a few weeks for best quality.
Always reseal the packaging or transfer dates into airtight containers. This simple step makes a noticeable difference in how long dates last.
Do Dates Go Bad? Understanding Shelf Life
Expiration vs best-by date
Dates typically come with a best-by date, not a strict expiration date. This means they may still be safe to eat after that date, though quality can decline.
The best-by date reflects peak flavor and texture, not safety. Many dried foods, including dates, remain edible beyond that point if stored correctly.
Still, it’s important to check for signs of spoilage. Dates can go bad over time, especially if exposed to heat, air, or moisture.
Natural preservation from sugar
Dates last longer than most fruits because of their high natural sugar content. Sugar acts as a preservative by reducing moisture available for microbial growth.
This is why dried dates can sit in the pantry for months without spoiling quickly. It’s a natural form of food preservation that has been used for centuries.
However, this doesn’t make dates immune to spoilage. Mold, fermentation, and contamination can still occur if storage conditions are poor.
Signs Your Dates Have Gone Bad
Mold and unusual spots
Mold is the clearest sign that dates have gone bad. Look for fuzzy growth, dark spots, or anything that doesn’t look like the natural surface of the fruit.
Mold can develop when dates are exposed to moisture or stored improperly. Even a small amount means the dates should be discarded.
It’s not worth trying to salvage moldy dates. Once mold appears, it can spread beyond what you can see.
Sour smell or fermentation
Fresh or properly stored dates have a sweet, rich aroma. If they start to smell sour or slightly alcoholic, fermentation may have begun.
Fermentation happens when natural sugars break down due to yeast activity. This is more common in warm or humid conditions.
While slightly fermented dates may not always be harmful, they’re not ideal to eat and should generally be avoided.
Texture and taste changes
As dates age, their texture can change. They may become excessively dry, hard, or unusually sticky.
A noticeable change in taste, especially bitterness or sourness, is another sign of spoilage. Fresh dates should taste naturally sweet.
If something feels off when you eat them, trust your judgment. Taste is often the final indicator that dates are no longer good.
White coating (crystallized sugar vs mold)
One common concern is the white coating that sometimes appears on dates. In most cases, this is sugar crystallization, not mold.
Crystallization happens when natural sugars rise to the surface and harden. It’s completely safe and doesn’t mean the dates are spoiled.
The difference is texture and appearance. Crystals look dry and powdery, while mold appears fuzzy or patchy and often comes with an odor.
Best Ways to Store Dates Properly
Pantry storage tips
If you store dates in the pantry, keep them in a cool, dry place away from direct sunlight. Heat and humidity shorten their shelf life quickly.
Use sealed packaging or airtight containers to protect them from air exposure. This helps maintain texture and prevents contamination.
Avoid storing dates near strong-smelling foods. They can absorb odors easily, which affects their flavor.
Refrigeration tips
Refrigeration is ideal for extending how long dates last, especially in warmer climates. Store them in airtight containers to prevent moisture buildup.
Glass containers or high-quality plastic containers work well. They keep out excess air and maintain consistent conditions.
Always check for condensation inside the container. Too much moisture can lead to mold growth over time.
Freezing methods
To freeze dates, place them in freezer-safe bags or containers and remove as much air as possible. This prevents freezer burn.
You can freeze dates whole or chopped, depending on how you plan to use them later. Portioning them makes it easier to thaw only what you need.
Let frozen dates thaw slowly in the fridge before using. This helps preserve texture and flavor.
Using airtight containers
Airtight containers play a major role in food preservation. They reduce exposure to oxygen and humidity, which are key causes of spoilage.
Whether you’re storing dates in the pantry or fridge, a good container makes a noticeable difference in shelf life.
For long-term storage, consider vacuum sealing. It further reduces air exposure and helps dates stay fresh for extended periods.
How to Keep Dates Fresh Longer
Moisture control
Moisture is one of the biggest threats to dates. Too much moisture encourages mold growth and speeds up spoilage.
Always keep dates dry and avoid introducing moisture into the container. Even wet hands can affect their condition.
If you notice condensation, switch to a dry container and check the dates for early signs of spoilage.
Temperature management
Consistent temperature is key to extending shelf life. Frequent changes between warm and cold environments can affect quality.
Store dates in a stable environment, whether that’s a pantry or refrigerator. Avoid placing them near heat sources.
In hotter regions, refrigeration is usually the better option to prevent rapid deterioration.
Avoiding contamination
Always use clean hands or utensils when handling dates. Contamination introduces bacteria that can shorten shelf life.
Once opened, keep the container sealed tightly after each use. This limits exposure to air and microbes.
Simple habits like these go a long way in keeping dates fresh and safe to eat.
Do Dates Need to Be Refrigerated?
When refrigeration is necessary
Refrigeration isn’t always required, but it’s highly recommended in many cases. Soft varieties like Medjool dates benefit the most from cooler storage.
If you’ve opened the package or live in a warm climate, refrigeration helps extend how long dates last significantly.
It also slows down any microbial activity, reducing the risk of mold and fermentation.
Climate considerations
Your environment plays a big role in storage decisions. In cooler, dry climates, pantry storage may be sufficient for dried dates.
In hot or humid areas, refrigeration becomes almost essential. Humidity increases the risk of spoilage even for dried fruits.
Adjust your storage method based on your surroundings rather than relying on one rule for all situations.
Can You Eat Expired Dates Safely?
Safety vs quality
Dates past their best-by date are often still safe to eat, especially if they’ve been stored properly. However, their quality may decline.
They might become drier, less flavorful, or slightly harder. This doesn’t necessarily make them unsafe.
Always inspect them before eating. Safety depends more on condition than the printed date.
When to discard
You should throw away dates if you see mold, notice a sour smell, or detect unusual taste changes. These are clear signs of spoilage.
If you’re unsure, it’s better to err on the side of caution. Food safety should always come first.
A quick visual and smell check is usually enough to decide whether dates are still good.
Conclusion
How long do dates last? Dates last much longer than most people expect, but their shelf life depends on how you store them. Dried dates can sit in the pantry for months, while refrigeration and freezing extend their freshness even further. The key is controlling moisture, temperature, and air exposure to prevent spoilage. Knowing the difference between harmless sugar crystals and actual mold also helps avoid unnecessary waste. Always check for smell, texture, and appearance before eating older dates. With the right storage habits, you can keep dates fresh, safe, and ready to use whenever you need them.
FAQs
How long do dates last in the fridge?
Dates can last 6 to 12 months in the refrigerator if stored in airtight containers.
Do dates go bad if left out?
Yes, especially fresh dates. At room temperature, they spoil faster due to heat and moisture.
Can you eat expired dates?
Yes, if they show no signs of spoilage, but quality may be lower.
How do you know if dates are spoiled?
Look for mold, sour smell, or unusual taste and texture changes.
Should dates be refrigerated?
It’s recommended, especially for soft varieties or in warm climates.
Can you freeze dates?
Yes, freezing can extend their shelf life up to a year or more.

Many people want healthier, affordable protein sources but end up relying on the same few options like chicken or common beans. This limits both nutrition variety and flavor in everyday meals. At the same time, confusion around lesser-known foods makes it harder to try something new with confidence. Anasazi beans solve that problem. They offer a rich nutritional profile, a slightly sweet taste, and faster cooking compared too many other beans. They also fit well into modern plant-based diets while carrying deep cultural roots. This guide breaks everything down clearly. You’ll learn what Anasazi beans are, their health benefits, how to cook them properly, and simple recipes you can actually use. By the end, you’ll know exactly how to add them to your routine.
What Are Anasazi Beans?
Anasazi beans are heirloom legumes known for their distinctive red and white speckled appearance. They are slightly sweeter than many common beans and tend to cook faster, which makes them practical for everyday cooking.
These beans trace back to ancient farming practices in the Colorado Plateau, particularly within the Native American cuisine. They were cultivated by early communities who valued them for both nutrition and storage stability.
In terms of characteristics, Anasazi beans have a softer texture once cooked and a mild, nutty flavor. Compared to many modern bean varieties, they are considered a traditional or heirloom food, meaning they have been preserved without heavy genetic modification.
Read also: Meatloaf Mix Explained: What It Is and How to Use It
Nutritional Value of Anasazi Beans
Protein, Fiber, and Key Nutrients
Anasazi beans are a strong source of plant-based protein, making them useful for vegetarians and anyone trying to reduce meat consumption. A single serving provides a good balance of protein and complex carbohydrates.
They are also high in fiber, which supports digestion and helps maintain stable energy levels. This combination of protein and fiber makes them filling, which is useful for weight management and overall diet control.
Beyond that, they contain essential nutrients like iron, magnesium, and potassium. These minerals support muscle function, oxygen transport, and heart health, making anasazi beans a well-rounded addition to meals.
Low Glycemic Index Explained
One of the more important benefits of Anasazi beans is their low glycemic index. This means they release sugar into the bloodstream slowly, rather than causing sharp spikes.
For people managing blood sugar levels, this can make a real difference. Foods with a low glycemic index are often recommended in dietary approaches for long-term metabolic health.
In practical terms, eating Anasazi beans can help maintain steady energy throughout the day. This is especially useful for those trying to avoid crashes after meals or manage conditions like insulin resistance.
Health Benefits of Anasazi Beans
Supports Heart Health
The fiber in Anasazi beans plays a role in reducing cholesterol levels. Soluble fiber binds with cholesterol in the digestive system, helping remove it from the body.
They also contain potassium, which supports healthy blood pressure. Maintaining proper potassium levels helps balance sodium and reduces strain on the cardiovascular system.
When included regularly in a balanced diet, these beans contribute to long-term heart health. They work best alongside other whole foods rather than as a standalone solution.
Helps Control Blood Sugar
Because of their low glycemic index, Anasazi beans help avoid sudden spikes in blood sugar. This makes them a better option than many refined carbohydrates.
They are often recommended in diets focused on stable glucose levels. The combination of fiber and protein slows digestion, which helps regulate how sugar enters the bloodstream.
In real use, adding them to meals can make dishes more balanced. For example, pairing them with rice or vegetables improves overall nutrient distribution.
Improves Digestion
Fiber is essential for digestive health, and Anasazi beans provide a significant amount. This helps promote regular bowel movements and supports gut health.
Compared to some other beans, many people find Anasazi beans easier to digest. This may be due to their composition and the way they break down during cooking.
Proper preparation, such as soaking or rinsing, can further improve digestibility. These small steps often make a noticeable difference in comfort after eating.
Aids in Weight Management
Foods that are high in fiber and protein tend to keep you full longer. Anasazi beans fit well into this category, helping reduce unnecessary snacking.
They are also relatively low in fat, which makes them suitable for calorie-conscious diets. At the same time, they provide enough nutrients to keep meals satisfying.
In everyday use, they can replace heavier ingredients in dishes. For example, using them in place of processed meats can reduce overall calorie intake without sacrificing flavor.
Taste, Texture, and Comparison
What Do Anasazi Beans Taste Like?
Anasazi beans have a mild, slightly sweet flavor that sets them apart from stronger-tasting beans. This makes them easy to use in a wide range of dishes.
Their texture becomes soft and creamy when cooked properly. Unlike some beans that stay firm, anasazi beans tend to break down slightly, which works well in soups and stews.
Because of their balanced flavor, they pair well with spices like cumin, garlic, and chili powder. This makes them a natural fit for southwestern-style cooking.
Anasazi Beans vs Pinto Beans
Compared to pinto beans, Anasazi beans cook faster and often require less soaking time. This is one of their main practical advantages.
In terms of taste, they are slightly sweeter and less earthy than pinto beans. This subtle difference can change the overall flavor of a dish.
Nutritionally, both beans are similar, but Anasazi beans are often considered easier to digest. This can make them a better choice for people sensitive to legumes.
Why They Are Easier to Digest
Many people report less bloating when eating Anasazi beans compared to other varieties. While individual results vary, this is a commonly noted benefit.
Part of this comes down to how the beans break down during cooking. They tend to soften more easily, which may help the digestive process.
Preparation also matters. Soaking and rinsing beans removes certain compounds that can cause discomfort, making them easier on the stomach.
How to Cook Anasazi Beans

Do You Need to Soak Them?
Soaking is not strictly required for Anasazi beans, but it can reduce cooking time and improve texture. A typical soak lasts 6 to 8 hours.
If you skip soaking, expect a longer cooking time. This is manageable, but planning ahead can make the process smoother.
A quick soak method can also work. Boil the beans briefly, and then let them sit for an hour before cooking.
Stovetop Cooking Method
Start by rinsing the beans thoroughly. Add them to a pot with water, along with ingredients like garlic, onion, and bay leaves for flavor.
Bring the water to a boil, and then reduce to a simmer. Cook for about 60 to 90 minutes, depending on whether the beans were soaked.
Check for tenderness as they cook. The beans should be soft but not falling apart completely.
Instant Pot Method
Using a Instant Pot speeds up the process significantly. Add rinsed beans and water, then cook on high pressure.
For soaked beans, 20 to 25 minutes is usually enough. For uncooked beans, increase the time to around 35 to 40 minutes.
Allow natural pressure release for the best texture. This helps the beans finish cooking evenly.
Slow Cooker Method
A slow cooker is ideal for hands-off cooking. Add beans, water, and seasonings, then cook on low for 6 to 8 hours.
This method develops deeper flavor because of the longer cooking time. It works well for soups and stews.
Make sure the beans are fully covered with liquid throughout cooking. This prevents uneven texture.
Cooking Tips for Best Results
Cooking time can vary depending on the age of the beans. Older beans take longer to soften, so adjust your expectations accordingly.
Flavor improves when you cook beans with aromatics like onion, garlic, and spices. Adding salt toward the end helps avoid tough skins.
Avoid overcrowding the pot. Beans need space and enough water to cook evenly. Stir occasionally to prevent sticking.
Easy Anasazi Bean Recipes
Simple Anasazi Bean Soup
This is one of the easiest ways to start. Combine cooked beans with vegetable broth, garlic, and spices for a basic soup.
Let it simmer until the flavors blend. You can blend part of the soup for a thicker texture while keeping some whole beans.
This recipe works well for beginners because it is forgiving. You can adjust seasoning based on taste.
Southwestern Bean Bowl
Use cooked beans as a base with rice, vegetables, and toppings like avocado. Add spices such as cumin and chili powder.
This type of meal is balanced and easy to customize. You can keep it vegetarian or add protein if needed.
It’s also practical for meal prep. The ingredients store well and can be mixed in different combinations.
Vegan Anasazi Chili
Replace traditional beans with Anasazi beans in chili. Add tomatoes, onions, and spices for a rich flavor.
Slow cooking works best for this dish, allowing the flavors to develop fully. The beans soften and absorb the seasoning.
This is a good option for colder weather or larger meals. It reheats well and often tastes better the next day.
Storage and Buying Tips
Dried Anasazi beans should be stored in a cool, dry place. Airtight containers help prevent moisture and pests.
They can last up to a year or more, but fresher beans cook faster and taste better. Always check for damage or discoloration before use.
When buying, look for clean, evenly colored beans. Avoid packages with broken pieces or excessive dust.
Are There Any Side Effects?
Like most legumes, Anasazi beans can cause gas in some people. This is usually due to natural compounds that ferment in the gut.
Soaking, rinsing, and proper cooking reduce these effects. Gradually increasing intake also helps the body adjust.
People with specific dietary restrictions should consult a professional. While generally safe, moderation is always a good approach.
Conclusion
Anasazi beans stand out as a practical, nutritious, and versatile ingredient for everyday cooking. They offer a solid balance of protein, fiber, and essential nutrients while being easier to digest than many other beans. Their mild, slightly sweet flavor makes them easy to use in soups, bowls, and hearty meals without much effort. With simple cooking methods and flexible recipes, they fit naturally into both traditional and modern diets. Whether you are focusing on health, convenience, or variety, they are a reliable option worth adding to your pantry. Start with a basic recipe and adjust it to your taste as you get comfortable.
FAQs
What are Anasazi beans?
Anasazi beans are heirloom legumes known for their red and white pattern, mild flavor, and strong nutritional value.
Are Anasazi beans healthier than pinto beans?
They are similar nutritionally, but Anasazi beans may be easier to digest and have a slightly lower glycemic impact.
Do Anasazi beans need soaking?
Soaking is optional but helps reduce cooking time and improves texture.
What do Anasazi beans taste like?
They have a mild, slightly sweet, and nutty flavor compared to more earthy beans.
Can you cook Anasazi beans in an Instant Pot?
Yes, they cook well in an Instant Pot and require significantly less time than stovetop methods.
Are Anasazi beans good for weight loss?
Yes, their fiber and protein content help keep you full, which supports weight management.
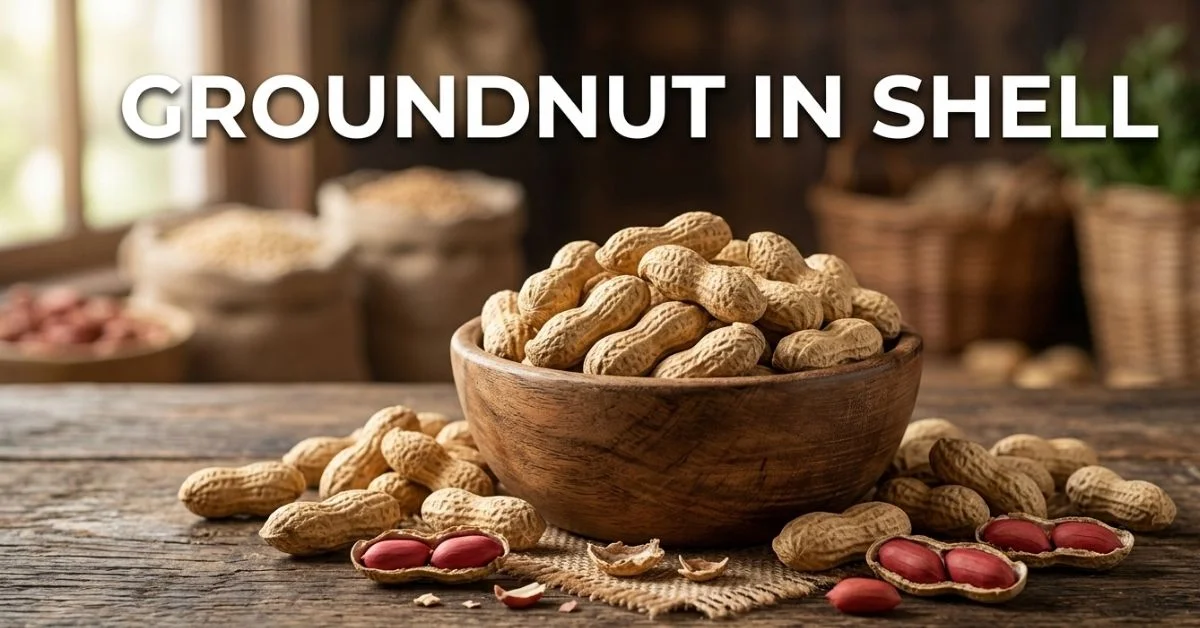
Groundnut in shell refers to whole peanuts that still have their natural outer hull intact. The shell protects the kernel from moisture, oxidation, and damage, which is why many people prefer buying peanuts this way. Scientifically known as Arachis hypogaea, groundnuts are widely eaten as snacks, used for oil production, and traded as agricultural commodities around the world. When people search for groundnut in shell, they usually want to understand its nutrition, health benefits, storage life, and the difference between in-shell and shelled peanuts.
From street vendors selling roasted peanuts outside sports stadiums to exporters shipping high-grade nuts across continents, in-shell groundnuts play an important role in both food culture and global trade. This guide explains everything you need to know, from nutrition and health effects to storage, roasting, and business uses.
What Is Groundnut in Shell?
Groundnut vs peanut same crop, different names
Groundnut and peanut refer to the same crop, scientifically known as Arachis hypogaea. In many countries such as India, Nigeria, and parts of Africa, the term groundnut is more common, while peanut is widely used in the United States. Regardless of the name, both refer to the edible legume that grows underground.
When the peanut is sold with its natural outer hull intact, it is called groundnut in shell or in-shell peanuts. This form is common in raw agricultural markets, export trade, and home roasting because the shell protects the kernel from damage and spoilage.
Read also: Meatloaf Mix Explained: What It Is and How to Use It
Parts of the nut: shell, skin, kernel
An in-shell peanut consists of three main parts. The outer groundnut shell or hull is a fibrous protective layer. Inside the shell are the edible kernels, which are covered by a thin red skin known as the groundnut skin or testa.
The kernel is the edible portion that contains most of the protein, fats, vitamins, and minerals. The skin also contains valuable antioxidants such as polyphenols and flavonoids. Even the shell has practical uses in agriculture and biomass fuel.
Common varieties and grades
Groundnuts are graded based on size, quality, and kernel characteristics. Export markets often refer to HPSG, which stands for Hand Picked Selected Groundnuts. These premium nuts are carefully sorted to remove damaged or moldy kernels. HPSG grades are commonly exported for snack processing, roasting, and international retail packaging.
Nutrition Facts of Groundnut
Groundnuts are often described as nutrient dense foods because they provide a combination of protein, healthy fats, vitamins, and minerals. According to dietary guidelines supported by organizations such as the World Health Organization and Food and Agriculture Organization, nuts can be part of a balanced diet when eaten in moderation.
Calories, protein, healthy fats, and fiber
A typical 100 gram serving of shelled peanuts contains around 560 calories. About 25 to 26 grams come from protein, making groundnuts one of the most protein-rich plant foods. They also contain about 49 grams of fat, most of which are healthy unsaturated fatty acids including monounsaturated and polyunsaturated fats.
Fiber is another important component. A serving provides roughly 8 to 9 grams of dietary fiber, which supports digestion and helps regulate appetite.
Vitamins and minerals
Groundnuts contain several essential micronutrients that support metabolism and overall health. These include vitamin E and a range of B vitamins such as niacin and folate. They also provide minerals like magnesium, phosphorus, iron, manganese, copper, zinc, and potassium.
Magnesium and phosphorus support bone health and energy metabolism. Iron and copper play roles in red blood cell formation. Zinc and manganese help support immune function and enzyme activity.
Antioxidants in skins and shells
The thin red skin around the peanut kernel contains several antioxidant compounds. These include polyphenols and phenolic acids such as p-coumaric acid. Research also shows that peanuts contain flavonoids such as genistein and biochanin.
One compound that often attracts attention is resveratrol, the same antioxidant found in grapes and red wine. Although the amounts in peanuts are modest, these compounds contribute to the antioxidant activity associated with peanuts.
Health Benefits and Risks
Heart health and cholesterol
Groundnuts contain a high proportion of unsaturated fatty acids, particularly monounsaturated fats. These fats are similar to those found in olive oil and are associated with improved cholesterol balance when consumed as part of a healthy diet.
Regular nut consumption has been linked with lower risk of heart disease in several nutritional studies. The combination of healthy fats, fiber, magnesium, and phytosterols helps support cardiovascular health.
Blood sugar and metabolic health
Because groundnuts contain protein, fiber, and fat, they are digested slowly and have a relatively low glycemic impact. This means they do not cause sharp spikes in blood sugar levels. For this reason, moderate peanut consumption may help support people managing metabolic syndrome or type 2 diabetes.
Peanuts can also support weight management. Even though they are calorie dense, their combination of protein and fiber can increase satiety, which may help reduce overeating.
Allergies and portion control
Despite their benefits, peanuts are one of the most common food allergens. People with peanut allergies should completely avoid them because reactions can be severe. Symptoms may include itching, swelling, breathing difficulty, or digestive problems.
Another consideration is portion size. Because peanuts are high in calories, eating large amounts regularly can contribute to excess calorie intake.
In-Shell vs Shelled Groundnuts

Yield conversion and real price
Many people assume that buying groundnut in shell is cheaper than buying shelled peanuts. In reality, the shell adds weight that is not edible. A common industry estimate is that about 1.5 kilograms of in-shell peanuts produce roughly 1 kilogram of kernels.
For home buyers or small businesses, this yield conversion helps determine the true cost of peanuts when comparing in-shell and shelled options.
Convenience vs freshness
Shelled peanuts are convenient because they are ready to eat or cook. However, removing the shell exposes the kernel to oxygen and moisture, which can accelerate oxidation and rancidity.
In-shell peanuts tend to stay fresh longer because the shell acts as a natural protective barrier. This is why many snack companies and traditional markets prefer selling peanuts in shell for roasting.
Best choice for different uses
For home roasting or boiling, groundnut in shell is usually the best choice. The shell protects the kernel during heating and helps preserve flavor. For cooking, peanut butter production, or quick snacks, shelled peanuts are often more convenient.
Small roasting businesses often buy in-shell peanuts because they can control the roasting process and maintain freshness.
How to Select and Buy Quality Groundnut in Shell
When buying raw groundnut in shell, visual inspection is the first step. The shells should be clean, intact, and free from cracks or holes. Large uniform shells usually indicate well-developed kernels.
Smell is another important indicator. Fresh peanuts have a mild, nutty aroma. If they smell sour, musty, or moldy, they may already be spoiled.
Touch can also reveal quality. Fresh shells feel firm and dry. If they feel damp or unusually light, the kernels inside may be damaged or shriveled.
Origin can matter as well. Major producers include China, India, Nigeria, the United States, Sudan, and Brazil. Some buyers prefer specific varieties from these regions due to taste, oil content, or kernel size.
Storage and Shelf Life of Groundnut in Shell
Proper storage plays a critical role in keeping peanuts safe and fresh. Because peanuts contain natural oils, they can become rancid if exposed to heat, light, and air.
The best storage conditions are cool, dry, and dark environments. Many households store in-shell peanuts in breathable bags or sealed containers to protect them from humidity and pests.
At room temperature, in-shell peanuts can last around three months if stored in a dry pantry. Refrigeration can extend shelf life to six months or longer. Freezing can preserve peanuts for a year or more without significant loss of flavor.
Food safety is also important. Poor storage conditions can encourage mold growth that produces aflatoxin, a toxin produced by certain fungi. Buying high-quality peanuts and keeping them dry significantly reduces this risk.
How to Roast and Boil Groundnut in Shell at Home
Roasting peanuts at home is simple and brings out their natural flavor. Before roasting, rinse the shells briefly to remove dust and allow them to dry.
For oven roasting, spread the peanuts in a single layer on a baking tray. Roast them at about 180°C for around 20 minutes, shaking the tray occasionally so they roast evenly. The shells will become slightly darker and fragrant.
Pan roasting is another traditional method. Heat a thick pan on medium heat and stir the peanuts continuously for about 15 minutes. This method is common among street vendors because it produces a smoky flavor.
Boiled groundnut is popular in many regions, especially in parts of Africa, Asia, and the southern United States. To prepare boiled peanuts, soak raw peanuts in salted water for several hours, then simmer them for two to three hours until the kernels become soft and savory.
Everyday Culinary Uses of Groundnut in Shell
In-shell peanuts are widely enjoyed as snacks. Roasted peanuts served warm are common at sports events, roadside stalls, and markets around the world. Cracking open each shell also slows down eating, which naturally encourages portion control.
Once shelled, the kernels can be used in many recipes. They can be ground into peanut butter, blended into sauces, or added to desserts and savory dishes. In many Asian and African cuisines, peanuts appear in chutneys, curries, and stews.
Even the process of shelling peanuts is part of the social experience. In many cultures, families sit together shelling peanuts while talking or watching sports, making them both a food and a shared activity.
Industrial, Agricultural, and Business Uses
Groundnuts are not only food crops but also important industrial raw materials. The kernels are commonly processed into Peanut oil, which is widely used for cooking because of its high smoke point and mild flavor.
After oil extraction, the remaining peanut meal becomes a protein rich ingredient for livestock feed. Farmers often use it in cattle, poultry, and fish feed formulations.
The shells also have practical uses. Groundnut shells can be used as biomass fuel, compost material, or soil conditioner. Some agricultural systems even use them as livestock bedding or organic manure.
For entrepreneurs, groundnut in shell offers several small business opportunities. Roasting units, snack packaging businesses, and export trading are common examples.
Global Production and Trade of Groundnut in Shell
Groundnuts are grown in many tropical and subtropical regions. The largest producers include China and India, followed by countries such as Nigeria, Sudan, and Brazil.
These countries supply both domestic markets and international trade. Some peanuts are exported in shell for roasting industries, while others are processed into peanut butter, oil, and snack products.
Global demand continues to grow due to the popularity of nuts as healthy snacks and plant protein sources.
Conclusion
Groundnut in shell is more than just a traditional snack. It is a nutrient dense food that provides protein, healthy fats, fiber, and important vitamins and minerals. The natural shell protects the kernels, which helps extend shelf life and maintain freshness compared to shelled peanuts.
Understanding how to select, store, and prepare in-shell peanuts makes a big difference in flavor and safety. Proper storage prevents problems like rancidity or mold, while roasting or boiling brings out their natural taste.
Beyond household consumption, groundnuts also play a role in global agriculture and food industries. They are used for oil production, livestock feed, and a variety of snack products. Whether you enjoy them roasted at home or use them in recipes, groundnut in shell remains a versatile and valuable food.
FAQs
Is groundnut in shell healthier than shelled peanuts?
Nutritionally they are the same once the shell is removed. However, the shell protects the kernel and helps maintain freshness during storage.
How long can groundnut in shell last?
At room temperature they can last about three months in a dry pantry. Refrigeration can extend shelf life to around six months or more.
How do I know if groundnut in shell has gone bad?
Spoiled peanuts often smell musty or sour. The shells may appear moldy, and the kernels can taste bitter or rancid.
Can I roast groundnut in shell at home?
Yes. Spread them on a baking tray and roast at around 180°C for about 20 minutes, stirring occasionally for even roasting.
Are peanut shells edible?
Peanut shells are technically safe but very fibrous and hard to digest. Most people discard them or use them for compost or biomass.
How much groundnut can I eat per day?
A small handful, around 28 to 30 grams of kernels, is generally considered a moderate daily portion for most healthy adults.
-

 Food4 weeks ago
Cuts of Steak: Complete Guide to Beef Cuts
-

 Food4 weeks ago
What Is Andouille Sausage? Complete Guide
-

 Food6 days ago
Black Pudding Guide: History, Recipe & Nutrition
-

 Drinks6 days ago
Easy Lychee Martini Recipe Sweet & Floral Cocktail
-

 Food4 weeks ago
Ultimate Tripas Recipe and Cooking Guide
-

 Food4 weeks ago
Shirleys Coffee Shop Guam Locations Menu and Guide
-

 Blog3 weeks ago
Saltwater Kitchen & Sushi: Menu, Reviews, and Visitor Guide
-

 Food4 days ago
Italian Ice Flavoring Guide: Flavors, Bases, and Recipes