
Food
Best Prime Rib Dry Brine for Incredible Flavor
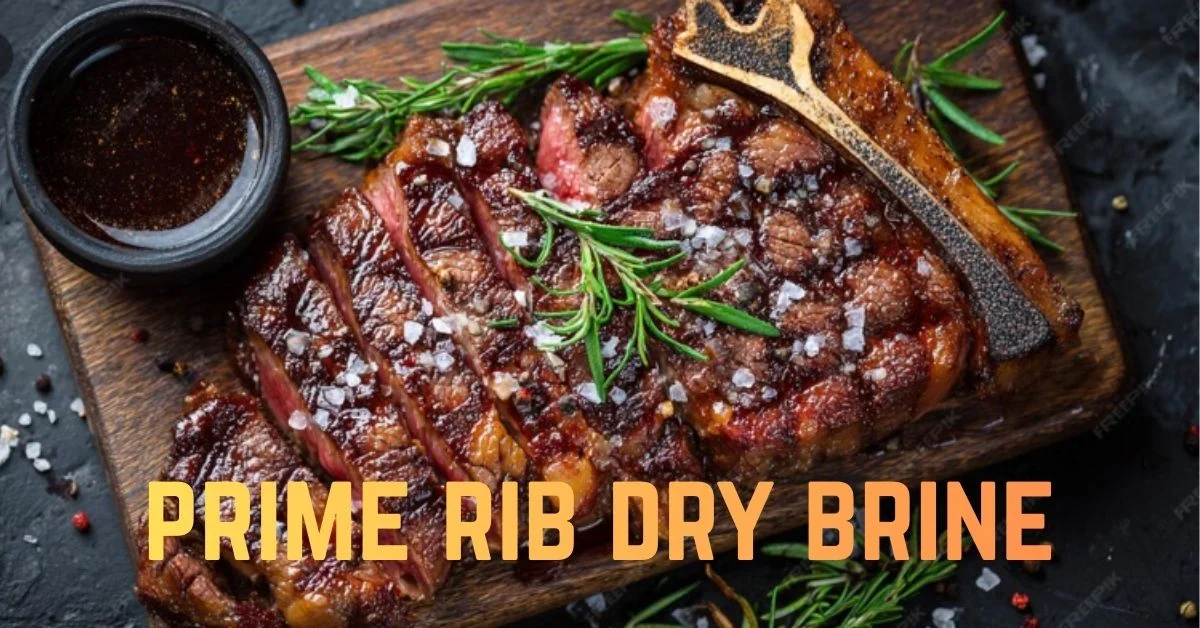
Cooking prime rib at home often falls short in one key area: flavor that penetrates beyond the surface. Many roasts look impressive but taste under-seasoned inside, or worse, end up unevenly cooked and lacking that rich, savory depth people expect. The problem usually comes down to preparation, not cooking. Proper prime rib dry brine changes everything. When done correctly, it transforms a simple rib roast into a deeply seasoned, tender, and juicy centerpiece with a beautifully developed crust. It is not complicated, but it does require the right timing, salt ratio, and setup. This guide breaks down exactly how to dry brine prime rib with clarity and precision. You will learn the science behind it, the correct method, and how to avoid the common mistakes that ruin results.
What Is Dry Brining and Why It Matters
prime rib dry brine brining is a simple process where you apply salt directly to the surface of meat and let it rest over time. Unlike wet brine, there is no water involved. The salt works gradually, drawing moisture out and then allowing it to be reabsorbed.
For prime rib dry brine, this method is especially effective because of the size and fat content of the roast. A thick rib eye roast needs time for seasoning to penetrate beyond the surface, and dry brining allows that to happen naturally.
The result is a roast that is seasoned all the way through, not just on the outside. It also helps create a better crust during cooking, which is one of the defining features of a well-prepared prime rib.
Read also: Powerful Coconut Water with Pineapple Health Benefits
The Science behind Dry Brining
When salt is applied to meat, it first draws moisture out through a process often explained as osmosis. That moisture dissolves the salt, creating concentrated brine on the surface. Over time, this liquid gets pulled back into the meat.
As the salt diffuses deeper, it begins to break down some of the proteins in the meat fibers. This process, known as protein denaturation, helps the meat retain moisture during cooking and improves tenderness.
prime rib dry brine brining also sets the stage for a better Maillard reaction. As the surface dries out in the refrigerator, it browns more effectively in the oven, creating a rich, flavorful crust that defines a great prime rib.
Ingredients and Tools You’ll Need
Essential Ingredients
The foundation of any prime rib dry brine is kosher salt. Its coarse texture makes it easier to distribute evenly across the surface, and it avoids the over-salting risk that comes with finer table salt.
Beyond salt, you can layer flavor with black pepper, garlic powder, and fresh herbs like rosemary and thyme. These additions complement the natural richness of the rib roast without overpowering it.
It is best to keep the seasoning simple during the brining stage. Strong marinades or wet ingredients interfere with the drying process, which is essential for proper crust formation later.
Must-Have Tools
A wire rack is one of the most important tools for dry brining. It allows air to circulate around the entire roast, which helps dry the surface evenly while it rests in the refrigerator.
A sturdy roasting pan is necessary for cooking, especially for larger cuts. It should hold the roast securely and allow heat to circulate evenly during roasting or reverse searing.
A reliable meat thermometer is essential. Prime rib is too expensive to guess. Monitoring internal temperature ensures you hit the right doneness without overcooking.
Best Salt Ratio for Prime Rib Dry Brine
Getting the salt ratio right is where many people go wrong. A good guideline is about ½ teaspoon of kosher salt per pound of meat. This provides enough seasoning without overwhelming the natural flavor.
For larger roasts, consistency matters more than precision. The goal is to coat the entire surface evenly, including the sides and any exposed edges. Uneven application leads to uneven flavor.
If you are unsure, it is better to slightly under-salt than overdo it. You can always add a finishing sprinkle after cooking, but fixing an over-salted roast is far more difficult.
How Long to Dry Brine Prime Rib

Time is what makes the prime rib dry brine effective. At a minimum, you should allow 12 hours, but this is usually not enough for thicker cuts. A full 24 hours delivers much better results.
For optimal flavor and texture, 36 to 48 hours is ideal. In testing different timings, a 48-hour dry brine consistently produced deeper seasoning and a noticeably better crust.
Going beyond 48 hours is possible, but the benefits start to level off. The key is giving the salt enough time to work without letting the exterior dry out excessively.
Step-by-Step Dry Brine Method
Preparing the Roast
Start by patting the prime rib dry with paper towels. Removing surface moisture helps the salt adhere properly and begins the drying process immediately.
Trim any excessive surface fat if needed, but leave a good layer intact. Fat contributes to flavor and helps protect the meat during cooking.
Place the roast on a wire rack set over a tray. This setup ensures airflow around the entire piece, which is critical for even drying.
Applying Salt Evenly
Sprinkle kosher salt evenly over the entire surface. Take your time and ensure all areas are covered, including the sides and ends.
Gently press the salt into the meat so it adheres well. Avoid rubbing aggressively, as this can create uneven patches.
At this stage, you can add a light layer of pepper or garlic powder, but keep it minimal. The focus during dry brining is on salt penetration.
Proper Fridge Setup (Uncovered Method)
Place the rack with the roast in the refrigerator uncovered. This might feel unusual, but it is essential for airflow and surface drying.
Keep the roast on a middle shelf where air circulation is consistent. Avoid crowded areas in the fridge where airflow is restricted.
Over time, you will notice the surface becoming slightly dry and firm. This is exactly what you want for developing a strong crust during cooking.
Should You Add Seasoning Beyond Salt?
Salt does the heavy lifting during prime rib dry brine, but additional seasoning can enhance the final result. The timing of when you add it matters.
For best results, apply herbs and spices shortly before cooking rather than during the brining phase. This preserves their aroma and prevents them from drying out.
A simple mix of black pepper, garlic powder, and fresh herbs works well. Combined with a butter baste during cooking, it creates a balanced and flavorful crust.
Cooking After Dry Brining
Reverse Sear Method
The reverse sear method involves cooking the prime rib slowly at a low temperature first. This allows for even cooking from edge to center.
Once the roast reaches the desired internal temperature, it is finished with a high-heat sear. This creates a crisp, deeply browned crust.
This method pairs especially well with prime rib dry brine brining because the surface is already dry, making it easier to achieve that perfect finish.
Traditional Oven Roast
A traditional oven roast starts at a higher temperature and gradually cooks the meat through. It is a more straightforward method and works well for most home kitchens.
The key is managing the heat so the outside does not overcook before the inside reaches the right temperature. A thermometer is critical here.
Even with this method, the prime rib dry brine improves both flavor and texture. The meat stays juicier, and the crust develops more evenly.
Ideal Internal Temperature Guide
Internal temperature determines the final doneness of your prime rib. For rare, aim for about 120–125°F before resting. Medium-rare typically lands around 130–135°F.
Keep in mind that the temperature will continue to rise slightly after the roast is removed from the oven. This carryover cooking is normal and should be factored in.
Using a meat thermometer removes guesswork. Insert it into the thickest part of the roast for the most accurate reading and consistent results.
Resting and Slicing for Maximum Juiciness
Resting the roast after cooking is not optional. It allows the juices to redistribute throughout the meat instead of spilling out when sliced.
A good resting time for prime rib dry brine is about 20 to 30 minutes, depending on size. Cover it loosely with foil to keep it warm without trapping too much steam.
When slicing, cut against the grain for maximum tenderness. This small detail makes a noticeable difference in texture and overall eating experience.
Common Dry Brining Mistakes to Avoid
One of the most common mistakes is over-salting. This usually happens when using fine salt instead of kosher salt or applying too much without measuring.
Another issue is poor airflow in the refrigerator. Placing the roast in a covered container or crowded space prevents proper drying and reduces crust quality.
Timing mistakes also matter. Brining too briefly limits flavor penetration, while excessive time can lead to an overly dry surface. Balance is key.
Dry Brine vs Wet Brine: Which Is Better?
prime rib dry brine brining and wet brining both have their place, but for prime rib dry brine is generally the better choice. It enhances flavor without diluting the meat.
Wet brining introduces water into the process, which can slightly affect the texture. It works well for lean cuts but is less ideal for a rich rib roast.
Dry brining delivers a more concentrated flavor and better crust. For most home cooks aiming for a classic prime rib result, it is the preferred method.
Pro Tips for Incredible Flavor Every Time
After testing different approaches, one thing stands out: consistency matters more than complexity. A simple prime rib dry brine done correctly will outperform complicated seasoning blends.
Let the roast sit at room temperature for about an hour before cooking. This helps it cook more evenly and reduces temperature shock in the oven.
Finally, do not rush the process. From brining to resting, each step builds toward the final result. Paying attention to these details is what separates a good roast from a great one.
Conclusion
A well-executed prime rib dry brine is the difference between a decent roast and one that delivers deep, even flavor in every bite. By focusing on the right salt ratio, proper timing, and good airflow in the fridge, you set the foundation for a tender and juicy result. Understanding how the process works also makes it easier to avoid common mistakes that can affect texture and taste. Whether you choose a reverse sear or a traditional roast, the preparation does most of the work. Keep the method simple, stay consistent, and trust the process. Once you try it this way, it becomes the standard approach for any prime rib worth serving.
FAQs
How long should youprime rib dry brine?
A minimum of 24 hours works well, but 36 to 48 hours gives the best flavor and texture.
What salt is best for prime rib dry brine brining?
Kosher salt is ideal because of its coarse texture and even distribution.
Do you rinse off prime rib dry brine?
No, rinsing removes the seasoning. The salt is meant to stay and absorb into the meat.
Can you prime rib dry brine too long?
Yes, going much beyond 48 hours can dry out the surface too much without adding benefits.
Should prime rib be covered in the fridge?
No, it should remain uncovered to allow airflow and proper surface drying.
Does prime rib dry brine brining make meat salty?
When done with the correct ratio, it enhances flavor without making the meat overly salty.

Dunkin’s Vanilla Creme Donut Dunkin is one of those treats that instantly makes you smile. The soft, fluffy yeast-raised dough, filled with creamy vanilla custard and lightly dusted with powdered sugar, gives a melt-in-your-mouth experience that is both indulgent and comforting. The donut’s gentle vanilla flavor is not overpowering, making it a versatile option for all ages. Many enjoy pairing it with hot coffee, iced lattes, or even chocolate milk to balance the sweetness and enhance the flavor. Its simple presentation and comforting taste evoke nostalgia, reminding many adults of bakery-style donuts from their childhood.
The Vanilla Creme Donut Dunkin has become a go-to choice for breakfast, mid-morning snack, or coffee breaks, combining rich flavor with an easy, portable treat. Its light dough ensures that the custard filling shines, creating a satisfying contrast with every bite.
Read also: Easy Recipe for Mediterranean Fish
Ingredients of Vanilla Creme Donut Dunkin
The Vanilla Creme Donut Dunkin uses a combination of simple bakery ingredients that deliver its signature flavor and texture:
-
Enriched wheat flour
-
Sugar
-
Yeast
-
Palm and canola oils
-
Eggs
-
Skim milk and cream
-
Vanilla extract
-
Salt
-
Powdered sugar for topping
-
Natural and artificial flavors
The yeast dough makes the donut soft and airy, while the creamy vanilla custard gives a smooth, rich filling. The powdered sugar on top adds just enough sweetness and makes the donut visually appealing. All ingredients are crafted to create a classic, comforting flavor that fans love.
Calories and Nutritional Information
A single Vanilla Creme Donut Dunkin contains approximately 340 calories. The nutritional breakdown is:
-
Total fat: 18g
-
Saturated fat: 7g
-
Trans fat: 0g
-
Cholesterol: 40mg
-
Sodium: 260mg
-
Total carbohydrates: 42g
-
Sugars: 20g
-
Protein: 5g
This donut is indulgent but manageable as an occasional treat. Pairing it with a protein-rich beverage, like milk or a protein coffee shake, can help balance sugar intake while still enjoying the creamy vanilla flavor.
Price and Availability
The Vanilla Creme Donut Dunkin usually costs between $1.49 and $1.79 depending on your location. It’s available at most Dunkin outlets nationwide and can also be ordered through the Dunkin mobile app for delivery or pickup. Seasonal promotions sometimes feature combo deals with coffee, making it easier to enjoy this classic donut without skipping your morning routine.
Why the Vanilla Creme Donut Dunkin Stands Out
The Vanilla Creme Donut Dunkin stands out because of its texture, flavor balance, and nostalgic appeal. The yeast-raised dough is light and airy, while the creamy vanilla custard provides a rich, smooth contrast. Unlike overly sweet donuts, this option remains balanced, making it appealing to a wide audience. Many fans highlight its comforting and familiar taste, which recalls childhood bakery experiences.
Its versatility is another reason it’s popular. The Vanilla Creme Donut Dunkin works as a snack, breakfast item, or coffee companion. Its compatibility with both hot and cold beverages makes it an all-day treat.
Taste and Texture Review
Biting into the Vanilla Creme Donut Dunkin gives a soft, slightly firm outer dough that holds the creamy custard filling in place. The filling is smooth, sweet, and lightly aromatic, offering a classic vanilla flavor without being artificial. Powdered sugar adds subtle sweetness, while the overall donut remains light rather than heavy. Many fans describe it as comforting, simple, and reliable—a donut you can enjoy anytime.
Pairing Ideas for Vanilla Creme Donut Dunkin
Pairing enhances the experience of enjoying the Vanilla Creme Donut Dunkin. Consider these combinations:
-
Hot brewed coffee or espresso for a bold contrast
-
Iced coffee or cold brew for a refreshing twist
-
Hot chocolate for extra indulgence
-
Vanilla or caramel lattes for complementary flavors
-
Milk or chocolate milk for a classic combination
These pairings allow the donut to shine while balancing its sweetness, creating a full flavor experience.
Comparisons with Other Dunkin Donuts
The Vanilla Creme Donut Dunkin can be compared with other popular filled and frosted donuts from Dunkin:
-
Boston Cream Donut: Chocolate-coated with custard, richer chocolate flavor
-
Strawberry-Filled Donut: Fruity filling, lighter vanilla taste but sweeter overall
-
Crème Brûlée Donut: Caramelized sugar topping, more decadent flavor
The Vanilla Creme Donut Dunkin is simpler, creamy, and less sweet, perfect for classic flavor lovers.
Allergen and Dietary Information
For those with dietary restrictions, it’s important to note that the Vanilla Creme Donut Dunkin contains eggs, milk, wheat, and traces of soy. It is not suitable for gluten-intolerant or dairy-allergic individuals. Dunkin does not currently offer a vegan or gluten-free version. Those monitoring sugar intake should note the donut has 20g of sugar per serving.
Regional Availability
While the Vanilla Creme Donut Dunkin is widely available across most Dunkin outlets in the U.S., availability may vary by region and store size. Smaller or seasonal locations may rotate flavors, so checking through the Dunkin app or calling your local store ensures it’s in stock.
Seasonal and Limited-Time Variations
Although the classic Vanilla Creme Donut Dunkin is available year-round, Dunkin sometimes releases limited-time variations during holidays. You may encounter subtle twists, such as spiced custard for winter or festive toppings during holidays. These seasonal editions maintain the classic flavor while adding a unique touch for celebrations.
Serving Suggestions for Vanilla Creme Donut Dunkin
The Vanilla Creme Donut Dunkin is versatile:
-
Warm with coffee or cappuccino for breakfast
-
Paired with cold milk for a classic snack
-
Sliced on a breakfast platter with berries and yogurt
-
Used as a dessert base with chocolate or caramel drizzle
-
Part of a brunch spread with muffins, bagels, and fruit
These ideas enhance the flavor and make the donut a flexible option for any occasion.
Storage and Freshness Tips
To enjoy the Vanilla Creme Donut Dunkin at its best:
-
Store in an airtight container at room temperature for up to 24 hours
-
Refrigerate for up to 2 days, but the dough may firm slightly
-
Avoid freezing, as the custard filling can separate
-
Reheat briefly in the microwave to restore softness
Proper storage ensures the donut maintains its intended texture and flavor.
Homemade Copycat Version
For those who want to recreate the Vanilla Creme Donut Dunkin at home:
-
Prepare yeast dough with flour, sugar, yeast, eggs, milk, and butter
-
Make vanilla custard with milk, sugar, eggs, cornstarch, and vanilla extract
-
Fry dough, fill with custard using a piping bag, and dust with powdered sugar
This DIY version allows you to control sweetness and experiment with flavors while still capturing the classic donut taste.
Dietary Alternatives
If you want a lighter option:
-
Use Greek yogurt and vanilla extract instead of custard
-
Bake the dough instead of frying
-
Substitute whole wheat or oat flour for added fiber
These changes retain much of the vanilla flavor while making the donut slightly healthier.
Customer Reviews and Popularity
Fans praise the Vanilla Creme Donut Dunkin for:
-
Creamy, smooth filling that’s not overly sweet
-
Soft, fluffy dough that melts in the mouth
-
Perfect portion for a snack or breakfast
-
Consistent flavor across locations
Many enjoy it alongside coffee, noting how the donut complements the drink’s bitterness. Social media posts often highlight nostalgia, with adults recalling similar bakery-style donuts from their childhood.
Fun Facts About Vanilla Creme Donut Dunkin
-
It’s a nostalgic favorite, reminding many adults of childhood donuts
-
Yeast-raised dough makes it lighter than typical cake donuts
-
Powdered sugar adds subtle sweetness and enhances visual appeal
-
Often called a “comfort food” by fans
These details show why the Vanilla Creme Donut Dunkin is more than just a donut—it’s an experience.
Serving Ideas for Occasions
The Vanilla Creme Donut Dunkin is perfect for:
-
Breakfast buffets
-
Office snacks
-
Weekend coffee mornings
-
Small parties or gatherings
-
Paired with fresh fruit or berries for a balanced treat
Its simple elegance makes it a hit at events without needing fancy presentation.
Conclusion
The Vanilla Creme Donut Dunkin is a classic treat that combines fluffy yeast dough with smooth vanilla custard and a light powdered sugar topping. With around 340 calories, it’s indulgent but not overwhelming. Its nostalgic flavor, soft texture, and versatility make it a favorite for breakfast, snacks, or coffee breaks. Whether you enjoy it in-store, order via the Dunkin app, or try a homemade version, this donut delivers a comforting, creamy, and satisfying experience every time. Fans love its balance of sweetness and simplicity, making it a timeless choice among Dunkin donuts.
FAQs
How many calories are in Dunkin Vanilla Creme Donut?
About 340 calories per donut.
What ingredients are used in Dunkin Vanilla Creme Donut?
Flour, sugar, yeast, eggs, milk, cream, vanilla extract, and powdered sugar.
Is Dunkin Vanilla Creme Donut good?
Yes, it’s soft, creamy, and lightly sweet, making it a favorite snack.
How much does Dunkin Vanilla Creme Donut cost?
Usually between $1.49 and $1.79, depending on location.
Can I order Dunkin Vanilla Creme Donut online?
Yes, through the Dunkin mobile app for delivery or pickup.
What drinks pair well with Vanilla Creme Donut Dunkin?
Coffee, iced lattes, hot chocolate, or milk complement the flavor perfectly.
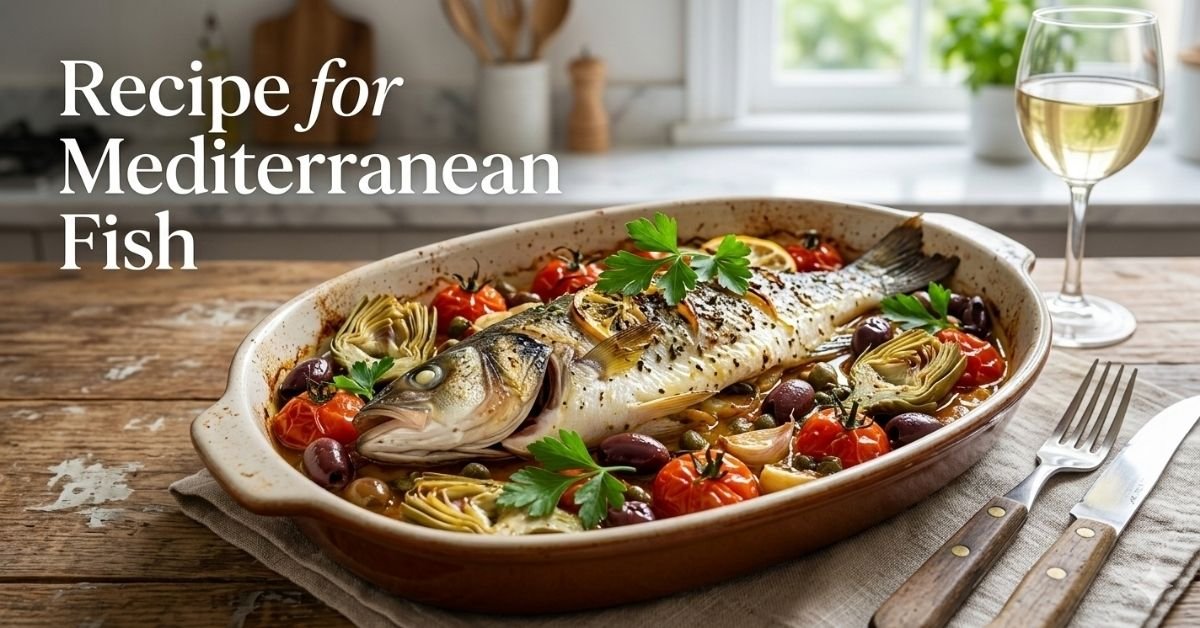
Mediterranean fish is a favorite for anyone who loves fresh, healthy meals full of flavor. This recipe for Mediterranean fish brings together tender white fish, bright cherry tomatoes, briny olives, and fragrant herbs for a dish that’s both easy and satisfying. Perfect for a weeknight dinner or a special occasion, this baked fish recipe is simple enough for beginners but flavorful enough to impress. You’ll learn how to balance acidity, roast vegetables perfectly, and season your fish for maximum taste.
Cooking Mediterranean-style fish isn’t just about following steps; it’s about understanding how flavors work together. The bright lemon, garlic, and olive combination creates a dish that’s fresh and aromatic. By using this recipe, you’ll also learn handy cooking tips like choosing the best white fish, adjusting cooking times, and adding substitutions when needed.
Read also: Easy Shrimp Ceviche Recipe Mexican
Ingredients
-
4 white fish fillets (cod, halibut, or tilapia)
-
1 cup cherry tomatoes, halved
-
1/2 cup Kalamata olives, pitted and halved
-
1/2 cup artichoke hearts, quartered
-
2 tablespoons capers, drained
-
3 cloves garlic, minced
-
2 tablespoons olive oil
-
1 teaspoon dried oregano
-
Juice of 1 lemon
-
Salt and pepper to taste
-
Fresh parsley, chopped for garnish
Optional Ingredients:
-
Feta cheese, crumbled
-
Red pepper flakes for extra heat
-
White wine for added depth
Choosing the Right Fish
Selecting the right fish is key to making this recipe successful. White fish like cod, halibut, or tilapia work best because they have a firm texture that holds up during baking. Freshness is important; look for fish that smells clean, not fishy, and has firm flesh. If fresh fish isn’t available, frozen fillets are fine—just thaw them completely before cooking.
Substitutions can help when certain fish are unavailable. Mahi mahi or sea bass can also work well. Make sure to adjust cooking times depending on the thickness of the fillets, as thicker pieces need slightly longer in the oven.
Preparing the Vegetables
Vegetables add both flavor and color to Mediterranean fish. Cherry tomatoes roast beautifully and release natural sweetness that complements the fish. Kalamata olives give a salty depth, while artichoke hearts and capers add a tangy bite.
Tips for prep:
-
Halve the cherry tomatoes for faster roasting.
-
Rinse capers to remove excess salt.
-
Cut artichoke hearts into small quarters for even cooking.
-
Toss all vegetables with olive oil, salt, and pepper before adding them to the fish.
Roasting vegetables along with fish helps blend flavors and reduces cleanup since it’s all cooked on one pan.
Marinating the Fish
A simple marinade enhances flavor without being complicated. Combine lemon juice, olive oil, garlic, oregano, salt, and pepper. Brush it over both sides of the fish fillets and let them sit for 10–15 minutes.
Marinating helps the fish absorb flavors and keeps it moist during baking. Avoid marinating too long, especially with acidic ingredients like lemon juice, because it can start to “cook” the fish and affect texture.
Baking the Fish
Preheat your oven to 425°F (220°C). Place the marinated fish fillets on a baking sheet lined with parchment paper. Arrange vegetables around the fish, making sure they’re spread evenly for uniform cooking.
Bake for 12–15 minutes, depending on thickness, or until the fish reaches an internal temperature of 145°F (63°C). The fish should flake easily with a fork. If you like a golden top, broil for 1–2 minutes at the end.
One-Pan Cooking Tips
Cooking everything on one pan makes this recipe quick and cleanup easy. Here are some tips:
-
Space fish fillets apart so they cook evenly.
-
Use parchment paper to prevent sticking.
-
Roast vegetables first if they require longer cooking.
-
Keep an eye on cherry tomatoes—they can overcook quickly.
One-pan meals are perfect for weeknights because they save time and dishes while still producing a flavorful, healthy dinner.
Balancing Flavors
Mediterranean fish is all about balance. The acidity from lemon, saltiness from olives and capers, and sweetness from roasted tomatoes need to complement each other. Taste and adjust seasoning before serving.
Adding fresh parsley at the end brightens the dish, while optional feta adds creaminess. If you want a little extra depth, a splash of white wine during baking enhances the aroma without overpowering other flavors.
Serving Suggestions
Serve Mediterranean fish over a bed of:
-
Cooked quinoa or rice
-
Couscous or bulgur wheat
-
Roasted or steamed vegetables
You can also pair it with a side salad or warm pita bread for a full Mediterranean-inspired meal. Drizzle with extra lemon juice or olive oil just before serving for a fresh finish.
Storing Leftovers
Store any leftovers in an airtight container in the refrigerator for up to 2 days. Reheat gently in the oven or microwave to avoid drying out the fish. Avoid storing with vegetables that release a lot of moisture, as it can make the fish soggy.
Health Benefits
Mediterranean fish is low in calories, high in protein, and full of healthy fats from olive oil and olives. Adding vegetables increases fiber, vitamins, and minerals. This recipe supports heart health and provides a nutrient-rich meal without compromising on flavor.
Using fresh herbs like parsley and oregano not only enhances taste but also adds antioxidants, while fish itself provides omega-3 fatty acids that are great for brain and heart health.
Substitutions and Variations
-
Swap white fish with salmon for richer flavor.
-
Use green olives instead of Kalamata for a milder taste.
-
Replace lemon juice with lime juice for a different citrus note.
-
Add roasted red peppers or zucchini for extra vegetables.
-
Skip feta if you prefer a dairy-free dish.
These variations allow you to adapt the recipe based on preferences or what’s available in your kitchen.
Conclusion
This recipe for Mediterranean fish is simple, healthy, and full of vibrant flavors. By roasting fish with fresh vegetables, herbs, and olives, you get a complete, balanced meal that’s easy to make and packed with nutrients. Perfect for beginners or busy weeknights, it delivers a tasty Mediterranean experience at home with minimal effort. With a few simple tips, substitutions, and flavor adjustments, you can make this dish your own while enjoying a wholesome, satisfying dinner.
FAQs
Can I bake frozen fish for this recipe?
Yes, just thaw completely and adjust baking time slightly longer.
How do I prevent the fish from sticking?
Use parchment paper or lightly oil the baking sheet before placing fish.
What if I don’t have artichoke hearts?
You can omit or replace with roasted zucchini or bell peppers.
Can I make this recipe spicy?
Yes, add a pinch of red pepper flakes to the marinade.
How long should cherry tomatoes roast?
About 10–12 minutes at 425°F, just until they soften and release juices.
Can I use dried herbs instead of fresh?
Yes, but use about half the amount of dried herbs as fresh for balanced flavor.
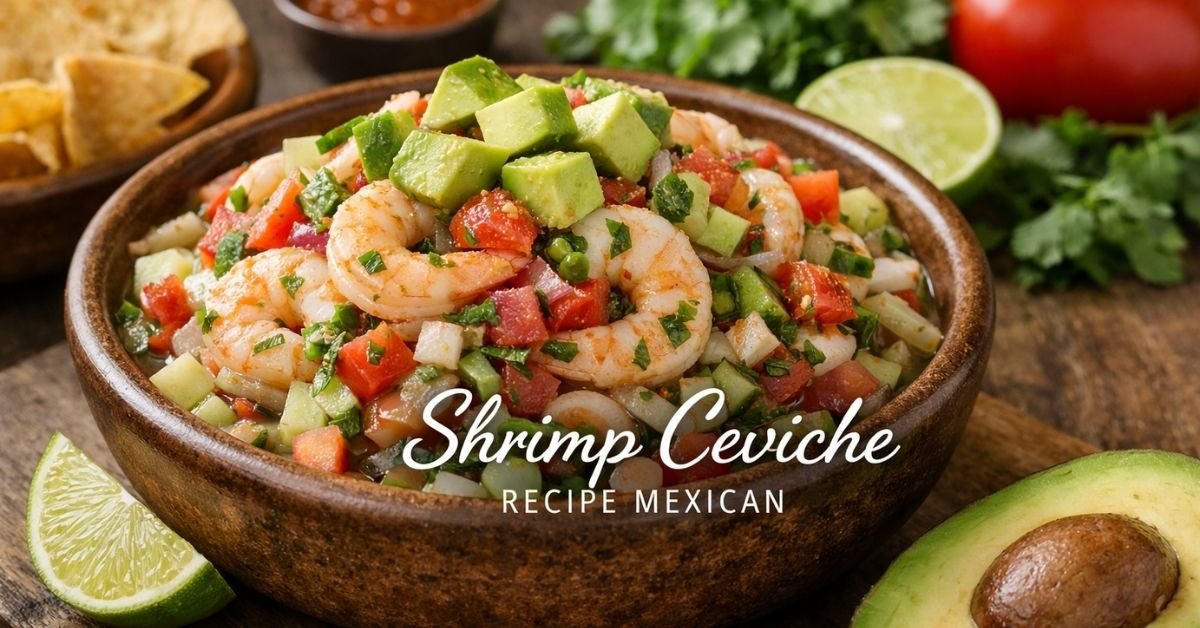
If you’ve been looking for a fresh, tangy, and flavorful dish, this Shrimp ceviche recipe mexican is exactly what you need. Shrimp ceviche is a classic Mexican dish that combines tender shrimp, zesty lime juice, crisp vegetables, and a touch of spice for a refreshing taste. This Shrimp ceviche recipe mexican is beginner-friendly and perfect for anyone wanting to enjoy an authentic Mexican seafood experience at home. By following this guide, you’ll learn how to marinate shrimp properly, balance flavors, and serve the dish in ways that bring out its natural colors and textures.
Read also: What is Carpaccio Beef: Definition and Recipe
Ingredients Needed for Shrimp Ceviche Recipe Mexican
-
1 pound raw shrimp, peeled and deveined
-
6–8 fresh limes, juiced
-
1–2 serrano or jalapeño peppers, finely chopped
-
2 Roma tomatoes, diced
-
1 small white onion, finely chopped
-
1 cucumber, peeled and diced
-
1 avocado, diced (add at the end to prevent browning)
-
2 tablespoons fresh cilantro, chopped
-
Salt and pepper to taste
-
Optional: ½ cup Clamato juice or tomato juice
-
Optional: Tortilla chips or tostadas for serving
This ingredient list ensures your Shrimp ceviche recipe mexican has all the right flavors and textures for a classic experience.
Choosing the Right Shrimp
For the best Shrimp ceviche recipe mexican, using the right shrimp is crucial. Medium-sized shrimp (about 21–25 count) are ideal because they stay tender without being rubbery. You can use raw shrimp that will “cook” in lime juice, giving that authentic ceviche texture. If you prefer pre-cooked shrimp, they only need a short marination time of 15–20 minutes so they soak up the flavor without becoming tough. Using the right shrimp ensures your Shrimp ceviche recipe mexican is fresh and delicious.
Preparing the Citrus Marinade
The lime juice in this Shrimp ceviche recipe mexican does more than add flavor—it “cooks” the shrimp. For best results, always use fresh lime juice. Mix lime juice with salt, pepper, and optional Clamato juice if you like a slightly richer flavor. Pour this mixture over your shrimp and refrigerate. Raw shrimp should marinate for 30–60 minutes, while pre-cooked shrimp only need 15–20 minutes. Timing is key for this Shrimp ceviche recipe mexican to achieve the perfect balance between tangy and tender.
Vegetable Preparation and Texture Tips
Vegetables give your Shrimp ceviche recipe mexican crunch, freshness, and color. Dice tomatoes and cucumber evenly so every bite is balanced. Chop onions and peppers finely to distribute heat. If you prefer mild spice, remove seeds from the peppers. Fresh cilantro is essential for authentic flavor, so chop just before mixing. Add avocado only at the very end to avoid browning, keeping your Shrimp ceviche recipe mexican visually appealing and creamy.
Mixing and Layering Flavors
Once the shrimp is marinated, drain excess citrus if it’s too strong. Gently fold in vegetables, cilantro, and optional Clamato juice. Taste and adjust seasoning with salt, pepper, or a pinch of celery salt for depth. Stir carefully so tomatoes and avocado remain intact. This careful mixing ensures your Shrimp ceviche recipe mexican stays fresh, tangy, and colorful with every bite.
Serving Suggestions for Shrimp Ceviche Recipe Mexican
Shrimp ceviche is versatile and can be served in many ways:
-
On tostadas with cilantro and diced avocado
-
In small bowls as an appetizer
-
With tortilla chips for casual snacking
-
As a side dish with grilled fish or seafood
Chilling the ceviche before serving enhances flavors and keeps the dish refreshing. Presentation matters, and these simple options make your Shrimp ceviche recipe mexican both tasty and inviting.
Regional Variations
Different regions in Mexico offer unique twists on Shrimp ceviche recipe mexican:
-
Sonora Style: Combines tomatoes, serrano peppers, and sometimes tomato juice for a slightly sweet taste.
-
Coastal Style: Emphasizes lime, onions, and peppers for a pure, citrus-forward flavor.
-
Quick Version: Uses pre-cooked shrimp for a 15–20 minute prep without compromising taste.
Exploring these variations lets you enjoy multiple versions of this Shrimp ceviche recipe mexican while learning about authentic Mexican culinary styles.
Spice Level Adjustments
Adjusting spice is easy in this Shrimp ceviche recipe mexican. Serrano peppers are hotter than jalapeños, so start small and taste as you go. Removing seeds reduces heat for milder flavor, while keeping seeds intensifies spice. Flavors develop during marination, so it’s better to start mild and add more heat if needed, ensuring your Shrimp ceviche recipe mexican suits everyone’s taste.
Make-Ahead and Storage Tips
While best fresh, this Shrimp ceviche recipe mexican can be prepped ahead:
-
Marinate shrimp separately and mix vegetables later.
-
Combine just before serving.
-
Store in an airtight container in the fridge for up to 24 hours.
-
Avoid freezing, as shrimp texture changes and vegetables get watery.
Following these steps keeps your Shrimp ceviche recipe mexican fresh and vibrant while saving prep time for busy days.
Health Notes
Shrimp ceviche is naturally low in calories and high in protein, making this Shrimp ceviche recipe mexican a healthy meal choice. Vegetables add fiber and vitamins, while lime juice provides vitamin C. Adding avocado contributes healthy fats and creaminess. Using fresh, high-quality shrimp reduces risks associated with raw seafood, keeping your Shrimp ceviche recipe mexican both safe and nutritious.
Common Mistakes to Avoid
-
Over-marinating shrimp can make it rubbery.
-
Adding avocado too early leads to browning.
-
Using bottled lime juice reduces flavor intensity.
-
Skipping salt or peppers makes the dish flat.
-
Not draining excess citrus can make the ceviche too sour.
Avoiding these mistakes ensures your Shrimp ceviche recipe mexican comes out perfectly every time.
Enhancing Flavor and Presentation
For a visually appealing Shrimp ceviche recipe mexican, serve in clear bowls or on colorful tostadas. Garnish with fresh cilantro, avocado, or a lime slice. Optional radish slices or a pinch of paprika add flair without changing the authentic taste. Small presentation touches elevate your Shrimp ceviche recipe mexican from simple to impressive for family or guests.
Conclusion
This Shrimp ceviche recipe mexican gives you a fresh, tangy, and colorful dish perfect for summer, parties, or a light meal. From choosing the right shrimp to marinating, mixing vegetables, and serving creatively, every step enhances flavor and texture. By following these simple steps, you can enjoy an authentic Mexican shrimp ceviche experience at home with vibrant flavors and easy preparation.
FAQs
How long should shrimp marinate in lime juice?
Raw shrimp need 30–60 minutes, pre-cooked shrimp 15–20 minutes.
Can I use pre-cooked shrimp?
Yes, just shorten marination time for proper texture.
Do I have to use Clamato juice?
No, it’s optional. Lime juice alone works for this Shrimp ceviche recipe mexican.
Can I make it ahead of time?
Yes, store shrimp and vegetables separately and mix before serving.
Which peppers are best for heat?
Serrano for spicy, jalapeño for mild. Adjust seeds for flavor.
How should I serve it?
Tostadas, bowls, or tortilla chips work best for this Shrimp ceviche recipe mexican.
-

 Food1 month ago
Cuts of Steak: Complete Guide to Beef Cuts
-

 Food1 month ago
What Is Andouille Sausage? Complete Guide
-

 Food1 day ago
Shirleys Coffee Shop Guam Locations Menu and Guide
-

 Food1 month ago
Ultimate Tripas Recipe and Cooking Guide
-

 Drinks1 week ago
Easy Lychee Martini Recipe Sweet & Floral Cocktail
-

 Food1 week ago
Italian Ice Flavoring Guide: Flavors, Bases, and Recipes
-

 Food1 week ago
Black Pudding Guide: History, Recipe & Nutrition
-

 Blog4 weeks ago
Saltwater Kitchen & Sushi: Menu, Reviews, and Visitor Guide