
Food
Authentic Taiwanese Red Braised Pork Belly Recipe
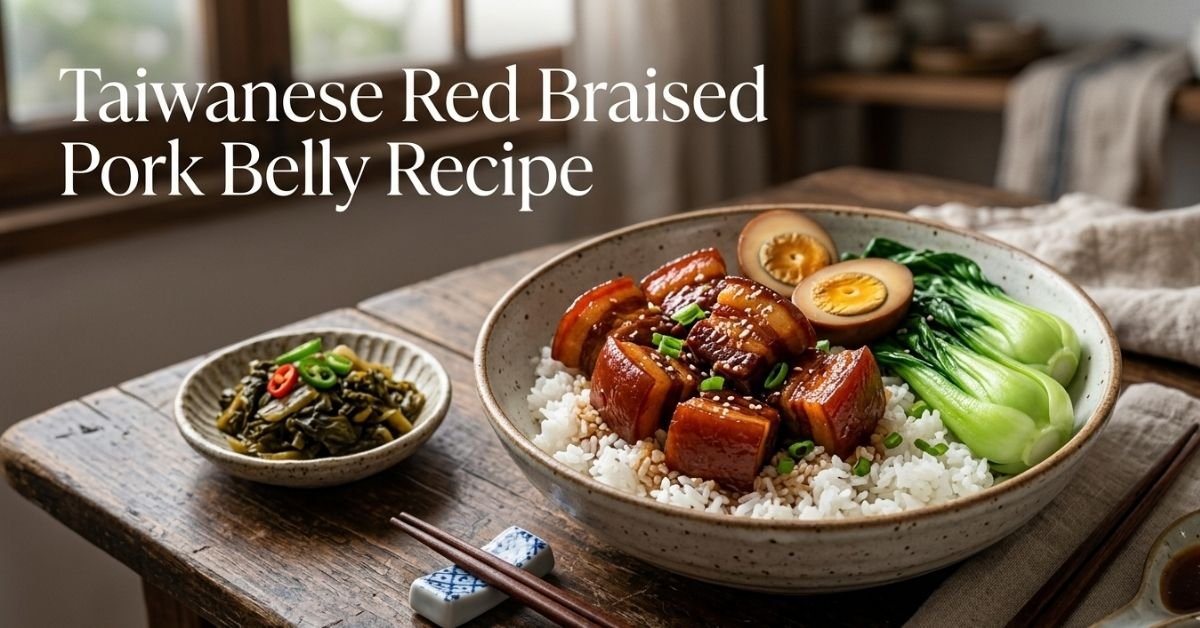
Taiwanese red braised pork belly is one of the most comforting dishes in Taiwanese home cooking. It is commonly known as Lu Rou Fan and is served as small cubes of pork belly simmered slowly in a fragrant soy based sauce. The sauce contains ingredients such as dark soy sauce, rock sugar, garlic, ginger, and warm spices like star anise. When the pork cooks slowly, the fat and collagen break down and create a rich sauce that coats every piece of meat. The finished dish is typically spooned generously over a bowl of steamed rice, turning a simple meal into something deeply satisfying.
In Taiwan this dish appears everywhere from family kitchens to busy night markets. Vendors often keep large pots simmering for hours, allowing the sauce to deepen in flavor as more pork is added throughout the day. The result is a glossy reddish brown stew that smells warm and slightly sweet. The flavor is balanced between salty soy sauce, caramel sweetness, and aromatic spices. The soft pork belly almost melts when eaten with rice, which explains why the dish is considered a classic comfort food.
Another important part of the experience is the combination of textures. The sauce becomes slightly thick and silky because of the collagen released from pork belly during braising. When spooned over rice, it seeps into the grains and creates layers of flavor in every bite. Some versions include braised eggs or mushrooms, which absorb the sauce and add even more depth to the bowl.
Read also: Best Smoked Shotgun Shell Recipe for BBQ Lovers
Essential Ingredients for Authentic Flavor
A traditional Taiwanese red braised pork belly recipe relies on a short but powerful ingredient list. Each component contributes to the balance between savory, sweet, and aromatic flavors. Using authentic ingredients helps recreate the taste found in Taiwanese street food stalls and home kitchens.
Key ingredients typically include:
• Pork belly with skin
• Light soy sauce
• Dark soy sauce for color
• Rock sugar or brown sugar
• Garlic cloves
• Fresh ginger slices
• Star anise pods
• Chinese five spice powder
• Shaoxing rice wine
• Fried shallots
• Water or broth
• Hard boiled eggs optional
• Dried shiitake mushrooms optional
Pork belly is the star ingredient because its layers of fat and meat create the rich texture that defines the dish. When slowly braised, the fat becomes silky rather than greasy. Dark soy sauce is especially important because it gives the dish its signature deep reddish brown color while adding mild sweetness.
Rock sugar is traditionally used instead of regular sugar. It melts slowly and produces a smooth caramel flavor without making the sauce overly sweet. Fried shallots are another distinctive ingredient often used in Taiwanese cooking because they provide a subtle roasted aroma that enhances the entire braise.
Preparing the Pork Belly Before Cooking
Proper preparation is essential for achieving tender pork belly and a clean tasting braising sauce. Many traditional cooks begin by blanching the pork briefly before the braising process begins. This step removes impurities from the meat and results in a clearer sauce.
To prepare the pork belly properly:
• Cut pork belly into small cubes about 2 cm wide
• Place the pieces in boiling water for 2 to 3 minutes
• Remove and rinse with warm water
• Pat dry before cooking
Blanching is optional but recommended if the pork contains visible impurities or bone fragments. The short boil removes excess blood and helps create a smoother final sauce. After blanching, the pork is ready for browning, which develops flavor through caramelization.
Some cooks skip this step and instead sear the pork directly in a wok. Both methods work well. Blanching simply produces a cleaner broth while direct searing creates a deeper roasted flavor.
Traditional Braising Method on the Stovetop
The stovetop method remains the most authentic way to prepare Taiwanese red braised pork belly. It allows the cook to control heat gradually while the sauce develops complex flavor. The key idea is to simmer gently for a long time so the pork becomes tender.
Basic cooking steps include:
• Heat a wok or pot with a little oil
• Add rock sugar and cook until lightly caramelized
• Add pork belly cubes and stir until slightly browned
• Add garlic, ginger, and star anise
• Pour in soy sauces and rice wine
• Add water until pork is partially covered
• Simmer on low heat for about 60 to 90 minutes
• Stir occasionally and adjust seasoning
As the pork cooks, the sauce slowly thickens and coats the meat. The slow cooking process allows collagen to dissolve into gelatin, which creates the silky mouthfeel associated with authentic braised pork rice. Patience during this stage is essential because rushing the process prevents the pork from reaching its signature tender texture.
How to Achieve Melt In Mouth Texture
The famous tenderness of Taiwanese braised pork comes from proper braising technique. Pork belly contains connective tissue that must break down slowly in order to become soft and succulent. Temperature control is therefore extremely important.
Several tips help achieve the ideal texture:
• Use low gentle simmering heat
• Allow at least 60 to 90 minutes cooking time
• Keep the pot partially covered
• Stir occasionally to prevent sticking
• Avoid boiling rapidly
When the braise is done correctly, the pork becomes soft enough to cut with chopsticks. The fat layers should appear translucent rather than greasy. This transformation happens when collagen slowly converts into gelatin, which thickens the sauce naturally.
Cooking longer often improves the dish even further. Many home cooks allow the braise to simmer for up to two hours so the sauce becomes richer and more concentrated.
Adding Hard Boiled Eggs and Mushrooms
Many Taiwanese households include additional ingredients that absorb the flavorful braising liquid. Two common additions are hard boiled eggs and dried shiitake mushrooms. Both ingredients soak up the soy based sauce and create delicious variations within the same dish.
Popular add ins include:
• Hard boiled eggs peeled before adding
• Dried shiitake mushrooms soaked in water
• Fried tofu cubes
• Bamboo shoots
The eggs gradually turn brown as they absorb the sauce, creating a beautiful marbled appearance. Mushrooms contribute an earthy flavor that deepens the umami profile of the braise. These additions also help stretch the dish to feed more people without increasing the amount of pork required.
Many night market vendors include these ingredients because they add variety to each bowl of braised pork rice.
Instant Pot and Pressure Cooker Method
Modern kitchens often rely on pressure cookers to reduce cooking time. Fortunately Taiwanese red braised pork belly adapts well to this method while still producing tender meat. The pressure cooker speeds up the collagen breakdown process.
To cook using a pressure cooker:
• Saute pork belly with sugar and aromatics
• Add soy sauce, wine, and water
• Seal the lid and cook on high pressure for 30 minutes
• Allow natural pressure release for 10 minutes
• Simmer briefly to thicken the sauce
Although the cooking time is shorter, the flavor remains rich because pressure cooking traps steam and intensifies aromas. This method is especially helpful for busy cooks who want authentic flavor without waiting two hours for the braise to finish.
After pressure cooking, the sauce can be reduced for a few minutes to achieve the glossy consistency typical of traditional Lu Rou Fan.
Serving the Dish with Rice and Side Dishes
The traditional way to serve Taiwanese red braised pork belly is over freshly steamed rice. The sauce is spooned generously over the rice so every grain absorbs the savory liquid. The result is a deeply comforting rice bowl that feels both simple and luxurious.
Common serving elements include:
• Steamed white rice
• Pickled mustard greens
• Blanched bok choy
• Braised eggs
• Chili oil for extra spice
These additions balance the richness of the pork. Fresh vegetables add brightness while pickled greens introduce acidity that cuts through the fatty texture. Many Taiwanese families prepare this meal as a quick dinner because the braised pork can be cooked earlier and reheated easily.
A small bowl of soup is also often served alongside the rice bowl, creating a complete and satisfying meal.
Nutrition and Cost Considerations
Despite its indulgent taste, braised pork rice can fit into a balanced meal when served in moderate portions. Pork belly provides protein and energy while rice supplies carbohydrates for sustained energy. The dish is quite rich because of its fat content, so smaller servings are usually sufficient.
Approximate nutrition per serving may include:
• Calories around 450 to 500
• Protein about 18 grams
• Fat roughly 30 grams
• Carbohydrates about 30 grams
The cost of preparing this dish at home is generally affordable. Pork belly is usually less expensive than premium cuts of meat, and the remaining ingredients such as soy sauce, garlic, and spices are pantry staples used in many Asian recipes.
Cooking at home therefore allows families to enjoy a restaurant style comfort dish while controlling both ingredients and portion sizes.
Storage, Freezing, and Reheating Tips
One advantage of braised dishes is that they store very well. In fact, many cooks believe Taiwanese red braised pork belly tastes even better the next day because the sauce has more time to absorb into the meat.
Proper storage tips include:
• Refrigerate leftovers within two hours
• Store in an airtight container
• Keep in refrigerator up to four days
• Freeze for up to two months
To reheat, place the pork and sauce in a small saucepan and warm gently over medium low heat. Adding a few tablespoons of water prevents the sauce from becoming too thick. Frozen portions should thaw overnight in the refrigerator before reheating.
These storage techniques make the dish excellent for meal preparation because a single batch can provide several meals throughout the week.
Common Mistakes to Avoid When Cooking
Although the recipe appears simple, a few common mistakes can affect the final result. Avoiding these errors ensures the pork becomes tender and the sauce develops balanced flavor.
Frequent mistakes include:
• Cooking at high heat which toughens the pork
• Using lean pork instead of pork belly
• Adding too much soy sauce early
• Skipping caramelization of sugar
• Over reducing the sauce
Another common issue is using regular sugar incorrectly. Rock sugar melts gradually and produces a more delicate sweetness, while granulated sugar can sometimes create a harsher caramel flavor if overheated.
Taking time with the braising process and tasting the sauce during cooking helps prevent these problems.
Flavor Variations and Dietary Adaptations
Although traditional Taiwanese braised pork follows a specific flavor profile, many cooks adjust the recipe according to personal preferences or dietary needs. These variations allow the dish to remain accessible while still respecting its classic roots.
Possible variations include:
• Spicy version with dried chili peppers
• Low sodium version using reduced sodium soy sauce
• Gluten free version using tamari instead of soy sauce
• Mushroom based vegetarian adaptation
• Extra aromatic version with cinnamon stick
Vegetarian adaptations replace pork with mushrooms or tofu while keeping the same braising sauce. Although the texture differs, the rich soy based flavor remains similar and still pairs beautifully with rice.
These adjustments demonstrate how a traditional recipe can evolve while preserving its comforting character.
Conclusion
Taiwanese red braised pork belly is a beloved comfort dish known for its tender texture and deeply savory sauce. Slow braising transforms simple ingredients into a rich meal that pairs perfectly with steamed rice. By using authentic aromatics, controlling cooking temperature, and allowing enough time for collagen to break down, anyone can recreate this classic dish at home. Whether prepared using the traditional stovetop method or a modern pressure cooker, the Taiwanese Red Braised Pork Belly Recipe delivers satisfying flavor that reflects the heart of Taiwanese home cooking.
FAQs
What is Taiwanese braised pork rice called?
It is called Lu Rou Fan, a popular Taiwanese rice bowl topped with braised pork belly.
Do you need to blanch pork belly before braising?
Blanching is optional but helps create a cleaner tasting sauce.
How long should pork belly braise?
Typically 60 to 90 minutes on the stovetop for tender texture.
Can Lu Rou Fan be made ahead of time?
Yes, the flavor often improves after resting overnight.
What sugar is best for this dish?
Rock sugar is traditional because it melts slowly and creates smooth sweetness.
Can the dish be frozen?
Yes, braised pork belly freezes well for up to two months.
A binder in cooking is a substance applied to the surface of meat before seasoning to help the dry rub or spices stick better. Think of it as a light glue layer between the meat and the seasoning. Without it, rubs can slide off or fall away during handling and cooking.
The concept confuses a lot of people because the word “binder” means two different things depending on context. In BBQ and grilling, it refers to something like mustard or oil that holds seasoning to the surface. In baking and recipe cooking, binders like eggs or flour hold ingredients together inside a dish. This guide focuses on both, but covers the BBQ version in detail since that is where most confusion happens.
By the end, you will know what binders are, when to use them, which type works best for different meats, and when you can skip them entirely.
What Is a Binder in Cooking?
Simple Definition
A binder in cooking is any ingredient that helps other components stick together or adhere to a surface. In grilling and BBQ, it is applied as a thin coat on raw meat so that dry rub seasoning clings to the surface instead of falling off. In everyday cooking and baking, binders are used inside recipes to hold ingredients like meatballs, burgers, or batters together during cooking.
A good binder is usually neutral in flavor, easy to spread, and does not overpower the seasoning or the natural taste of the meat.
Two Types of Binders Worth Knowing
The first type is the surface binder, which is what most BBQ cooks mean. You spread it on raw meat, apply your rub on top, and let it work as an adhesive. Mustard, oil, and mayo all fall into this category.
The second type is the structural binder, used in recipes to hold a dish together. Eggs bind meatloaf. Flour or breadcrumbs hold crab cakes. Cornstarch thickens sauces. These binders work inside the food, not on the surface. Both types serve the same basic idea: keeping things where they are supposed to be.
Read also: The Complete Guide to Seafood Boil Kit
What Does a Binder Actually Do?
Helps Seasoning Stick to the Surface
When you sprinkle a dry rub on raw meat without a binder, only a little of it sticks to the surface. The rest shakes off when you move the meat to the grill, pick it up, or adjust it with tongs. A thin layer of binder creates a slightly tacky surface that grips the seasoning and keeps it in place through handling and the early stages of cooking.
This matters more on smooth surfaces like chicken thighs or pork tenderloin than on something naturally rough and moist like a freshly trimmed brisket.
Moisture and Surface Adhesion Explained
Raw meat already has some moisture on the surface. That natural moisture does help rub stick, which is why binders are not always necessary. However, the moisture dries out quickly, especially on lean cuts or pre-dried meats. A binder like oil or mustard stays tacky longer and gives the rub something consistent to cling to.
Here is a simple way to understand it: if you try to stick something to a dry wall, it falls off. Add a thin coat of paste, and it holds. The binder works the same way, just on meat.
Does It Affect Flavor?
This is the most common myth around binders, especially mustard. Many people avoid using mustard because they worry it will make their brisket taste like a hot dog. In reality, mustard loses almost all of its distinctive flavor during long cooking processes. What stays behind is a tiny bit of acidity and a faint savory note, both of which actually help seasoning taste better.
Oil adds no flavor unless you use something strong like sesame oil. Mayo, which is mostly oil and egg, also disappears into the crust with little impact on final taste.
The short answer: binders rarely add noticeable flavor, especially after an hour or more of cooking.
Do You Really Need a Binder?
When a Binder Is Useful
Binders are most helpful when you are working with smooth or lean cuts of meat that do not have much natural surface moisture. They also make a difference when you are using a heavy rub and want every bit of seasoning to stay put. If you are cooking for guests or entering a BBQ competition, a binder gives you more control and consistency.
They also help when the meat has been dry-brined or air-dried in the fridge overnight, since the surface will be very dry and rubs will not stick well on their own.
When You Can Skip It
Honestly, you can skip a binder more often than you think. Fresh, well-trimmed meat with a moist surface will hold a moderate rub without any help. If you season your meat and let it rest for 20 to 30 minutes, the salt pulls a little moisture out of the meat and creates a natural adhesive layer. Many experienced pitmasters skip binders entirely and get great results.
If you are using a light seasoning or just salt and pepper, a binder is rarely needed.
What Happens Without One
The rub may not stick as evenly. Some seasoning will fall off during handling. The crust that forms during cooking might be slightly thinner. For most backyard cooks, this difference is minor. For slow-smoked meats where a thick bark is the goal, it might matter more.
Common Types of Binders
Mustard
Yellow mustard is the most popular BBQ binder by far. It spreads easily, stays tacky at room temperature, and forms a good base for rubs. Its flavor disappears almost completely during cooking, which surprises most first-time users. Dijon mustard works the same way but costs more. Regular yellow mustard is the practical choice for most cuts.
Oil, Including Olive and Vegetable Oil
Oil is a cleaner-tasting option that works well on chicken and fish. It creates a slightly slippery surface, so you need to apply your rub firmly after coating. Olive oil adds a faint fruity note, which can be nice on lighter proteins. For bold BBQ rubs on red meat, neutral vegetable oil is a better choice.
Mayonnaise
Mayo is underrated as a binder. It sticks well, contains fat and egg, and creates a beautiful brown crust during cooking. It works especially well on chicken and fish. The fat content helps seasoning adhere better than plain oil in many cases. A thin coat is all you need.
Hot Sauce and Other Liquids
Hot sauce, Worcestershire sauce, or even pickle juice can work as binders. They add a subtle layer of flavor and are great for cooks who want a little extra kick on the surface. These are thinner than mustard or mayo, so they work better as a secondary layer under oil rather than as a standalone binder.
Best Binder for Different Foods
Brisket and Large Cuts
Mustard is the classic choice for brisket. The meat is large, takes a long time to cook, and benefits from a thick bark. Yellow mustard gives the rub something firm to grip and helps develop a deep crust over 10 to 16 hours of smoking.
Chicken
Oil or mayo works best on chicken. Mayo in particular gives chicken an incredibly moist, golden crust. Apply it to the outside and under the skin if possible, then coat with your seasoning blend.
Steak
For most steaks, no binder is needed. A generous coat of oil before seasoning works well if you want something. A thin layer of olive oil plus salt and pepper is a classic steak prep for a reason.
Burgers and Ground Meat
Ground meat uses structural binders like egg, breadcrumbs, or oats to hold the patty together during cooking. These are internal binders. Without them, loose-mixed burgers can fall apart on the grill.
How to Use a Binder, Step by Step
How Much to Apply
Less is more. You are aiming for a thin, even coat, not a thick paste. For a full brisket, a few tablespoons of mustard is enough. For a rack of ribs, one to two tablespoons works. If you can clearly see the binder sitting thick on the meat, you have used too much.
When to Apply Before Cooking
Apply the binder right before you add your rub. There is no benefit to applying it hours in advance. Coat the meat, season it immediately, and then let the whole thing rest for 30 to 60 minutes before cooking. This rest period lets the salt in the rub start working and helps the surface set.
Adding Dry Rub Correctly
After the binder is applied, press the rub into the surface rather than just sprinkling it. Use your palm to gently press the seasoning in. This helps it stick better and creates a more even crust during cooking.
Binder vs Marinade vs Dry Rub
Key Differences
A marinade is a liquid mixture that soaks into the meat, adding flavor from the inside. A dry rub is a blend of spices applied to the outside of the meat. A binder is the adhesive layer that helps the dry rub stick to the surface. These are three different tools with three different purposes.
When to Use Each One
Use a marinade when you want deep flavor penetration, especially for thin cuts or poultry. Use a dry rub when you want a seasoned crust or bark. Use a binder when you are applying a rub to a smooth or dry surface and want it to stay put.
You can combine all three. Marinate overnight, dry the surface, apply a binder, add your rub, and smoke or grill.
Common Mistakes to Avoid
Using Too Much Binder
A thick coat of mustard or mayo does not mean better results. It can create a gummy texture under the rub and prevent proper bark formation. Always use a thin, even layer.
Choosing the Wrong Type
Using a strong-flavored binder like Dijon or a seasoned mayo on a delicately flavored protein can overpower it. Match the binder to the protein. Keep it neutral for bold rubs, and use flavored binders only when you want a specific result.
Expecting Flavor Impact
If you are using a binder hoping it will add a mustard or tangy flavor to your final dish, you will mostly be disappointed. Binders serve a mechanical purpose. Any flavor contribution is subtle at best after cooking.
Binder Comparison Table
Mustard works great as a binder for brisket, ribs, and pork. It is thick, easy to spread, very affordable, and the flavor fully disappears after cooking. Excellent choice for BBQ.
Oil works well for chicken, fish, and steaks. It is thin, requires firm rub application, and adds little to no flavor. Best for lighter proteins.
Mayonnaise works excellent for chicken and fish. It is creamy, creates a great crust, is moderately priced, and adds a subtle richness. Especially good on poultry.
No binder works fine for moist cuts with natural surface moisture. It requires no prep, costs nothing, and has no flavor impact. Fine for quick cooks or well-marbled meat.
Alternative Ways to Make Seasoning Stick
Natural Meat Moisture
Fresh meat has enough surface moisture to hold a light seasoning. If your cut feels wet to the touch, pat it dry with a paper towel, then season. The natural proteins on the surface will grip the spice particles. This works reliably for simple salt-and-pepper applications.
Resting Time After Seasoning
Season your meat and let it rest uncovered for 20 to 40 minutes before cooking. Salt draws moisture out of the meat, which then dissolves and creates a natural brine on the surface. When you cook after this rest period, the rub adheres more firmly. This is one of the simplest ways to avoid needing a binder at all.
Conclusion
A binder in cooking is simply a substance that helps things stick together, either on the surface of meat to hold seasoning in place, or inside a recipe to hold ingredients together. For BBQ and grilling, a thin coat of mustard, oil, or mayo is all you need. It takes 30 seconds to apply and can make a real difference in how your crust forms and how evenly your rub stays on the meat.
That said, binders are not mandatory. Learn when they help, when you can skip them, and pick the right type for the food you are cooking. That alone puts you ahead of most backyard cooks.
FAQs
Does a binder add flavor to meat?
Not in any significant way. Most binders like mustard, oil, and mayo lose their distinct flavor during cooking, especially at high temperatures or over long smoking sessions. A binder serves a mechanical purpose, helping seasoning stick, rather than a flavor purpose. Any taste contribution is minor.
Is mustard the best binder for BBQ?
Mustard is the most popular BBQ binder because it is affordable, easy to spread, and flavorless after cooking. But it is not always the best. Mayo works better on chicken, and oil is a cleaner option for fish or steak. The best binder depends on the cut and cooking method.
Can I cook without using a binder?
Yes, absolutely. Many great BBQ cooks never use a binder. If your meat has natural moisture, or if you use a light seasoning, you do not need one. A binder is a helpful tool, not a requirement.
What is the best binder for beginners?
Yellow mustard is the easiest starting point. It is cheap, widely available, easy to spread, and fool-proof. You will not taste it in the final dish, and it makes applying your first rub much simpler.
Can I use binders in regular cooking, not just BBQ?
Yes. Eggs, breadcrumbs, flour, and cornstarch are common binders used in everyday cooking to hold dishes together. They keep meatballs firm, thicken sauces, and help coatings stick to fried foods. The term binder covers both surface adhesion in BBQ and structural binding in recipe cooking.
A seafood boil kit is a packaged set of ingredients that lets you cook a full seafood boil at home without sourcing everything separately. Most kits include some combination of shellfish, seasoning, and sometimes sides like corn or potatoes. The idea is simple: less prep work, more eating.
The confusion starts when people realize not all kits are the same. Some are fresh, some frozen. Some feed two people, others feed ten. And if you cook it wrong, even a great kit turns into rubbery, over-salted seafood that nobody wants.
This guide covers everything from what is actually inside these kits, to how to pick the right one for your group size, cook it properly, avoid the most common mistakes, and customize it to your taste. By the end, you will know exactly what to buy and how to make it work.
What Is a Seafood Boil Kit?
A seafood boil kit is a ready-to-cook or partially prepped package that contains the main components of a traditional seafood boil. Instead of buying crab legs, shrimp, clams, and seasoning separately, you get most of it bundled together, often with cooking instructions included.
Featured Snippet Answer:
A seafood boil kit is a packaged cooking kit that includes seafood (such as shrimp, crab, or crawfish), seasoning blend, and sometimes sides like corn or potatoes. It simplifies the process of making a full seafood boil at home by combining key ingredients in one ready-to-cook package, usually with step-by-step instructions.
What Is Typically Included
Most kits come with a protein (shrimp, snow crab legs, crawfish, or a mix), a seasoning blend (often Cajun or Old Bay based), and sometimes extras like corn on the cob, baby potatoes, or sausage. Higher-end kits might include a dipping sauce or clarified butter.
Budget kits usually include only the seafood and seasoning. You add everything else yourself. That is fine if you know what you are doing, but beginners sometimes expect a complete meal and feel surprised when they still need to shop for sides.
Who Should Use a Kit
Kits are a good fit for people who want the seafood boil experience without the trial and error of building a recipe from scratch. They work well for parties, family dinners, or someone cooking a boil for the first time.
If you already know your preferred seasoning ratios and have a go-to recipe, you may find kits limiting. But for most home cooks, the convenience is worth it, especially for larger gatherings where scaling portions manually gets complicated.
Read also: Pimento Olives: Everything You Need to Know
Types of Seafood Boil Kits
Cajun Style Kits
Cajun seafood boil kits lean heavily on bold spices, including cayenne, paprika, garlic, and onion powder. These are the most popular kits sold online and in grocery stores. The heat level varies a lot between brands. Some are mild enough for kids, others genuinely spicy.
A common issue with Cajun kits is seasoning balance. Some are heavy on salt, which can overwhelm the natural sweetness of shrimp or crab. If you are buying one for the first time, look for kits where the seasoning is separate so you can control how much goes in.
Low Country Boil Kits
Low Country boils come from the coastal southeast, particularly Georgia and South Carolina. They traditionally include shrimp, smoked sausage, corn, and potatoes, cooked together in a seasoned broth. Kits in this style tend to be more balanced in spice, with a savory, herby flavor rather than pure heat.
These kits are usually better for mixed groups where not everyone likes intense spice. They also tend to be more filling because of the included sides.
Crawfish Boil Kits
Crawfish boil kits are popular in Louisiana-style cooking and typically come with live or pre-cooked crawfish, a bold seasoning mix, and sometimes mushrooms or artichokes alongside the usual corn and potatoes.
These kits are more seasonal and regional. If you are outside the Gulf Coast, finding fresh crawfish kits locally can be difficult. Online ordering is usually the better route here.
Fresh vs Frozen Kits
Fresh kits are better in flavor but have a much shorter shelf life, typically two to three days in the refrigerator. Frozen kits last longer and are more convenient, but texture can suffer if the seafood is not thawed properly.
For large gatherings where you are ordering ahead, frozen kits make logistical sense. For a dinner you are cooking tonight, fresh is worth the extra step. Just make sure fresh kits come packed in ice or are clearly refrigerated at the point of sale.
Best Seafood Boil Kits to Buy
Best Overall Kit
The Cajun Original Seafood Boil Kit consistently gets strong reviews for seasoning quality and portion size. It includes a well-balanced spice blend and works well on the stovetop without any additional seasoning required. It is widely available online and ships frozen.
Best Budget Option
For budget buyers, store-brand frozen shrimp boil kits from retailers like Walmart or Target offer a reliable base. They lack the premium seafood cuts of higher-end brands but work well when you plan to add your own corn, potatoes, and sausage.
Best Premium Kit
Gulf Coast premium seafood boil kits that include snow crab clusters, large shrimp, and house-made seasoning blends are the top choice for special occasions. Expect to spend significantly more, but the quality difference in the shellfish is noticeable. These are worth it when you want to impress guests.
Best for Large Groups
For parties of eight or more, bulk crawfish boil kits or catering-style packs from online seafood retailers are the practical choice. They are designed to scale and often include additional seasoning packets so you can adjust flavor as you add more water or seafood.
How to Choose the Right Seafood Boil Kit
Serving Size Guide
Featured Snippet Answer:
As a general rule, plan for one to one and a half pounds of shellfish per person for a seafood boil. If the kit includes sides like corn and potatoes, the lower end of that range works. For shellfish-only kits without heavy sides, go with one and a half pounds per adult to ensure everyone has enough.
Most kits list serving sizes on the packaging, but those numbers are often optimistic. A kit labeled as serving four will comfortably feed three adults who are actually hungry, especially if the kit is mostly shrimp without many sides.
Ingredients and Quality
Check what types of seafood are included and where they are sourced. Wild-caught shrimp and crab have better texture and flavor than farmed alternatives. Some budget kits use pre-cooked frozen seafood that can turn mushy if overcooked even slightly. Look for raw seafood kits when possible for better control over the final result.
Spice Level and Flavor Options
Most brands offer mild, medium, and hot versions. If you are cooking for a group, go medium and have hot sauce available on the side rather than defaulting to hot and leaving spice-sensitive guests with nothing to eat.
Some kits also have flavor variations like lemon pepper, garlic butter, or herb-based blends. These are great alternatives to Cajun if you want something different or are cooking for someone who does not enjoy heavy spice.
Price vs Value
A good mid-range kit runs between 30 and 60 dollars depending on what is included and how many it serves. Premium kits with crab clusters and large shrimp can run over 100 dollars. Budget options under 20 dollars are usually seasoning-forward with lower-quality protein.
Do not judge purely by price. A 45-dollar kit that feeds four with quality ingredients is better value than a 25-dollar kit that feeds two with pre-cooked rubbery shrimp.
How to Cook a Seafood Boil Kit
Equipment You Need
You need a large stockpot, ideally 12 quarts or bigger. If you do not have one, a wide Dutch oven or a deep roasting pan can work in a pinch. You will also need a large colander, tongs, and either newspaper or a baking sheet to serve on.
An outdoor propane burner gives you more control over heat for large batches, but a standard stovetop burner works fine for kits feeding four or fewer people.
Cooking Instructions Using the Stovetop Method
Fill your pot halfway with water and bring it to a full boil. Add your seasoning packet and stir until dissolved. Add the items that take the longest to cook first: potatoes, then corn, then sausage. Let these cook for eight to ten minutes before adding shellfish.
Add shrimp last since they cook in two to three minutes. Crab legs take five to seven minutes. Crawfish need about eight to ten minutes depending on size. Once everything is cooked, drain the pot and dump everything out onto a large surface for serving.
Alternative Cooking Methods
Oven bag method: Place everything in a large turkey-size oven bag, add seasoning and a cup of water, seal it, and bake at 400 degrees for 45 to 55 minutes. This method works well for smaller batches and creates a natural steam that keeps seafood moist.
Outdoor burner: If you are feeding a large group, an outdoor propane burner with a 30-quart pot is the traditional and most efficient approach. You can boil larger volumes faster and serve directly from the pot.
Cooking Time by Seafood Type
Shrimp: 2 to 3 minutes. Crab legs: 5 to 7 minutes. Crawfish: 8 to 10 minutes. Clams and mussels: 5 to 6 minutes or until shells open. Lobster tails: 8 to 10 minutes depending on size.
When in doubt, err on the side of slightly less time. Seafood continues cooking slightly after it leaves the hot water.
Common Mistakes to Avoid
Overcooking the Seafood
This is the most common error. Shrimp that turns grey, curls tightly, and becomes firm is overcooked. It happens fast. Many home cooks add all the seafood at once and walk away. Stagger your additions based on cook time and pull everything out promptly.
Getting the Order of Ingredients Wrong
Adding shrimp at the same time as potatoes means the shrimp will be overcooked and rubbery by the time the potatoes are done. Always add ingredients in order of how long they take to cook. Hardest and densest items go in first.
Misjudging the Seasoning
Some people use the entire seasoning packet without tasting first. Others add too little because they are nervous about spice. Add the packet gradually, taste the broth after a few minutes, and adjust. You can always add more seasoning but you cannot take it out once it is in.
How to Customize Your Seafood Boil
Add-On Ideas
Smoked andouille sausage is the classic addition that most kits leave out. Cut it into thick coins and add it with the corn. Hard-boiled eggs added in the last few minutes absorb the seasoning beautifully and are a staple in authentic boils. Extra mushrooms, artichokes, and even broccoli work surprisingly well.
Adjusting the Spice Level
If a kit is too spicy for your group, add more water and a squeeze of lemon juice to dilute the heat. If you want more spice, add cayenne pepper directly to the broth or toss the cooked seafood in a hot sauce blend before serving.
Sauce Options
Garlic butter sauce is the most popular dipping option. Melt butter, add minced garlic, a squeeze of lemon, and a pinch of Old Bay. For a Cajun dipping sauce, mix mayonnaise, hot sauce, garlic, and smoked paprika. Both take under five minutes and elevate any kit significantly.
Where to Buy Seafood Boil Kits
Online Stores
Amazon, Gold belly, and direct brand websites offer the widest selection. Shipping is usually overnight or two-day for fresh kits. Frozen kits ship standard. Online buying is best when you want a specific brand or regional style not available locally.
Local Grocery Options
Walmart, Kroger, and most regional grocery chains carry frozen seafood boil kits. Selection is more limited than online but you avoid shipping costs and can inspect freshness in person. Seafood counters at some stores will even assemble custom kits on request.
Bulk and Party Kits
For events, wholesale clubs like Costco or Sam’s Club offer large-format frozen seafood that you can combine with a separately purchased seasoning blend. This approach is more economical for groups of ten or more than buying individual retail kits.
Storage, Shelf Life, and Safety
How to Store Fresh vs Frozen Kits
Fresh kits should be refrigerated immediately and used within two days of purchase. Store them in the coldest part of your refrigerator, not in the door. Frozen kits are best used within three months for quality, though they remain safe longer if kept at consistent freezer temperature.
Never refreeze a kit that has been thawed unless it has been cooked first.
Reheating Leftovers
Reheat cooked seafood gently in a covered pan with a small amount of butter and water over low heat. Avoid microwaving shellfish directly since it makes the texture rubbery. Shrimp and crab reheat in two to three minutes on the stovetop. Leftovers are best used within 24 hours.
Is a Seafood Boil Kit Worth It?
For most people, yes. A good kit saves time, reduces the guesswork of seasoning, and makes the experience accessible without requiring you to track down seven separate ingredients. The best kits offer real quality at a fair price and work well for everything from weeknight dinners to backyard parties.
The key is knowing what to look for. Buy raw seafood when possible, check the serving size honestly, and have a plan for customizing with add-ons. A kit is a starting point, not a limitation.
Conclusion
Seafood boil kits make one of the most enjoyable, communal meals much easier to pull off at home. The right kit, cooked properly and customized to your group, delivers results that genuinely rival restaurant versions. Focus on raw seafood quality, get your timing right, and do not skip the garlic butter.
FAQs
How much seafood boil kit do I need per person?
Plan for one to one and a half pounds of shellfish per person. If the kit includes corn, potatoes, or sausage, one pound per person is usually enough. For shellfish-only kits, go with the higher end of that range.
Can I cook a seafood boil kit without a large pot?
Yes. You can use an oven bag method with a standard roasting pan, or cook in batches using a Dutch oven. The result is slightly different from a traditional boil but still works well for smaller servings.
What is the difference between Cajun and Low Country boil kits?
Cajun kits are heavier on spice, particularly cayenne, and often do not include sides. Low Country kits are milder, more herb-forward, and typically include shrimp, sausage, corn, and potatoes as part of the package.
How long does a seafood boil kit last in the freezer?
Most frozen kits maintain quality for up to three months. After that, the seafood is still safe if stored at a consistent temperature, but the texture may degrade. Always check the use-by date on the packaging.
Can I add my own seafood to a kit?
Absolutely. Most seasoning-included kits work as a base. You can add extra shrimp, crab legs, or clams to scale up the quantity. Just adjust cooking time based on what you add and make sure not to overcrowd the pot.
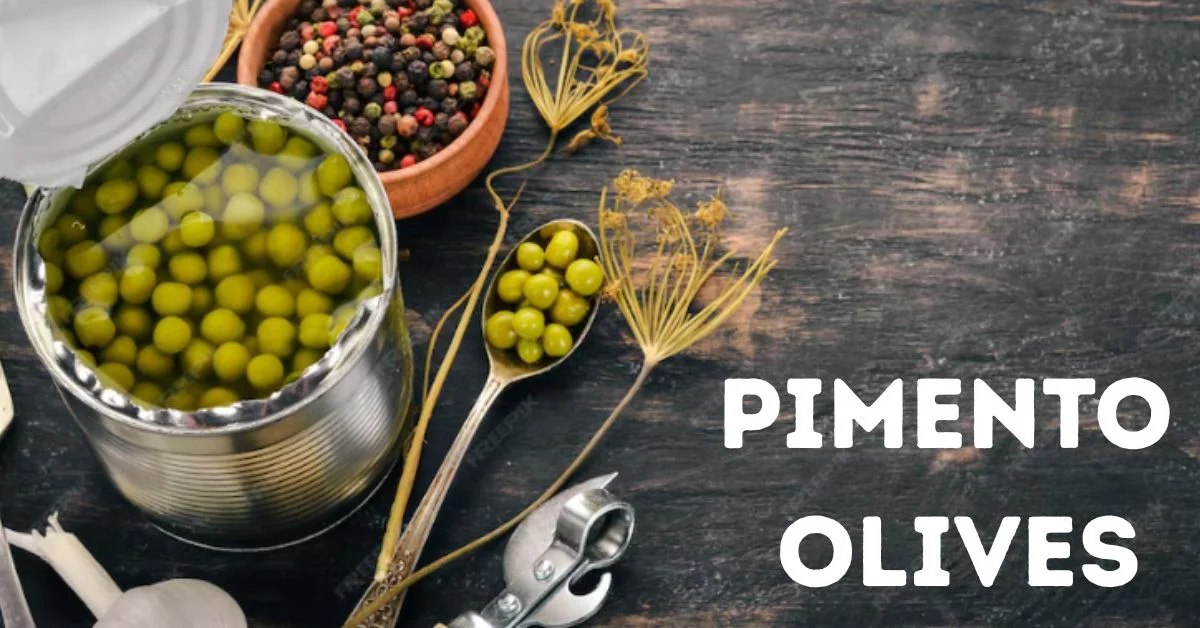
Pimento olives are green olives stuffed with a small strip of sweet red pimento pepper. You find them in grocery stores, cocktail glasses, and charcuterie boards everywhere, yet most people have no idea what the red filling actually is or why it is there in the first place.
A lot of confusion comes from the word “pimento” itself. People mix it up with paprika, roasted red peppers, and even pimiento cheese. This article clears all of that up. You will learn what pimento olives are, how they are made, what they taste like, how to buy the good ones, and how to use them beyond just dropping them into a martini. Whether you are a first-time buyer or a longtime fan, this guide covers everything worth knowing.
What Are Pimento Olives?
The Basic Definition and What Goes Into Them
Pimento olives are whole green olives, usually pitted, with a small piece of pimento pepper pressed or piped into the hollow center. The olive is almost always brined, which means it has been cured in a saltwater solution to remove bitterness and develop that sharp, tangy flavor people associate with olives.
The combination of the briny, slightly bitter olive and the mild, sweet pepper creates a balance that works incredibly well together. That contrast is the whole reason this pairing became so popular in the first place.
Most pimento olives you find in stores use Manzanilla olives, a Spanish variety that is small, firm, and mild. However, larger gourmet versions often use Spanish Queen Olives, which have a meatier texture and bolder flavor.
What Exactly Is a Pimento Pepper?
This is where most people get confused. A pimento pepper (sometimes spelled pimiento) is a specific variety of sweet red pepper. It is heart-shaped, about 3 to 4 inches long, and much milder and sweeter than a standard bell pepper. The heat level is essentially zero.
Pimento is not the same as paprika, even though paprika is often made from dried pimento peppers. In olive production, the pimento is used fresh or in a paste form, not dried or smoked. It is also different from generic roasted red peppers, which are usually larger and less sweet.
A simple way to think about it: pimento is the fresh, sweet version. Paprika is what happens when you dry and grind it. In olives, you always get the fresh or paste form.
Read also: The Complete Guide to Hosting an Oyster Roast
Why Are Olives Stuffed with Pimento?
How This Tradition Started
The practice of stuffing olives with pimento started in Spain and France in the early 1900s. Before that, olives were sold whole or simply pitted. When producers began removing pits for convenience, they realized the hollow center affected the olive’s texture and made it feel incomplete.
Inserting a small piece of pimento solved two problems at once. It filled the cavity so the olive held its shape, and it added a contrasting flavor that made the olive more interesting to eat. Spanish producers popularized the combination, and it spread quickly through Europe and into American markets by the mid-20th century.
Why the Flavor Pairing Works So Well
Salt and sweet is one of the oldest flavor contrasts in cooking. The brine of a green olive is sharp and slightly bitter. The pimento brings a gentle sweetness and a soft, yielding texture. Together they make each other taste better.
This is the same reason people put sea salt on caramel or serve prosciutto with melon. Contrast creates balance. A plain brined olive can be a bit one-note. The pimento rounds it out without overpowering the olive’s natural character.
How Pimento Olives Are Made
The Traditional Stuffing Method
Traditionally, workers stuffed olives by hand. A whole green olive would be pitted, then a thin strip of pimento pepper would be folded and pressed into the cavity. This method required skill because the pepper had to fit snugly without tearing the olive.
High-end producers still use this hand-stuffed method for their premium lines. If you have ever noticed that a jar of expensive olives looks more irregular and rustic compared to a budget brand, that is usually why. Handmade simply looks less uniform.
How Most Commercial Brands Do It Today
Large-scale commercial production switched to a paste stuffing method decades ago. Instead of whole strips, pimento is blended into a smooth paste with thickeners like sodium alginate (a seaweed-based ingredient) and then piped into the olive. The paste firms up once it sets, creating that consistent red center you see in most grocery store jars.
This method is faster and cheaper but produces a slightly different texture. The paste filling is softer than a whole pepper strip. It tastes similar but lacks the slight bite and chew you get from real pepper pieces. For everyday use this is perfectly fine, but if texture matters to you, check the label for “hand-stuffed” or “whole pimento.”
What Do Pimento Olives Taste Like?
Breaking Down the Flavor
Pimento olives taste salty, tangy, slightly bitter, and faintly sweet all at once. The dominant flavor is always the olive itself, which brings that classic briny punch. The pimento sits underneath as a quieter note, adding a soft sweetness that softens the sharp edges of the brine.
The flavor also depends on the quality of the olive. A cheap olive will taste mostly of salt and little else. A good-quality olive will have a more complex taste with fruity, grassy, and slightly buttery notes underneath the saltiness.
Texture and Saltiness Level
The texture of a pimento olive should be firm but not rubbery. The olive should give slightly when bitten, not feel mushy or tough. The pimento filling, whether paste or whole, should have a softer, almost creamy texture that contrasts nicely with the olive.
Saltiness varies significantly between brands. Some jars are intensely salty, almost to the point where you would not want to eat more than a few at a time. Others are more balanced. If you are salt-sensitive, rinsing pimento olives under cold water before serving reduces the sodium noticeably without ruining the flavor.
Types of Pimento Olives
Spanish Queen Olives
Spanish Queen olives are the premium option. They are larger, meatier, and have a more complex flavor than standard Manzanilla olives. The flesh is thick and almost buttery, and the briny flavor is more pronounced. If you are serving olives on a cheese board or as a standalone snack, Queen olives make a much better impression.
Cocktail and Gourmet Varieties
Cocktail olives are smaller and usually milder. They are sized to fit on a cocktail pick without looking oversized in a glass. Gourmet varieties might use different olive types, artisan brine recipes, or whole pimento strips instead of paste. Some specialty brands infuse the brine with garlic or herbs, which adds another layer of flavor.
Jarred vs. Fresh Options
Almost all pimento olives are sold jarred in brine. Fresh-stuffed olives from a deli counter do exist, but they are less common. Deli olives are often higher quality and more recently prepared, but they also have a shorter shelf life once you get them home. Jarred olives are convenient and last much longer, making them the practical choice for most people.
Are Pimento Olives Healthy?
Nutritional Breakdown
A serving of about 10 pimento olives (roughly 40 grams) contains approximately 50 to 60 calories, 5 to 6 grams of fat (mostly monounsaturated), less than 1 gram of protein, and minimal carbohydrates. They also provide small amounts of vitamin E, iron, and copper.
The fat in olives is the same type found in olive oil and is associated with heart health. Pimento olives also contain polyphenols and antioxidants, particularly if they are made from higher-quality olives.
Benefits and Real Drawbacks
The main benefit of pimento olives is the healthy fat content and antioxidant profile. They are low in carbs, which makes them a good snack option for people watching carbohydrate intake. The pimento pepper adds a small amount of vitamin C and beta-carotene.
The main drawback is sodium. A serving of 10 olives can contain anywhere from 400 to 700 milligrams of sodium, which is significant. People managing blood pressure or following a low-sodium diet need to be careful with portion size. Rinsing the olives helps, but the sodium does not disappear entirely since it penetrates the olive flesh during curing.
How to Choose the Best Pimento Olives
Reading Labels the Right Way
Look for olives that list “pimento” or “sweet red pepper” as the stuffing ingredient rather than vague terms like “pepper paste.” If the label says “hand-stuffed” or “whole pimento,” that is usually a better-quality product. Avoid jars where the ingredient list is long and includes artificial preservatives, colors, or flavor enhancers.
The brine ingredients matter too. Simple brine with water, salt, and maybe vinegar or lactic acid is a good sign. A short ingredient list usually signals a less processed product.
What Good Olives Look Like
Quality pimento olives should look plump and firm in the jar, not shriveled or floating unevenly. The brine should be fairly clear, not cloudy or murky. The pimento filling should be a rich red or orange-red color. Pale or pinkish filling often signals low-quality pepper paste or older product.
Give the jar a gentle shake. The olives should move freely and not be crushed together. Avoid jars with broken olives or olives that look smashed.
How to Use Pimento Olives
In Cocktails
Pimento olives are the classic garnish in a dirty martini. The olive brine is actually used in the drink itself, giving that signature salty-savory note. One or three olives on a pick is traditional (never two, according to bar lore).
Beyond martinis, pimento olives work well in a Bloody Mary, a Gibson variation, or as a garnish for savory cocktails. They can even be skewered with pickled vegetables for a cocktail snack plate.
In Cooking and Recipes
Pimento olives add salt, depth, and color to a huge range of dishes. Chop them into a tomato sauce for pasta, fold them into a Spanish-style rice dish, or scatter them over a flatbread pizza with feta and sun-dried tomatoes. They work beautifully in a classic olive tapenade.
They also go well in braised chicken dishes, particularly with Mediterranean herbs like rosemary and thyme. The olives break down slightly during cooking and release their brine into the sauce, which adds complexity without needing extra seasoning.
Snacks and Appetizer Ideas
On a charcuterie board, pimento olives sit naturally next to cured meats, sharp cheeses, and pickled vegetables. Thread them onto skewers with fresh mozzarella balls and cherry tomatoes for a simple caprese-style appetizer. Wrap them in thin strips of prosciutto for an elegant two-bite snack that takes about two minutes to prepare.
Pimento Olives vs. Other Stuffed Olives
Garlic-Stuffed Olives
Garlic-stuffed olives are sharper and more pungent. The garlic dominates the flavor in a way that pimento does not. If you prefer bold flavors and plan to use the olives in savory cooking or on a meat-heavy board, garlic-stuffed olives hold up better. For cocktails or delicate dishes, pimento is the more versatile choice.
Blue Cheese-Stuffed Olives
Blue cheese-stuffed olives are richer and more indulgent. They pair especially well with red wine and work beautifully on a cheese-focused board. However, the strong flavor of blue cheese narrows how you can use them. Pimento olives are milder and more adaptable across different settings.
Which Type to Choose
Choose pimento olives when you want something versatile, familiar, and balanced. Choose garlic when you want boldness in savory applications. Choose cheese-stuffed when you are focused on a wine pairing or upscale appetizer situation. For everyday use, pimento is the most practical and crowd-pleasing option.
How to Make Pimento Olives at Home
What You Need
You need whole pitted green olives (Manzanilla or Queen), fresh pimento peppers or jarred roasted red peppers, brine (water, salt, white wine vinegar), and clean glass jars. This is a simple process that does not require any special equipment.
Step-by-Step Method
Drain and rinse your pitted olives. Cut the pimento or roasted red pepper into strips thin enough to fit into the olive cavity. Roll each strip slightly and press it firmly into the olive. Pack the stuffed olives into clean jars. Prepare a brine with one cup of water, one tablespoon of salt, and two tablespoons of white wine vinegar. Pour the brine over the olives, seal the jars, and refrigerate for at least 24 hours before eating. The flavor develops more fully after 48 to 72 hours.
Storage and Shelf Life
How to Store an Opened Jar
Once opened, keep pimento olives submerged in their brine and store them in the refrigerator. Always use a clean utensil when removing olives. Introducing bacteria from your fingers shortens shelf life significantly. If the brine level drops, you can top it up with a simple salt and water solution.
How Long They Last
Unopened jarred olives can last 12 to 18 months in a cool, dark pantry. Once opened and refrigerated, they stay good for 2 to 3 months as long as they remain submerged in brine. Signs of spoilage include a slimy texture, an off smell, or visible mold on the surface of the brine.
Common Mistakes People Make
Buying Based on Price Alone
The cheapest pimento olives are often the saltiest and least flavorful. A mid-range or specialty brand costs only a little more but delivers noticeably better taste and texture. Spend an extra dollar or two and you will notice the difference immediately.
Overusing Them in Recipes
Pimento olives are already salty. When you cook with them, reduce or eliminate added salt until you taste the dish with the olives in it. A common mistake is following a recipe’s salt instructions without accounting for the brine already in the olives.
Improper Storage After Opening
Leaving opened jars at room temperature is a mistake many people make. Once opened, the jar must go in the refrigerator. Olives left at room temperature after opening will soften, taste off, and can develop bacteria quickly.
Conclusion
Pimento olives are simple, versatile, and genuinely useful to have on hand. The combination of a briny green olive with a sweet pimento filling is not random. It is a well-tested balance of flavors that has been popular for over a century for good reason.
Now that you know what the filling actually is, how the olives are made, and what to look for when buying them, you can make smarter choices at the store and get more out of them in the kitchen. Whether you use them in cooking, on a board, or in a cocktail, the quality of the olive makes all the difference.
FAQs
What is the red stuff inside pimento olives?
The red filling is pimento pepper, a sweet, mild variety of red pepper. In most commercial brands it is processed into a paste and piped in. Premium brands use whole strips of the actual pepper. It has very little heat and adds a mild sweetness that balances the briny olive.
Are pimento olives the same as Spanish olives?
Not exactly. Most pimento olives are made with Spanish olive varieties like Manzanilla or Queen, so the terms overlap, but “Spanish olives” refers to the origin or variety while “pimento olives” specifically means the olive is stuffed with pimento pepper.
Can you eat pimento olives straight from the jar?
Yes, absolutely. They are fully cured and ready to eat. If you find them too salty, rinse them briefly under cold water before serving.
Are pimento olives good for you?
In moderate amounts, yes. They contain healthy monounsaturated fats and antioxidants. The main concern is sodium, so people watching salt intake should limit portions or rinse the olives before eating.
What is the difference between pimento and pimiento?
They are the same thing. Pimiento is the Spanish spelling and pimento is the anglicized version. Both refer to the same sweet red pepper variety used in olive stuffing.
-

 Food1 month ago
Cuts of Steak: Complete Guide to Beef Cuts
-

 Food1 month ago
What Is Andouille Sausage? Complete Guide
-

 Food4 days ago
Shirleys Coffee Shop Guam Locations Menu and Guide
-

 Drinks2 weeks ago
Easy Lychee Martini Recipe Sweet & Floral Cocktail
-

 Food1 month ago
Ultimate Tripas Recipe and Cooking Guide
-

 Food2 weeks ago
Italian Ice Flavoring Guide: Flavors, Bases, and Recipes
-

 Food2 weeks ago
Black Pudding Guide: History, Recipe & Nutrition
-

 Blog4 weeks ago
Saltwater Kitchen & Sushi: Menu, Reviews, and Visitor Guide