
Food
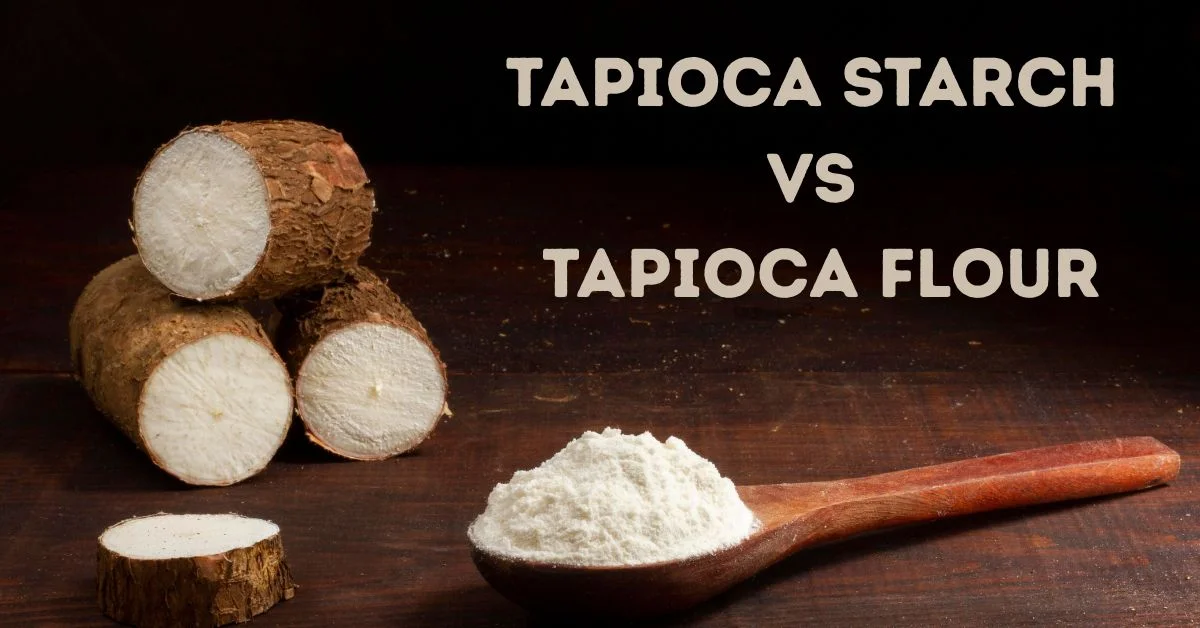
Tapioca Starch vs Tapioca Flour: What’s the Difference?
Tapioca starch and tapioca flour are two names that cause a lot of confusion in the kitchen, and honestly, the confusion is understandable. They look almost identical, they come from the same plant, and many brands use the names interchangeably on their packaging. So when a recipe calls for one, you are left wondering if you can just grab the other.
The short answer is that in most cases, yes, they are the same thing. But there are some important nuances depending on where you buy them and how they are processed. This article breaks down exactly what each one is, how they behave in cooking and baking, when they are interchangeable, and when they are not. You will also find a comparison table, substitution ratios, common mistakes to avoid, and a simple decision guide so you always reach for the right ingredient.
Tapioca Starch vs Tapioca Flour: The Quick Answer
Are they the same or different?
In the vast majority of cases, tapioca starch and tapioca flour are exactly the same product. Both are made from the starchy liquid extracted from cassava root, which is then dried into a fine white powder. They behave the same in recipes, have the same texture, and produce the same results when used for thickening or baking.
Tapioca starch and tapioca flour refer to the same ingredient: a fine, white, odorless powder extracted from cassava root. Both terms describe starch that has been separated from the cassava fiber, dried, and milled. They can be used interchangeably in almost every recipe with no adjustments needed.
Why the Confusion Exists
The naming inconsistency comes down to where a product is manufactured and how a brand chooses to label it. In the United States, you will often see “tapioca starch” on the label. In parts of Asia and Latin America, the same product is commonly sold as “tapioca flour.” Some brands even print both terms on the same bag.
The confusion gets worse when cassava flour enters the picture, because that is a genuinely different product, and mixing them up in a recipe can seriously affect the result.
Read also: Blueberry Muffin Mix: A Complete Guide to Using It Right
What Is Tapioca, Simply Explained
Where It Comes From
Tapioca comes from the cassava plant, a starchy root vegetable native to South America. It is now grown widely across Africa, Asia, and the Caribbean. Cassava is one of the world’s most important food crops because it thrives in poor soil and harsh climates. The plant itself is called cassava, manioc, or yuca depending on the region.
How Tapioca Starch Is Made
To make tapioca starch, the cassava root is peeled and grated. The grated pulp is then mixed with water and pressed or squeezed to extract the starchy liquid. That liquid is allowed to settle so the starch sinks to the bottom. The water is drained off, and the wet starch is dried and milled into a fine, silky powder. No other processing takes place, which is why the final product is almost pure starch with very little protein, fiber, or fat.
Tapioca Starch vs Tapioca Flour, Fully Explained
What Is Tapioca Starch
Tapioca starch is the pure extracted starch from cassava root. It is bright white, very fine, and has a slightly silky feel between your fingers, similar to cornstarch. It has no real flavor or smell on its own. It dissolves easily in cold water and activates quickly when heat is applied, making it a popular thickening agent.
What Is Tapioca Flour
Tapioca flour is the same product as tapioca starch in most commercial settings. The word “flour” is used by some manufacturers because the final product has been milled to a fine powder, and flour is a familiar term for consumers. In some specialty or health food contexts, you may find a slightly coarser version labeled as tapioca flour, but this is not common and is not a meaningful difference for most recipes.
Are They Actually Identical?
For all practical purposes, yes. If you hold both side by side, they will look and feel the same. A recipe that calls for one will work with the other. The only time there is a real functional difference is if one product has been processed with the fiber still included, which would make it more similar to cassava flour. Always check the label: if the ingredients list says only cassava or tapioca starch, you are good.
Key Differences at a Glance
| Feature | Tapioca Starch | Tapioca Flour |
| Source | Cassava root | Cassava root |
| Texture | Very fine, silky | Very fine, silky |
| Color | Bright white | Bright white |
| Flavor | Neutral | Neutral |
| Processing | Starch extracted from liquid | Same process, different label |
| Fiber content | None | None (usually) |
| Common uses | Thickening, frying, baking | Thickening, frying, baking |
| Interchangeable? | Yes, in nearly all cases | Yes, in nearly all cases |
| Same as cassava flour? | No | No |
Texture and Cooking Behavior
Thickening Power
Tapioca starch is a strong thickener. It activates at a lower temperature than cornstarch, which means sauces can come together faster. It also creates a glossy, clear finish rather than a cloudy or matte one. This is why fruit pie fillings often use tapioca starch: it thickens beautifully and leaves the filling clear and shiny.
One teaspoon of tapioca starch thickens roughly the same amount of liquid as one teaspoon of cornstarch, though you may need slightly more tapioca depending on the recipe.
Crispiness vs Chewiness
One of the most useful things to know about tapioca starch is that it can do two opposite things depending on how it is used. When added to a frying batter or coating, it creates a crispier, lighter crust compared to plain flour. This is a popular technique in many Asian cooking styles. Think of dishes where the fried coating stays crispy even after sitting for a few minutes.
On the other hand, when used in baked goods like mochi, cookies, or certain gluten-free breads, tapioca starch creates a chewy, stretchy texture. This is because the starch forms a network when baked that holds moisture and pulls back slightly.
Behavior in Heat and Liquids
Tapioca starch starts to thicken at around 60 to 65 degrees Celsius (140 to 150 degrees Fahrenheit). It reaches full thickening quickly and can become too thick if overcooked. Unlike some starches, it does not hold up well if a sauce or filling is frozen and then reheated, as it can turn watery or slimy. Keep this in mind when making freezer meals or make-ahead dishes.
Uses in Cooking and Baking
Best Uses for Tapioca Starch
Tapioca starch is excellent for:
Thickening soups, gravies, and sauces: It gives a smooth, glossy result without changing the color or flavor of the dish. A classic example is thickening a stir-fry sauce so it coats each piece evenly.
Frying coatings: Mixed with a small amount of rice flour or plain flour, tapioca starch creates an incredibly crispy shell on fried chicken or vegetables. Many Korean and Taiwanese fried chicken recipes rely on it heavily.
Gluten-free baking: Tapioca starch is almost always used in gluten-free flour blends to add chew and elasticity that other flours cannot provide on their own.
Fruit pie fillings: As mentioned earlier, it sets clear and holds well at room temperature, which makes pies look clean when sliced.
Best Uses for Tapioca Flour
Since tapioca flour is the same product, the uses are identical. However, you might see it listed specifically in Brazilian cheese bread recipes (pao de queijo), bubble tea pearls, puddings, and some Southeast Asian sweets. In these recipes, the term tapioca flour is often used because the recipe originates from a region where that is the common name.
When They Do Not Work Well
Tapioca starch does not work well in dishes that need to be simmered for a long time or frozen and reheated. The starch breaks down and loses its thickening power. It also does not perform well as a 1:1 replacement for all-purpose flour in bread recipes that need gluten structure, like a sandwich loaf. It works best as part of a blend, not as a sole flour substitute.
Substitutions and Ratios
Can You Swap Them 1:1?
Yes. Tapioca starch and tapioca flour can always be swapped at a 1:1 ratio. There is no adjustment needed.
Substituting Other Starches
If you do not have tapioca starch, here are your best alternatives:
Cornstarch: Use a 1:1 ratio. It thickens well but produces a slightly more opaque, matte finish. It also does not add chew to baked goods the way tapioca does.
Arrowroot powder: Use a 1:1 ratio. Very similar to tapioca starch in texture and clarity. A good swap in sauces and pie fillings. Arrowroot also breaks down if overcooked, similar to tapioca, so watch your heat.
Potato starch: Use about three quarters of the amount. It is heavier and thickens more aggressively. Good in baking, less ideal in clear sauces.
Cassava flour: Not a direct substitute. Cassava flour contains fiber and has a different texture and absorbency. Using it in place of tapioca starch in a sauce or frying batter will not give the same result.
Recipe-Specific Tips
For frying batters, tapioca starch is hard to replace. If you need a crispy crust and only have cornstarch, use it, but the result will be slightly heavier.
For gluten-free bread blends, try to keep tapioca starch in the recipe. Without it, the bread often crumbles because there is nothing to add elasticity.
Tapioca vs Cassava Flour: An Important Distinction
Key Differences
Cassava flour and tapioca starch are not the same. Cassava flour is made by drying and milling the whole cassava root, including the fiber. Tapioca starch is only the extracted starch, with no fiber remaining.
This means cassava flour has more fiber, more flavor, and much higher absorbency. It behaves more like all-purpose flour in recipes. Many gluten-free and grain-free recipes use cassava flour as a 1:1 replacement for wheat flour, which tapioca starch cannot do.
When to Choose Cassava Flour Instead
If you are making tortillas, flatbreads, or any recipe that needs a more flour-like texture and structure, cassava flour is the better choice. It also works better in grain-free cookie and cake recipes where you want a more traditional, soft crumb rather than a chewy, stretchy one.
Nutrition Overview
Carbs and Calories
Tapioca starch is almost entirely carbohydrate. A two-tablespoon serving contains roughly 45 calories and about 11 grams of carbs, with almost no fat, protein, or fiber. It is not a nutritious ingredient in the traditional sense, but it serves a functional role in cooking rather than a nutritional one.
Gluten-Free Benefits
Both tapioca starch and tapioca flour are naturally gluten-free. They are safe for people with celiac disease and non-celiac gluten sensitivity. They are also grain-free, making them suitable for paleo and certain elimination diets. Because the processing is minimal, they are generally free of common allergens.
Common Mistakes to Avoid
Over-Thickening and Gumminess
Adding too much tapioca starch to a sauce or filling is one of the most common mistakes. The result is a gummy, almost rubbery texture that is unpleasant. A good rule is to start with less than you think you need and add more gradually. Most sauces need no more than one to two teaspoons per cup of liquid.
Using the Wrong Type in Baking
Using cassava flour when a recipe calls for tapioca starch (or vice versa) is a recipe failure waiting to happen. The absorbency and texture are completely different. Always double-check which one your recipe actually needs before you start.
Misreading Labels
In international grocery stores and online shops, labeling can be wildly inconsistent. Some products labeled “tapioca flour” are the pure starch, and some are blends or even cassava flour. Always check the ingredient list. If it lists only “cassava starch” or “tapioca starch,” you have the right product. If you see dietary fiber listed, it is likely cassava flour.
Buying and Storage Tips
What to Look for in Stores
Tapioca starch is usually found in the baking aisle, the health food section, or in Asian and Latin American grocery stores. It should look and feel very fine and white, with no clumps. Avoid bags that feel damp or show discoloration.
Naming Differences by Region
In Thailand and other Southeast Asian countries, the product is almost always called tapioca starch. In Brazil and some Latin American countries, it is often labeled tapioca flour or polvilho doce. In health food stores in the US and UK, you may see both names. Bob’s Red Mill, for example, labels their product as tapioca flour, but it is the same extracted starch as any product labeled tapioca starch.
Store it in an airtight container in a cool, dry place. It keeps well for up to one year if stored properly.
Quick Decision Guide
If You Want a Crispy Texture
Go with tapioca starch. Mix it into your coating or batter to create a light, crispy crust on fried foods. This works especially well for chicken, shrimp, and vegetables.
If You Want to Thicken Sauces
Use tapioca starch or tapioca flour. Either label works. Use about one teaspoon per cup of liquid and add it near the end of cooking to avoid breaking down the starch.
If You Are Baking Gluten-Free
Use tapioca starch as part of a blend. Combine it with almond flour, rice flour, or another gluten-free flour to give your baked goods the chew and elasticity they need. Do not use it as your only flour.
Conclusion
If a recipe says tapioca starch and you only have tapioca flour, or the other way around, just use what you have. They are the same product in almost every real-world situation.
Where it matters is in understanding the difference between tapioca starch and cassava flour. Those two are genuinely different ingredients, and swapping them without understanding the consequences can ruin a dish.
For thickening, frying, and gluten-free baking, tapioca starch is a reliable, versatile ingredient that deserves a spot in your pantry. Just start with small amounts, avoid freezing dishes thickened with it, and always double-check the label before buying.
FAQs
Is tapioca flour gluten-free?
Yes. Tapioca flour and tapioca starch are both naturally gluten-free. They are derived from cassava root and contain no wheat, barley, or rye. They are safe for people with celiac disease, but always check that the product was processed in a gluten-free facility if cross-contamination is a concern.
Can I replace cornstarch with tapioca starch?
Yes, at a 1:1 ratio. Tapioca starch will give a slightly glossier, clearer finish than cornstarch. Both work well for thickening sauces and gravies. For frying, tapioca starch produces a crispier result.
Why do recipes use both terms?
Because the terms are used interchangeably depending on the country and brand. There is no standardized naming rule, so different cookbooks and recipe sites use whichever term is familiar to their audience. The product itself is the same.
Can I use tapioca starch in place of all-purpose flour?
Not as a 1:1 swap. Tapioca starch does not have the protein structure that all-purpose flour provides. It works well as part of a gluten-free flour blend, but on its own it will not produce bread or cake with normal structure.
Is tapioca starch the same as cassava flour?
No. Cassava flour is made from the whole dried cassava root and contains fiber. Tapioca starch is made only from the extracted liquid starch and contains almost no fiber. They behave very differently in recipes and are not direct substitutes.
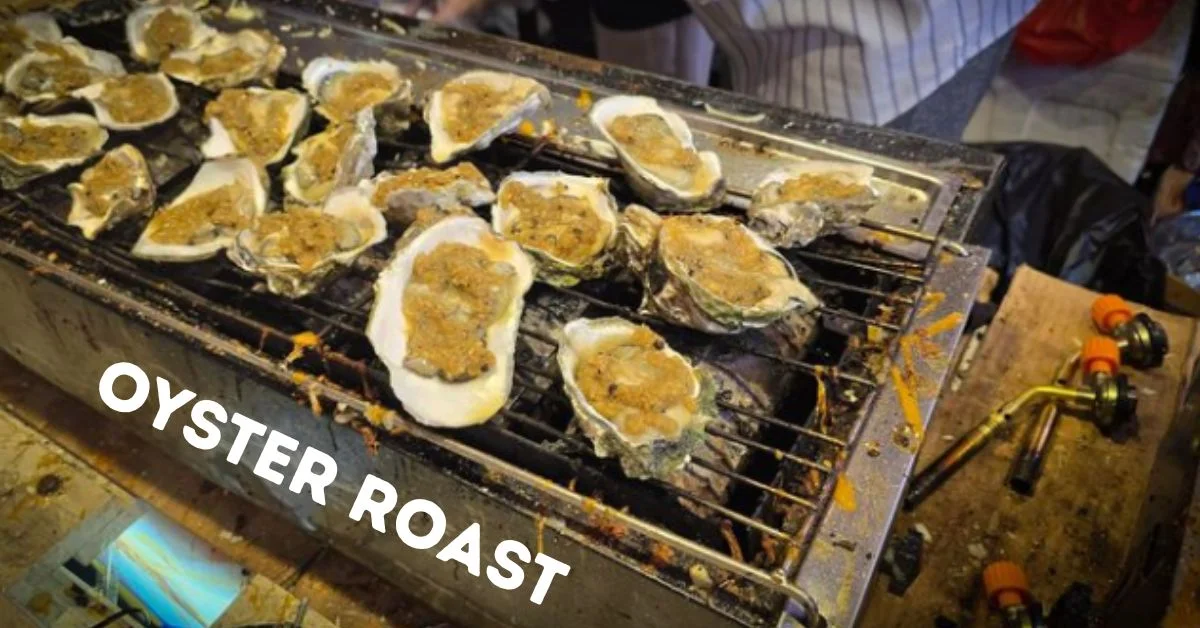
An oyster roast is a Southern coastal tradition where fresh oysters are steamed or roasted over an open fire, then dumped directly onto a table for guests to shuck and eat together. It is part cookout, part social event, and completely unique in the way it brings people together around simple, delicious food.
Many people want to host one but feel unsure about how to pull it off. How many oysters do you need? What equipment is required? How do you cook them right without overdoing it? This guide covers everything from planning and equipment to cooking, serving, and cleanup so you can host a great oyster roast whether it is your first time or your fifth.
What Is an Oyster Roast?
An oyster roast is exactly what it sounds like: a gathering where oysters are cooked in bulk, usually over high heat, and served straight from the cooking surface to a crowd. It is less about fine dining and more about the experience of eating together, getting your hands dirty, and enjoying fresh shellfish in a casual, communal setting.
Origins and Tradition
The oyster roast has deep roots in the Low country region of South Carolina and Georgia, where oysters were plentiful and feeding large groups of people inexpensively was a practical necessity. Native Americans in the region roasted oysters long before European settlers arrived, and coastal communities carried the tradition forward through generations.
Today, oyster roasts are common across the mid-Atlantic and Southeastern United States, especially from fall through early spring when oysters are at their best. Church fundraisers, family reunions, tailgates, and wedding receptions all use this format because it scales easily and costs less per person than most catered meals.
Read also: Tapioca Starch vs Tapioca Flour: What’s the Difference?
What Makes It Different from Other Seafood Events
Unlike a crab boil or shrimp boil where everything cooks together in a pot, an oyster roast keeps things simple. Oysters go directly onto a flat grate or metal sheet over fire, get covered with wet burlap, and steam in their own liquid for a few minutes. Then they get tossed onto a table and guests shuck them on the spot. There is no complicated seasoning process, no long prep time, and very little equipment beyond the basics.
Planning Your Oyster Roast
Good planning is what separates a smooth event from a stressful one. The main things to nail down early are quantity, budget, and location.
How Many Oysters Per Person
A commonly used rule is one dozen oysters per person as a side dish and two to three dozen per person if oysters are the main attraction. For a crowd of 20 guests where oysters are the centerpiece, plan on at least 40 to 60 dozen total. That sounds like a lot, but oysters are small and people tend to eat more than they expect.
A practical tip: order about 10 to 15 percent extra to account for any that do not open properly or arrive damaged. Running out of oysters at an oyster roast is the one thing guests will remember.
Budget and Cost Considerations
Oysters are priced by the bushel or by the dozen. A bushel holds roughly 100 oysters and typically costs between 35 and 60 dollars depending on the region and time of year. For a party of 20 people, you might need 4 to 6 bushels, putting your oyster cost alone at 140 to 360 dollars.
Additional costs to budget for include charcoal or wood, a metal roasting sheet or grill grate, gloves, shucking knives, burlap bags, side dishes, drinks, and disposable table coverings. A full setup for 20 people typically runs between 300 and 600 dollars total, which is still far cheaper than a catered dinner.
To save money, rent equipment instead of buying it if this is a one-time event. Many seafood suppliers or event rental companies carry roasting sheets and burners.
Choosing the Right Location
Oyster roasts work best outdoors. You are dealing with open flame, large quantities of shells, and significant steam, none of which are well suited to indoor spaces. A backyard, park pavilion, or beach area with enough flat ground is ideal.
Make sure the surface under your cooking area is non-flammable and that you have enough space to set up a separate eating table away from the heat source. Guests should not be standing near the fire while eating. At least 15 to 20 feet between the roasting station and the eating table is a good target.
Ingredients and Equipment Checklist
You do not need much to pull off a great oyster roast, but a few key items make a big difference in safety and quality.
Essential Tools and Setup
Here is what you need at minimum: a heavy metal sheet or expanded metal grate measuring at least 4 by 8 feet, cinder blocks or a steel frame to elevate it, a heat source (propane burner, fire pit, or hardwood fire), wet burlap sacks, thick welding gloves, oyster shucking knives, and a flat table for serving. Newspaper or brown paper works well to line the table, making cleanup simple.
A garden hose nearby is useful for keeping burlap wet and for rinsing hands. Trash cans or large buckets for shells should be placed right at the table edges.
Types of Oysters to Buy
Not all oysters taste the same. East Coast varieties like Blue Point, Wellfleet, and Chesapeake Bay oysters are briny and firm, which holds up well to roasting. Gulf Coast oysters tend to be larger and milder. Pacific oysters are buttery and work fine for roasting but are less traditional for this style of event.
Buy fresh, live oysters. A live oyster has a tightly closed shell or one that snaps shut when tapped. Avoid any that are already open and do not close, smell strongly of ammonia, or have cracked shells. Freshness is non-negotiable for both flavor and safety.
Optional Add-ons for a Better Experience
A few upgrades that experienced hosts swear by: a separate raw bar setup with ice for guests who prefer uncooked oysters, a cast iron pan for making small batches with butter and garlic, and a printed condiment station so guests can see all their topping options at once. These small touches take the event from basic to memorable.
Step-by-Step: How to Host an Oyster Roast
Once your setup is ready, the actual cooking process is simple. The key is staying organized and working in batches.
Preparing Oysters Safely
Scrub oysters under cold running water with a stiff brush before cooking to remove mud and debris. Do not soak them in water for long periods. Keep them in a cool shaded area or on ice right up until they go on the heat. Never leave raw oysters sitting in the sun.
Wear gloves when handling raw oysters. Their shells are sharp and can cause cuts. Anyone with a weakened immune system, liver disease, or shellfish allergies should not eat them, and this should be communicated to guests in advance.
Cooking Methods: Roasting, Steaming, and Grilling
The classic roast method: heat your grate until it is very hot, spread oysters in a single layer (cup side down so the liquid stays inside), cover with a wet burlap sack, and let them cook for 8 to 10 minutes. You will know they are done when the shells just begin to crack open slightly.
For a grilling approach, place oysters directly on a charcoal or gas grill over high heat and cook for 5 to 8 minutes with the lid closed. Some hosts add a small amount of butter, garlic, or hot sauce directly into the shell before closing the grill lid for added flavor.
Steaming in a large pot or turkey fryer is another option for smaller gatherings. Add 2 inches of water or beer to the pot, bring it to a boil, add oysters, cover, and steam for 5 to 7 minutes.
Timing and Batch Cooking
Do not cook all your oysters at once. Working in batches keeps the food coming out hot and gives you control over the process. A standard approach for a party of 20 is to cook one bushel at a time every 15 to 20 minutes.
Designate one or two people as the roasting crew. They manage the fire, rotate batches, and keep the burlap wet. This frees everyone else to eat, socialize, and actually enjoy the event.
How to Serve Oysters
Serving is where the oyster roast format really shines. It is hands-on and social by design.
Traditional Serving Style
Dump each batch directly onto the newspaper-lined table so guests can gather around and start shucking. Provide oyster knives and thick gloves or folded towels so no one cuts themselves. The idea is to eat them right off the table, hot from the grate.
Veteran hosts often place one experienced shucker at each end of the table to help beginners get started. This makes the experience less intimidating for first-timers and keeps things moving.
Sauces and Toppings
Classic condiments for an oyster roast include cocktail sauce, fresh horseradish, hot sauce, lemon wedges, and melted butter. More adventurous options include mignonette (a vinegar and shallot sauce), garlic butter with herbs, or a smoky chipotle aioli.
Set up condiments in small bowls or squeeze bottles along the center of the table so guests can reach them without crowding. Crackers, especially saltines, are a traditional pairing that cuts the richness of the oyster.
Side Dishes and Drink Pairings
Good side dishes for an oyster roast include coleslaw, corn on the cob, hush puppies, grilled bread, and baked beans. These are easy to prepare ahead of time and hold up well at outdoor temperatures.
For drinks, crisp white wines like Muscadet or Sauvignon Blanc pair naturally with oysters. Cold lager beer is the most common choice at casual roasts. For non-alcoholic options, sparkling water with citrus or sweet tea both work well.
Pro Tips for a Successful Oyster Roast
These are the things most guides leave out but experienced hosts learn the hard way.
Hosting and Guest Management Tips
Mark a clear path from the eating table to the trash bins so shell disposal does not create chaos. Assign someone to manage the shell buckets and clear them regularly. Full buckets next to where people are eating create mess and smell.
Brief your guests before the first batch comes out. A quick 60-second explanation of how to shuck an oyster, where the knives are, and where to throw shells will prevent confusion and keep everyone comfortable.
Flavor Upgrades and Variations
Try finishing a batch with a compound butter poured over the shells right before serving. A simple mix of softened butter, minced garlic, lemon zest, and fresh parsley transforms a standard roast into something guests will request again.
Another popular variation is the New Orleans-style char-grilled oyster, where oysters go cup-side down on a very hot grill until bubbling, then get topped with butter, parmesan, and herbs. This works beautifully as a specialty batch alongside the traditional roast.
Weather and Setup Adjustments
Wind is the enemy of an outdoor fire. Set up your roasting station with a windbreak if possible. Cold weather actually helps keep oysters fresh longer before cooking, so fall and winter roasts have a natural advantage. In hot weather, keep uncooked oysters on ice and work in smaller batches.
If rain is a possibility, have a canopy or tent ready. The cooking can continue in light rain, but guests need shelter to enjoy eating comfortably.
Common Mistakes to Avoid
Even experienced hosts can run into problems with a few recurring issues.
Storage and Freshness Errors
Storing oyster roast in an airtight container or submerged in fresh water kills them. Keep them in a breathable bag or open container covered loosely with a damp cloth, stored at 35 to 45 degrees Fahrenheit. Use them within one to two days of delivery for best quality.
Overcooking or Undercooking
Overcooked oyster roast turn rubbery and dry out quickly. The target is just barely open, with the meat still plump and slightly translucent. If a shell does not open after cooking, it either needs more time or should be discarded. Do not try to force it open and serve it.
Undercooked oysters from a raw oyster setup are safe if they are fresh and properly handled. But oysters that are supposed to be roasted and come off the heat still completely sealed and cold inside are not done.
Poor Planning Issues
Underestimating quantity is the most common hosting mistake. Having a backup plan, such as a bag of shrimp or a pot of chowder, ensures no one leaves hungry if you run short. Over-ordering oysters is rarely a problem because leftovers can be used in soups, pasta, or stuffing the next day.
Cleanup and Aftercare
Shells are heavy and add up fast. Plan for this before the event, not after.
Disposal of Shells
One bushel of oyster roast produces a significant volume of shell. Check with local authorities about composting or disposal options. Many coastal areas have shell recycling programs that use old shells for reef restoration projects. If not, shells can go in yard waste bins or be composted for garden use since they break down into beneficial calcium over time.
Cleaning Equipment
Rinse the metal roasting sheet while it is still warm. Once grease and debris dry and harden, they are much harder to remove. A wire brush and hot water handle most of the cleanup. Burlap sacks can be rinsed, dried, and reused if they are in good shape.
Leftover Handling
Cooked oysters that did not get eaten should be refrigerated within two hours and used within one day. They work well in chowder, pasta with cream sauce, or as a topping for grilled bread. Raw oysters that were not cooked should be stored properly and used within one to two days.
Conclusion
An oyster roast is one of the most rewarding ways to feed a group of people. It is low-cost compared to most events of similar scale, easy to execute once you understand the basics, and genuinely fun for guests of all experience levels. Get the quantities right, keep the oysters fresh, cook in batches, and set up your table with good condiments and clear shell disposal. Do that and you will have a successful event that guests talk about long after the shells are cleared?
FAQs
Can you host an oyster roast at home?
Yes, absolutely. A backyard with enough space for a small fire or propane burner, a metal grate, and a table is all you need. Many home hosts use a large charcoal grill or a simple cinder block setup. Start with a small batch of one or two dozen oysters to practice before scaling up for a party.
What is the best season for an oyster roast?
Fall and winter are traditionally the best seasons, roughly September through April. Oysters are at peak flavor during cooler months and were historically avoided in summer when water temperatures increase bacterial risk. Modern refrigeration and aquaculture have made oysters safer year-round, but the fall and winter season still produces the best-tasting ones.
Are raw oysters safe to eat?
Raw oysters from reputable suppliers are generally safe for healthy adults. However, people with liver disease, weakened immune systems, diabetes, or shellfish allergies face higher risks and should avoid them entirely. Always buy from a licensed seafood dealer and check that oysters are alive before eating them raw.
How do you know when roasted oysters are done?
Roasted oysters are done when the shells begin to open slightly, usually after 8 to 10 minutes over high heat. The meat inside should be plump and warm but not shriveled or dried out. Remove them promptly from the heat and serve immediately for the best texture and flavor.
What do you do if guests do not know how to shuck an oyster?
Have two or three experienced shockers available to help, especially during the first batch. A quick demonstration goes a long way. Place the oyster flat side up, insert the knife at the hinge, twist to pop it open, then slide the knife along the inside of the top shell to release the meat. Thick gloves make it much safer for beginners.
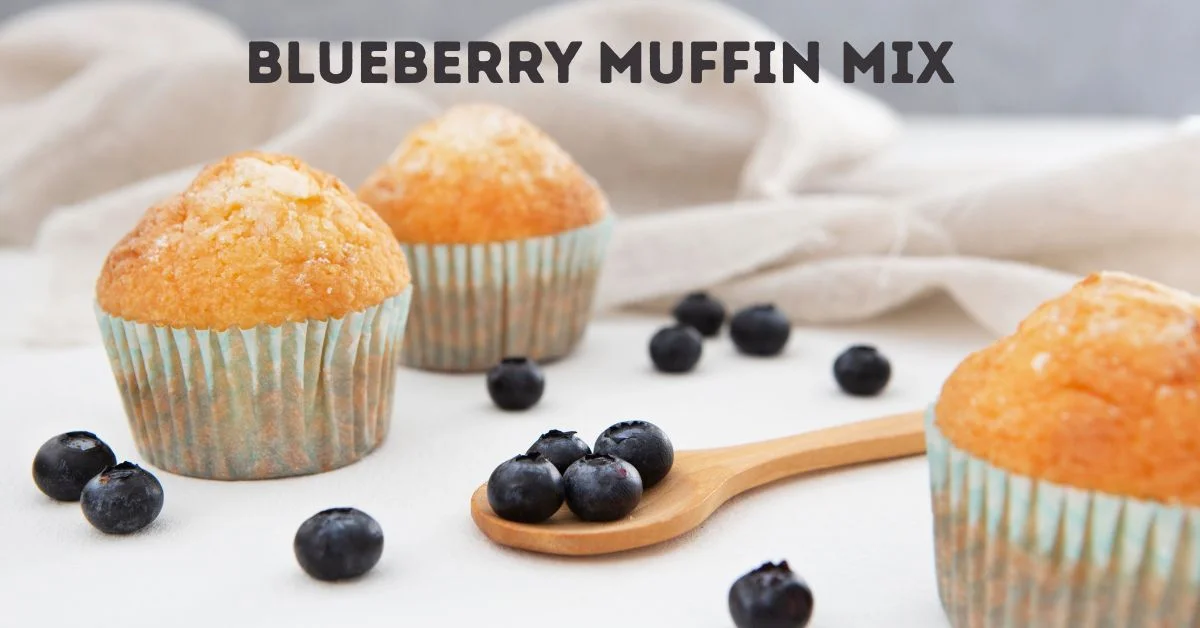
Blueberry muffin mix is a pre-measured blend of dry ingredients like flour, sugar, leavening agents, and sometimes dried or canned blueberries, designed to make baking faster and easier. You just add a few wet ingredients, stir, and bake. Simple enough, right? But a lot of people end up with flat, dense, or overly sweet muffins and can’t figure out why.
The problem usually isn’t the mix itself. It’s the small decisions made along the way: the wrong pan size, over mixing the batter, skipping the rest time, or not knowing how to improve a boxed mix with a few easy additions. This guide covers everything from picking the right mix to baking perfect muffins every time, including tips to make a boxed mix taste like it came from a bakery.
What Is Blueberry Muffin Mix?
Blueberry muffin mix is a shelf-stable baking product that combines pre-measured dry ingredients so you don’t have to measure out flour, sugar, baking powder, and salt separately. Most mixes include a small can or packet of blueberries as well.
The appeal is consistency and speed. A beginner can produce a decent batch of muffins in under 30 minutes with very little baking knowledge. For someone baking occasionally or in a small kitchen, it removes the guesswork.
Featured Snippet Answer:
Blueberry muffin mix is a packaged blend of flour, sugar, baking powder, salt, and flavoring agents. You typically add eggs, oil, and milk or water, then fold in the included blueberries. It simplifies the baking process and produces consistent results in about 20 to 25 minutes of oven time.
Most popular brands like Jiffy, Betty Crocker, and Krusteaz have slightly different formulas. Jiffy uses a very simple base and produces a smaller, denser muffin. Betty Crocker mixes tend to be softer with a sweeter profile. Krusteaz leans toward a bakery-style texture. Knowing the difference helps you pick the right one for your purpose.
Read also: Vanilla Creme Donut Dunkin Calories, Price, Ingredients, Reviews 2026
What Goes Into a Box of Muffin Mix?
Understanding what’s in the mix helps you make better decisions when baking with it. The base ingredients in most muffin mixes are enriched flour, sugar, hydrogenated oil or palm fat, leavening agents (baking powder and sometimes baking soda), salt, and a small amount of artificial or natural blueberry flavor.
The blueberries included with many mixes are either canned in syrup or dried and coated. They are soft and convenient but can be watery if you don’t drain them properly. Some premium mixes use freeze-dried blueberries, which are lighter and hold their shape better in the batter.
One thing that surprises new bakers: most muffin mixes already contain salt, fat, and sugar in specific ratios. When you start swapping ingredients, those ratios shift. That’s why randomly adding extra sugar or swapping water for juice sometimes throws off the texture.
A small tip from experience: if the mix uses canned blueberries, drain and pat them dry before folding them in. This prevents the batter from turning purple and keeps the blueberries from sinking to the bottom.
How to Make Blueberry Muffins from a Mix
Basic instructions are printed on every box, but following them exactly is rarely enough to get truly great results. Here’s a more reliable approach.
Gather Your Ingredients First
Before you open the box, set out your eggs, oil, and liquid and let them come to room temperature. Cold eggs and cold milk slow the leavening process slightly and can make your muffins denser than they should be. This takes about 15 minutes and makes a noticeable difference.
Measure and Mix Carefully
Add the wet ingredients to a bowl first, whisk them lightly, then pour in the dry mix. Stir only until the dry flour streaks disappear. Lumpy batter is completely fine and actually a good sign. Over mixing activates the gluten in the flour and produces a tough, rubbery muffin.
A real-life example: a home baker once shared that she was frustrated her muffins always came out flat and chewy. After adjusting her method to stop mixing at 12 to 14 strokes, her results improved completely. The fix was not the mix, it was the technique.
Let the Batter Rest
After mixing, let the batter sit for 5 to 10 minutes before scooping it into the pan. This short rest allows the baking powder to start activating and the flour to fully hydrate. The muffins will rise better and have a more even crumb.
Fill the Cups Correctly
Fill each muffin cup about two-thirds to three-quarters full. Too little batter produces flat muffins. Too much causes overflow and uneven tops. Use an ice cream scoop for even portions.
How to Make Boxed Muffin Mix Taste Homemade
This is the section most baking articles skip. A boxed blueberry muffin mix is a starting point, not a final product. A few small additions can completely change how the finished muffin tastes.
Replace Water with Milk or Buttermilk
If the recipe calls for water, swap it with whole milk. If you want a richer, slightly tangy flavor, use buttermilk. The fat and protein in milk improve texture and add a natural creaminess that water simply cannot provide.
Add an Extra Egg Yolk
Most mixes call for one egg. Adding an extra yolk (not the white) makes the muffin softer and richer. The fat in the yolk tenderizes the crumb without making it greasy.
Use Melted Butter Instead of Oil
Vegetable oil makes muffins moist, but butter adds flavor. Swap the oil for an equal amount of melted butter. The muffins will brown a little more on the sides and have a distinctly better taste. This is one of those small changes experienced bakers know instinctively.
Add Vanilla Extract
Half a teaspoon of pure vanilla extract added to the wet ingredients rounds out the sweetness and makes the muffin smell incredible while baking. It costs almost nothing but makes a big difference.
Fold in Fresh Blueberries
Even if you use the blueberries that come with the mix, adding a small handful of fresh blueberries deepens the flavor. Fresh berries burst during baking and create pockets of natural juice that dried or canned berries cannot replicate.
Sprinkle Sugar on Top Before Baking
A light sprinkle of coarse or raw sugar on top of each muffin just before going into the oven creates a slightly crisp, sparkly top. This is a bakery trick that looks impressive and adds a satisfying texture contrast.
Common Mistakes When Using Blueberry Muffin Mix
Even with a mix, things can go wrong. Here are the most frequent problems and how to fix them.
Dense or Heavy Muffins
Usually caused by over mixing or using cold ingredients. Mix gently and use room temperature eggs and liquid.
Muffins Didn’t Rise
This can happen when baking powder in the mix is old (yes, it can expire even in a sealed package), when the oven temperature was too low, or when the batter sat too long after mixing. Always bake within 20 minutes of mixing.
Blueberries Sank to the Bottom
Toss fresh blueberries in a teaspoon of flour before folding them in. This light coating helps them stay suspended in the batter during baking.
Muffins Stuck to the Pan
Even with a non-stick pan, it’s worth lining the cups with paper liners or spraying with a baking spray that includes flour. Plain cooking spray alone sometimes isn’t enough, especially with sugary batters.
Tops Were Pale and Flat
This usually means the oven temperature was too low or the cups were under filled. Increase the temperature by 10 to 15 degrees Fahrenheit and fill cups a little higher. A hot oven gives muffins that classic dome shape.
Choosing the Right Blueberry Muffin Mix
Not all mixes are equal. The right choice depends on what you’re looking for.
Featured Snippet Answer:
When choosing a blueberry muffin mix, consider the texture you want, the ingredients list, and the serving size. Jiffy is budget-friendly and makes smaller, denser muffins. Betty Crocker produces a softer, sweeter result. Krusteaz is closer to a bakery-style muffin. For a cleaner ingredient list, look for mixes without artificial dyes or high-fructose corn syrup.
If you’re baking for kids, a sweeter mix like Betty Crocker works well. For adults who prefer a less sugary muffin, Krusteaz or a natural-ingredient mix like Bob’s Red Mill gives a more balanced flavor. If you’re in a hurry and on a budget, Jiffy gets the job done in the simplest way.
Always check the blueberry portion. Some mixes include canned blueberries in a pouch, which are soft and sweet. Others include dried blueberries, which are chewier. Premium mixes use freeze-dried blueberries that rehydrate during baking. Each gives a slightly different result in the finished muffin.
Storage and Shelf Life
Storing Dry Mix
An unopened box of blueberry muffin mix typically lasts 12 to 18 months when stored in a cool, dry place away from direct sunlight. Once opened, transfer any unused mix to an airtight container and use within a few weeks for best results.
Storing Baked Muffins
Baked muffins stay fresh at room temperature for 2 to 3 days when kept in an airtight container. Don’t refrigerate them unless the weather is very warm, since refrigeration dries out the crumb quickly. For longer storage, freeze individual muffins wrapped in plastic, then placed in a freezer bag. They reheat perfectly in the microwave in about 30 seconds.
Conclusion
Blueberry muffin mix is a genuinely useful product when you know how to work with it. The box instructions are a baseline, not a ceiling. Small changes like using buttermilk instead of water, adding butter instead of oil, or tossing fresh berries in flour before folding them in can take a perfectly ordinary muffin to something you’d be happy to serve to guests.
The most important things to remember are to not over mix, let your batter rest briefly, and bake at the right temperature. Get those three things right and the mix will do the rest.
FAQs
Can I add fresh blueberries to a blueberry muffin mix?
Yes, and it’s highly recommended. Fresh blueberries add bursts of natural juice and a better flavor. Toss them lightly in flour before folding into the batter to prevent them from sinking.
Can I make blueberry muffin mix without eggs?
Yes. You can replace each egg with a flax egg (one tablespoon ground flaxseed plus three tablespoons water, rested for five minutes), unsweetened applesauce (three tablespoons), or a mashed banana. Texture will be slightly denser but still enjoyable.
Why are my blueberry muffins gummy inside?
Gummy centers usually mean under baking. Check your oven temperature with an oven thermometer since many ovens run cooler than their dial suggests. Insert a toothpick into the center; it should come out with a few dry crumbs, not wet batter.
Can I use blueberry muffin mix to make a loaf?
Yes. Pour the batter into a greased loaf pan and bake at a slightly lower temperature, around 325 degrees Fahrenheit, for 40 to 50 minutes. Check with a toothpick for doneness.
How do I make blueberry muffins moister?
Swap water for milk or buttermilk, use melted butter instead of oil, and add an extra egg yolk. These three changes make a noticeable improvement in moisture and richness without changing the recipe fundamentally.
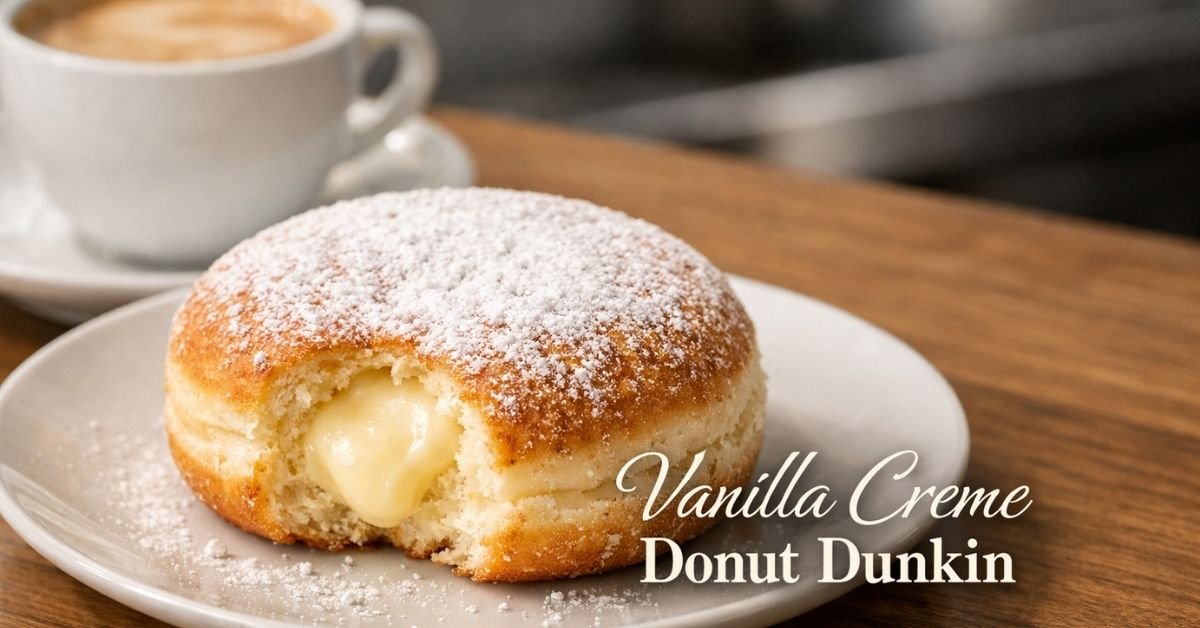
Dunkin’s Vanilla Creme Donut Dunkin is one of those treats that instantly makes you smile. The soft, fluffy yeast-raised dough, filled with creamy vanilla custard and lightly dusted with powdered sugar, gives a melt-in-your-mouth experience that is both indulgent and comforting. The donut’s gentle vanilla flavor is not overpowering, making it a versatile option for all ages. Many enjoy pairing it with hot coffee, iced lattes, or even chocolate milk to balance the sweetness and enhance the flavor. Its simple presentation and comforting taste evoke nostalgia, reminding many adults of bakery-style donuts from their childhood.
The Vanilla Creme Donut Dunkin has become a go-to choice for breakfast, mid-morning snack, or coffee breaks, combining rich flavor with an easy, portable treat. Its light dough ensures that the custard filling shines, creating a satisfying contrast with every bite.
Read also: Easy Recipe for Mediterranean Fish
Ingredients of Vanilla Creme Donut Dunkin
The Vanilla Creme Donut Dunkin uses a combination of simple bakery ingredients that deliver its signature flavor and texture:
-
Enriched wheat flour
-
Sugar
-
Yeast
-
Palm and canola oils
-
Eggs
-
Skim milk and cream
-
Vanilla extract
-
Salt
-
Powdered sugar for topping
-
Natural and artificial flavors
The yeast dough makes the donut soft and airy, while the creamy vanilla custard gives a smooth, rich filling. The powdered sugar on top adds just enough sweetness and makes the donut visually appealing. All ingredients are crafted to create a classic, comforting flavor that fans love.
Calories and Nutritional Information
A single Vanilla Creme Donut Dunkin contains approximately 340 calories. The nutritional breakdown is:
-
Total fat: 18g
-
Saturated fat: 7g
-
Trans fat: 0g
-
Cholesterol: 40mg
-
Sodium: 260mg
-
Total carbohydrates: 42g
-
Sugars: 20g
-
Protein: 5g
This donut is indulgent but manageable as an occasional treat. Pairing it with a protein-rich beverage, like milk or a protein coffee shake, can help balance sugar intake while still enjoying the creamy vanilla flavor.
Price and Availability
The Vanilla Creme Donut Dunkin usually costs between $1.49 and $1.79 depending on your location. It’s available at most Dunkin outlets nationwide and can also be ordered through the Dunkin mobile app for delivery or pickup. Seasonal promotions sometimes feature combo deals with coffee, making it easier to enjoy this classic donut without skipping your morning routine.
Why the Vanilla Creme Donut Dunkin Stands Out
The Vanilla Creme Donut Dunkin stands out because of its texture, flavor balance, and nostalgic appeal. The yeast-raised dough is light and airy, while the creamy vanilla custard provides a rich, smooth contrast. Unlike overly sweet donuts, this option remains balanced, making it appealing to a wide audience. Many fans highlight its comforting and familiar taste, which recalls childhood bakery experiences.
Its versatility is another reason it’s popular. The Vanilla Creme Donut Dunkin works as a snack, breakfast item, or coffee companion. Its compatibility with both hot and cold beverages makes it an all-day treat.
Taste and Texture Review
Biting into the Vanilla Creme Donut Dunkin gives a soft, slightly firm outer dough that holds the creamy custard filling in place. The filling is smooth, sweet, and lightly aromatic, offering a classic vanilla flavor without being artificial. Powdered sugar adds subtle sweetness, while the overall donut remains light rather than heavy. Many fans describe it as comforting, simple, and reliable—a donut you can enjoy anytime.
Pairing Ideas for Vanilla Creme Donut Dunkin
Pairing enhances the experience of enjoying the Vanilla Creme Donut Dunkin. Consider these combinations:
-
Hot brewed coffee or espresso for a bold contrast
-
Iced coffee or cold brew for a refreshing twist
-
Hot chocolate for extra indulgence
-
Vanilla or caramel lattes for complementary flavors
-
Milk or chocolate milk for a classic combination
These pairings allow the donut to shine while balancing its sweetness, creating a full flavor experience.
Comparisons with Other Dunkin Donuts
The Vanilla Creme Donut Dunkin can be compared with other popular filled and frosted donuts from Dunkin:
-
Boston Cream Donut: Chocolate-coated with custard, richer chocolate flavor
-
Strawberry-Filled Donut: Fruity filling, lighter vanilla taste but sweeter overall
-
Crème Brûlée Donut: Caramelized sugar topping, more decadent flavor
The Vanilla Creme Donut Dunkin is simpler, creamy, and less sweet, perfect for classic flavor lovers.
Allergen and Dietary Information
For those with dietary restrictions, it’s important to note that the Vanilla Creme Donut Dunkin contains eggs, milk, wheat, and traces of soy. It is not suitable for gluten-intolerant or dairy-allergic individuals. Dunkin does not currently offer a vegan or gluten-free version. Those monitoring sugar intake should note the donut has 20g of sugar per serving.
Regional Availability
While the Vanilla Creme Donut Dunkin is widely available across most Dunkin outlets in the U.S., availability may vary by region and store size. Smaller or seasonal locations may rotate flavors, so checking through the Dunkin app or calling your local store ensures it’s in stock.
Seasonal and Limited-Time Variations
Although the classic Vanilla Creme Donut Dunkin is available year-round, Dunkin sometimes releases limited-time variations during holidays. You may encounter subtle twists, such as spiced custard for winter or festive toppings during holidays. These seasonal editions maintain the classic flavor while adding a unique touch for celebrations.
Serving Suggestions for Vanilla Creme Donut Dunkin
The Vanilla Creme Donut Dunkin is versatile:
-
Warm with coffee or cappuccino for breakfast
-
Paired with cold milk for a classic snack
-
Sliced on a breakfast platter with berries and yogurt
-
Used as a dessert base with chocolate or caramel drizzle
-
Part of a brunch spread with muffins, bagels, and fruit
These ideas enhance the flavor and make the donut a flexible option for any occasion.
Storage and Freshness Tips
To enjoy the Vanilla Creme Donut Dunkin at its best:
-
Store in an airtight container at room temperature for up to 24 hours
-
Refrigerate for up to 2 days, but the dough may firm slightly
-
Avoid freezing, as the custard filling can separate
-
Reheat briefly in the microwave to restore softness
Proper storage ensures the donut maintains its intended texture and flavor.
Homemade Copycat Version
For those who want to recreate the Vanilla Creme Donut Dunkin at home:
-
Prepare yeast dough with flour, sugar, yeast, eggs, milk, and butter
-
Make vanilla custard with milk, sugar, eggs, cornstarch, and vanilla extract
-
Fry dough, fill with custard using a piping bag, and dust with powdered sugar
This DIY version allows you to control sweetness and experiment with flavors while still capturing the classic donut taste.
Dietary Alternatives
If you want a lighter option:
-
Use Greek yogurt and vanilla extract instead of custard
-
Bake the dough instead of frying
-
Substitute whole wheat or oat flour for added fiber
These changes retain much of the vanilla flavor while making the donut slightly healthier.
Customer Reviews and Popularity
Fans praise the Vanilla Creme Donut Dunkin for:
-
Creamy, smooth filling that’s not overly sweet
-
Soft, fluffy dough that melts in the mouth
-
Perfect portion for a snack or breakfast
-
Consistent flavor across locations
Many enjoy it alongside coffee, noting how the donut complements the drink’s bitterness. Social media posts often highlight nostalgia, with adults recalling similar bakery-style donuts from their childhood.
Fun Facts About Vanilla Creme Donut Dunkin
-
It’s a nostalgic favorite, reminding many adults of childhood donuts
-
Yeast-raised dough makes it lighter than typical cake donuts
-
Powdered sugar adds subtle sweetness and enhances visual appeal
-
Often called a “comfort food” by fans
These details show why the Vanilla Creme Donut Dunkin is more than just a donut—it’s an experience.
Serving Ideas for Occasions
The Vanilla Creme Donut Dunkin is perfect for:
-
Breakfast buffets
-
Office snacks
-
Weekend coffee mornings
-
Small parties or gatherings
-
Paired with fresh fruit or berries for a balanced treat
Its simple elegance makes it a hit at events without needing fancy presentation.
Conclusion
The Vanilla Creme Donut Dunkin is a classic treat that combines fluffy yeast dough with smooth vanilla custard and a light powdered sugar topping. With around 340 calories, it’s indulgent but not overwhelming. Its nostalgic flavor, soft texture, and versatility make it a favorite for breakfast, snacks, or coffee breaks. Whether you enjoy it in-store, order via the Dunkin app, or try a homemade version, this donut delivers a comforting, creamy, and satisfying experience every time. Fans love its balance of sweetness and simplicity, making it a timeless choice among Dunkin donuts.
FAQs
How many calories are in Dunkin Vanilla Creme Donut?
About 340 calories per donut.
What ingredients are used in Dunkin Vanilla Creme Donut?
Flour, sugar, yeast, eggs, milk, cream, vanilla extract, and powdered sugar.
Is Dunkin Vanilla Creme Donut good?
Yes, it’s soft, creamy, and lightly sweet, making it a favorite snack.
How much does Dunkin Vanilla Creme Donut cost?
Usually between $1.49 and $1.79, depending on location.
Can I order Dunkin Vanilla Creme Donut online?
Yes, through the Dunkin mobile app for delivery or pickup.
What drinks pair well with Vanilla Creme Donut Dunkin?
Coffee, iced lattes, hot chocolate, or milk complement the flavor perfectly.
-

 Food1 month ago
Cuts of Steak: Complete Guide to Beef Cuts
-

 Food1 month ago
What Is Andouille Sausage? Complete Guide
-

 Food2 days ago
Shirleys Coffee Shop Guam Locations Menu and Guide
-

 Food1 month ago
Ultimate Tripas Recipe and Cooking Guide
-

 Drinks2 weeks ago
Easy Lychee Martini Recipe Sweet & Floral Cocktail
-

 Food1 week ago
Italian Ice Flavoring Guide: Flavors, Bases, and Recipes
-

 Food2 weeks ago
Black Pudding Guide: History, Recipe & Nutrition
-

 Blog4 weeks ago
Saltwater Kitchen & Sushi: Menu, Reviews, and Visitor Guide