
Food
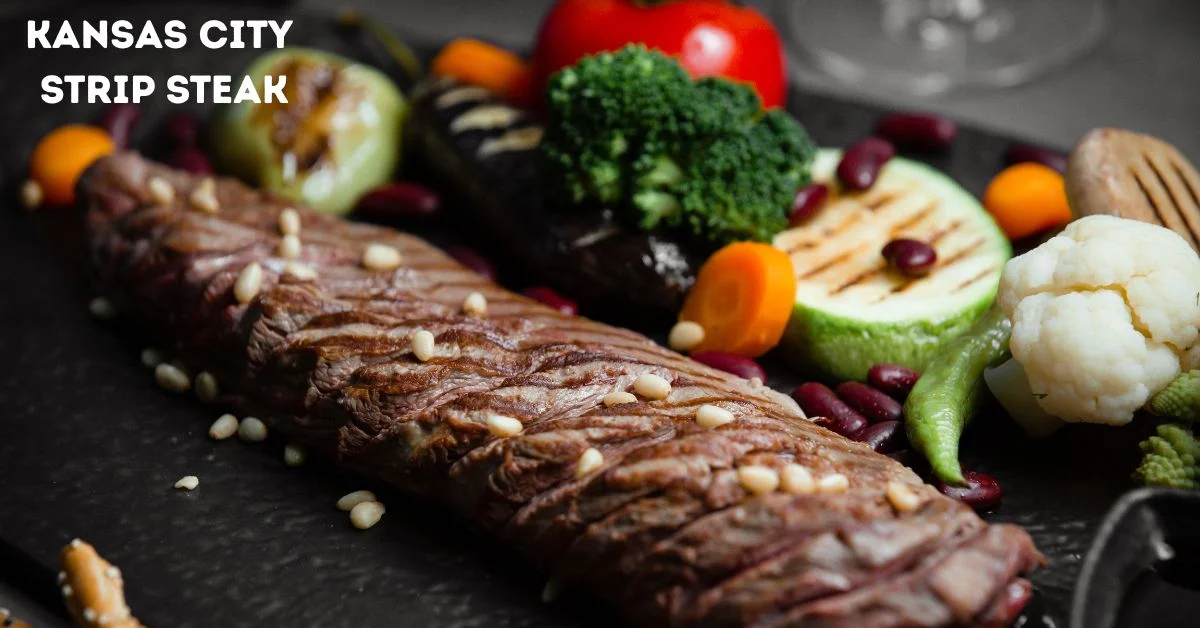
Kansas City Strip Steak: What It Is and How It Differs from NY Strip
Ever stood at the butcher counter staring at two steaks that look almost identical same shape, same color, nearly the same price but one’s called a Kansas City strip and the other a New York strip? I’ve been there. It’s one of those things that feels like it should be simple but somehow isn’t.
Here’s the short version: a Kansas City strip is a bone-in strip steak. A New York strip is the same cut, just without the bone. That one difference bone versus no bone changes the price, the cooking process, and the eating experience in ways most people don’t expect.
By the end of this, you’ll know exactly what you’re looking at, which one to buy, and how to cook it right.
What Is a Kansas City Strip Steak?
So here’s the simple version:
A Kansas City strip is a thick, bone-in strip steak cut from the short loin of the cow. It’s well-marbled, tender, and has a rich, beefy flavor especially in the meat right next to the bone. That bone runs along one edge and curves slightly, which gives it that signature look you’ll recognize instantly at a butcher counter. Think of it as a New York strip that still has its bone attached. Same muscle, same tenderness, just a little more going on.
Where It Comes From on the Cow
The short loin sits in the middle of the cow’s back, behind the ribs and in front of the sirloin. It’s a muscle that doesn’t do much heavy work and that’s exactly why steaks from this area tend to be so tender.
When a butcher cuts through the short loin with the bone left in and keeps just the strip portion (no tenderloin), you get a Kansas City strip. Remove the bone, and you’ve got a New York strip. Same cow, same section, different prep.
The bone itself is part of the lumbar vertebra specifically the transverse process. Not a lot of meat sits directly on it, but it does something interesting during cooking. We’ll get to that.
Read also: Cured Meats for Charcuterie Boards: A Practical Guide
Why Is It Called a Kansas City Strip?
The History Behind the Name
Kansas City has deep roots in the meatpacking world. By the late 1800s and early 1900s, it was one of the biggest beef-processing centers in the country. Local steakhouses made thick, bone-in strip steaks their signature, and over time the name just stuck.
The cut became tied to the Kansas City style of cooking generous portions, bone-in, cooked simply over high heat. It became a regional identity as much as a menu item.
Why the Same Steak Has Two Names
Honestly, even experienced cooks get confused by this. You’re not alone.
The New York strip got its name from Manhattan restaurants in the 1800s that served the boneless version as a premium cut. Both cities were essentially claiming the same muscle, just prepped differently. Over the decades, “New York strip” became the more nationally recognized name — partly because it sounds upscale, and partly because boneless cuts are just easier to portion and serve consistently in restaurants.
Here’s the thing:
Butchers in different regions still use both names, sometimes interchangeably. Some shops even label the bone-in version as a “New York strip bone-in,” which only adds to the mess. If you want the bone, just ask for a bone-in strip or a Kansas City strip by name. Any real butcher will know what you mean.
Kansas City Strip vs New York Strip
The Key Difference: Bone-In vs Boneless
This is really it. A Kansas City strip has the bone. A New York strip doesn’t. Everything else the muscle, the marbling pattern, the general flavor is nearly the same.
The bone in a KC strip runs along one edge and is usually trimmed to about an inch past the meat. Some butchers leave it longer for presentation. Either way, it adds weight you’re paying for but not fully eating, so keep that in mind when comparing prices at the case.
Flavor and Texture Comparison
Both cuts are firm and well-marbled with a strong, beefy flavor more pronounced than something like filet mignon.
The KC strip tends to taste a bit richer near the bone. Not because the bone magically injects flavor that’s a myth but because of how heat moves around it during cooking. That section just behaves differently, and in a good way.
In a side-by-side taste test with both cooked the same way, most people slightly prefer the bone-in version. But the difference is subtle. Not night and day.
Price and Availability
New York strips are easier to find and usually cheaper per pound because there’s no bone weight dragging up the price. Kansas City strips are harder to come by at a regular grocery store your best bet is a dedicated butcher shop, a specialty grocer, or a good meat market.
When both are priced similarly per pound, the boneless NY strip gives you more actual meat for the money. But if presentation and experience matter to you, the extra cost on the KC strip is worth it.
Bone-In vs Boneless: What Actually Changes?
Most articles skip this part entirely. I think it’s the most useful section, so let’s slow down here.
Does the Bone Really Add Flavor?
Not directly but indirectly, yes. And this confused me for a long time until I actually looked into the science of it.
Bone doesn’t release flavor compounds into the surrounding meat during a quick cook like grilling or pan-searing. The heat doesn’t penetrate deeply enough or long enough for that to happen. What the bone actually does is act as an insulator.
The meat right next to the bone cooks more slowly than the rest. So while the center and far edge of the steak hit your target temperature, the bone-side section stays slightly under which means juicier and more tender in that spot.
The flavor advantage isn’t chemistry. It’s physics. Less heat exposure means less moisture lost, and that gives you a better bite near the bone.
Cooking Differences
The bone creates uneven heat distribution. That sounds like a problem, but it’s really not it’s just something you need to work with rather than against.
On the grill, the bone side lags behind. Flip and rotate the steak properly and you can use that to your advantage. The bone-adjacent meat is more forgiving if you accidentally push past your target temp.
In a cast iron pan, things get a little trickier. The area right next to the bone won’t make full contact with the surface, so your sear won’t be perfectly even. Some cooks press the steak down gently to get better contact. Others just finish in the oven to let the heat even out.
Which Is Better for Grilling vs Pan-Searing?
For grilling: Kansas City strip wins. Full stop. High, dry heat suits the bone-in format perfectly, and the uneven geometry stops being an issue when you’re working with indirect heat and a lid.
For pan-searing:
the New York strip is easier. A flat, boneless steak makes full contact with a hot surface, which means a more even crust with less fuss. If you’re set on doing a KC strip in a pan, use a big heavy skillet and always finish in a 400°F oven after the initial sear.
How to Choose the Best Kansas City Strip
What to Look For
Marbling is your first priority. You want thin white lines of fat running through the meat itself — not just a thick layer of fat around the outside edge. That internal fat (intramuscular fat) is what keeps the steak juicy and flavorful during cooking.
Thickness is next. Go for at least 1 to 1.5 inches. Anything thinner and you’ll overcook the center before you get a proper crust.
Color should be a deep, cherry red. Brownish edges or a dull color usually mean it’s been sitting too long. Not necessarily spoiled, but not ideal.
USDA Grades, Simplified
USDA Prime has the best marbling and is what high-end steakhouses use. You’ll find it at specialty butchers or restaurant suppliers, and it costs more but the difference is real.
USDA Choice is the everyday standard. Most grocery stores carry it, and it’s genuinely good. A well-cooked Choice steak beats a poorly cooked Prime one every time.
USDA Select is the one to avoid for a cut like this. Low marbling, tends to dry out, and just not worth it for a strip steak.
Buying Mistakes to Avoid
Don’t go for the thinnest steak just to save a few dollars. You’ll lose all control over doneness.
Don’t write off a KC strip just because you’re paying for bone weight. You’re buying an experience, not just raw meat volume.
And don’t grab a package with a pool of liquid sitting at the bottom. A little myoglobin is normal, but excessive liquid means it’s been sitting. Move on.
How to Cook a Kansas City Strip Perfectly
Best Methods
Grill method: Preheat to high heat. Season generously with salt and pepper — you really don’t need much else. Sear each side for 3 to 4 minutes, then move to indirect heat with the lid closed for another 3 to 5 minutes depending on thickness. Give the bone side a little extra time.
Cast iron + oven method: Get the pan screaming hot. Add a high smoke-point oil. Sear both sides for 2 minutes each, then stand the steak on its fat cap edge for another minute. Transfer the whole pan to a 400°F oven and finish for 4 to 6 minutes until you hit your target.
Reverse sear (best for thick cuts): This is my personal favorite for anything over 1.25 inches. Put the steak on a wire rack in a 250°F oven until it’s about 10 to 15 degrees below your target temp. Then sear it hard in a ripping hot cast iron for 60 to 90 seconds per side. You get the most even doneness and a serious crust. Worth the extra time.
Internal Temperature Guide
- Rare: 125°F
- Medium-rare: 130–135°F (the sweet spot for KC strip)
- Medium: 140–145°F
- Medium-well: 150°F
- Well-done: 160°F+ (at this point you’re really losing everything that makes this cut worth buying)
Resting and Slicing
Let it rest at least 5 minutes after cooking. I know it’s hard. The smell alone makes you want to cut into it immediately. But cutting too soon pushes all those juices out onto your board instead of keeping them in the meat.
Slice against the grain when serving. The muscle fibers run lengthwise — cutting across them shortens those fibers and makes each bite noticeably more tender.
Common Mistakes When Cooking KC Strip
Overcooking the Lean Sections
The strip isn’t perfectly uniform in thickness. The thinner end cooks faster than the center. If you’re not watching, you’ll end up with one section perfect and the other overdone. Rotating the steak during cooking helps a lot. So does pulling it slightly earlier than your instincts say to.
Not Seasoning Properly
Salt needs time to actually work. Seasoning two minutes before you hit the grill means you’re mostly just coating the surface. Season at least 45 minutes ahead at room temperature or better yet, the night before, uncovered in the fridge. The surface dries out a bit, which actually helps you get a better crust.
Let’s be honest, most people under-season their steaks. Strip steaks are thick and bold, but they need more salt than you’d think. Season until it feels like too much. You’ll probably land about right.
Skipping Rest Time
Everyone knows this one. Almost everyone still skips it. Five minutes with a hot steak in front of you feels like a long time but a steak cut too soon loses a noticeable amount of moisture compared to one that’s been allowed to rest. Set a timer, walk away, and come back.
When Should You Choose Kansas City Strip Over NY Strip?
Best for Grilling Enthusiasts
If you love cooking over charcoal and you want something that looks great on the plate, go KC strip every time. The bone handles direct flame beautifully, adds visual drama, and gives that slightly different texture near the bone that makes working through the steak more interesting.
Flavor vs Convenience
Cooking for guests and want something that makes an impression? KC strip. It looks like a steakhouse cut and tastes like one too.
Quick weeknight dinner, multiple steaks in a pan, no fuss? New York strip. Easier to sear evenly, easier to portion, easier to find at your regular grocery store.
Restaurant vs Home Use
Steakhouses go with the KC strip when they want a bone-in strip on the menu — it photographs well and feels like a premium order. At home, either works fine. It really just comes down to what experience you’re after that night.
What Most People Get Wrong About Kansas City Strip
Here’s the misconception I hear most: people assume bone-in automatically means dramatically better flavor. So they pay more for the KC strip expecting a completely different tasting steak and then feel let down when it tastes pretty similar to a New York strip.
The bone’s effect is subtle and mostly textural, not some kind of flavor injection. You’re really paying for a juicier bite near the bone and a better-looking plate. That’s genuinely worth it for the right occasion. But if someone at a cookout tells you the bone “melts flavor into the meat,” that’s just not how it works on a fast cook.
The other thing people consistently miss is seasoning timing. A great KC strip starts being prepared hours before it ever hits a hot surface. That part matters more than most people realize.
Conclusion
Look, the Kansas City strip isn’t a magic steak. It’s not dramatically different from a New York strip, and anyone who tells you otherwise is overselling it. But it is a genuinely satisfying cut especially when you cook it right and eat it in good company.
The bone adds something real, even if it’s subtle. The presentation is hard to beat. And if you’re the kind of person who enjoys the process of cooking a great steak seasoning it the night before, firing up the grill, letting it rest while you fight the urge to cut into it then the KC strip is absolutely the right choice.
Season it early, cook it hot, let it rest, and don’t stress the details. That’s really all there is to it.
FAQs
Is Kansas City strip the same as New York strip?
They’re from the same part of the cow the short loin but a Kansas City strip is bone-in and a New York strip is boneless. Same muscle, same general flavor, just prepped differently.
Is bone-in steak always better?
Not always. Bone-in has a slight edge in juiciness near the bone and definitely wins on presentation. But for pan-searing or a quick weeknight dinner, boneless is easier to deal with. It depends on how you’re cooking and what you’re going for.
What is the best thickness for KC strip?
Between 1 and 1.5 inches. Thick enough to get a proper crust without overcooking the center, and sturdy enough to handle the grill or a cast iron well.
Can you cook it in a pan only?
Yes, but finish it in the oven. Sear both sides and the fat cap on the stovetop, then move the pan to a 400°F oven until you hit your temp. Pan-only works on thinner cuts but risks uneven results on anything thick.
Why is Kansas City strip sometimes hard to find?
Grocery stores favor the boneless New York strip because it’s easier to portion and sells more consistently. For a KC strip, head to a real butcher shop or specialty meat market. Some stores bring them in seasonally, especially around summer grilling season.

Ever lifted that shiny dome cover off your room service plate and thought, “wait, what even is this thing?” I’ve been there. Or maybe you walked past a hotel buffet and noticed those clear panels hovering over the food and wondered what they’re actually for. Hotels deal with food at a massive scale, and keeping it covered, fresh, and safe is a serious operation. If you’ve ever been curious about what hotels use to enclose food, I’m breaking it all down here, kitchen by kitchen, station by station.
What do hotels use to enclose thefood ?
Hotels mainly use plastic wrap, aluminum foil, airtight containers, metal or plastic cloches (those dome-shaped covers), chafing dish lids, and sneeze guards. The exact method depends on where the food is. Whether it’s being stored, served at a buffet, or sent up via room service makes a real difference in what gets used.
Why Hotels Cover Food
It’s not just about looking professional. There are real, practical reasons behind every cover and wrap you see in a hotel.
The biggest one is hygiene. Open food in a busy kitchen or buffet area gets exposed to airborne bacteria, insects, and cross-contamination from nearby dishes. A simple lid or wrap cuts that risk dramatically.
Temperature control is a close second. Hot food needs to stay hot, cold food needs to stay cold. The right cover traps heat or holds the chill in, and that directly affects how the food tastes when it reaches you.
And yes, presentation plays a role too, especially in hotels. A cloche lifted at your table feels like a moment. It sets the tone and signals that your meal was handled with care. Little details like that are part of what guests are actually paying for.
Read also: The Complete Guide to Seafood Boil Kit
Food Covers Used in Hotel Kitchens
This is where most of the action happens, and honestly, the tools here are far more practical than fancy.
Plastic Wrap (Cling Film)
This stuff is everywhere in hotel kitchens. Prepped ingredients, marinated proteins, cut vegetables, leftover sauces, almost everything gets wrapped tightly with cling film before going into the refrigerator. It’s cheap, quick to use, and seals out air really well.
Here’s something most people don’t realize: hotels buy commercial-grade cling film on large rolls. It’s thicker and clings far better than the roll you have in your kitchen drawer. Chefs use it on entire trays, individual portions, and storage bowls throughout the day without even thinking about it.
Airtight Containers and Lids
For anything stored longer than a few hours, kitchens switch to food-grade plastic or stainless steel containers with snap-on or press-fit lids. These are stackable, labeled by food type and prep date, and organized carefully in cold rooms or walk-in fridges.
You’ll see these used for stocks, sauces, prepped garnishes, and dry ingredients. They block moisture and odors and keep everything in order during a busy service.
Aluminum Foil
Foil is the go-to for hot foods going into or coming out of the oven. It traps steam, keeps food moist, and handles high heat without any issues.
A roast going into a banquet? Foil-wrapped until service. Bulk garlic bread? Foil trays with a foil top. It’s fast, disposable, and gets the job done without any fuss.
Food-Grade Storage Bins
Large hotels use heavy-duty polypropylene bins with tight-fitting lids for bulk prep. These are common for marinating large cuts of meat, storing bulk salad greens, or holding prepped ingredients overnight. Durable, easy to clean, and built to meet food safety standards.
What Hotels Use for Room Service Food
Room service is a different challenge entirely. Food has to travel from the kitchen to a guest room while staying at the right temperature and still looking good when it lands on your table.
Metal or Plastic Cloches (Dome Covers)
That classic dome cover you see lifted at the table? It’s called a cloche, from the French word for bell. Makes sense when you look at the shape. Hotels use stainless steel cloches for hot dishes. They trap heat during transit and create a nice moment when the cover comes off.
Plastic versions exist too, mostly for lighter presentations or budget properties. Metal ones are heavier and hold heat better, which is why upscale hotels stick with them.
Insulated Food Covers and Carriers
Beyond the cloche, many hotels use insulated tray covers or heated delivery bags. These wrap around the whole tray, not just one dish. Think of them as a portable oven that keeps everything warm from the kitchen corridor all the way to your room.
Some higher-end hotels take it further with heated trolleys that have built-in warming elements. Food stays at serving temperature for 20 to 30 minutes without losing quality. I spent way too long wondering how room service food arrived still hot. That’s how.
Disposable Lids and Wraps
For lighter items like fruit plates, pastries, or sandwiches, hotels often go with clear plastic lids or plastic domes that snap onto plates or bowls. Single-use, which cuts down on dishwashing and keeps hygiene tight for items moving without a trolley.
How Buffet Food Is Protected in Hotels
Let’s be honest, buffets are a bit of a hygiene nightmare if they’re not managed well. Food sits out for hours, hundreds of guests walk by, and things can go wrong fast. Hotels handle it with a few solid methods.
Sneeze Guards
Those clear panels you lean over at the buffet? They’re called sneeze guards. Their whole job is to block the line between a guest’s face and the food. Usually made of tempered glass or acrylic and mounted on the buffet frame at an angle.
You might never pay attention to them, but health regulations in most countries actually require them for open food service. They get cleaned regularly throughout the service too, not just at the end.
Chafing Dish Lids
Chafing dishes keep hot food warm using a water pan and a fuel burner underneath. The lid goes on between servings. Some are hinged, some are removable, but the function is the same: trap heat and keep food protected when no one’s actively serving.
Hotels almost always use stainless steel chafing dishes. They’re heat-safe, durable, and easy to swap out or clean between services.
Roll-Top Buffet Covers
Some hotels use roll-top covers, curved lids that slide back on a track above the food. You’ll see these over bread stations, pastry displays, or dry buffet items. They stay closed between guest visits and open easily without needing to be lifted and set aside.
For cold buffets, look out for ice beds with clear covers above them. Salads and cold cuts stay chilled from below and protected from above at the same time.
Disposable vs Reusable Food Covers in Hotels
Both have a place, and hotels make the call based on the situation.
When Hotels Use Disposable Options
Disposables make the most sense in high-volume or fast-moving situations. Large banquet portions, grab-and-go breakfast items, room service sandwiches, these often get single-use cling film, plastic lids, or foil trays. It speeds up service and reduces any risk of mix-ups.
Budget hotels lean heavily on disposables overall because they cut labour on the back end.
When Reusable Covers Are Preferred
Luxury and full-service hotels invest in reusable metal cloches, polished serving dishes with lids, and branded insulated carriers. These last for years, look far better on a tray, and match the premium experience guests expect.
There’s also an environmental reason. Reusable covers produce less waste, and a lot of hotels now treat that as part of their sustainability commitments, not just a bonus.
Cost vs Hygiene Considerations
Here’s the thing: reusable items need to be properly washed and sanitized after every single use. If that process slips, they become a contamination risk. Disposables remove that variable but add cost and waste over time.
Most hotels land somewhere in the middle. Reusables up front in the dining room, disposables in the kitchen and for takeaway-style packaging.
Real-World Example: A Day in a Hotel Kitchen
Here’s what the flow actually looks like from prep to plate.
Morning prep starts early. Chefs portion proteins, chop vegetables, and make sauces. Everything gets labeled and wrapped tightly with cling film or sealed into containers before going into the walk-in fridge.
By midday, banquet prep kicks in. Large foil trays are filled, covered with foil tops, and held in warming or speed ovens until service.
When room service orders come in, individual plates are assembled, covered with a stainless steel cloche, placed on a tray, and sent up.
At the buffet, chafing dish lids stay on between rushes. Staff check temperatures every 30 minutes and swap out anything that’s been sitting too long. Sneeze guards stay in place the whole service.
It’s not glamorous behind the scenes. It’s methodical and mostly about stopping problems before they start.
What Most People Get Wrong About This Topic
You might be wondering if hotels just pick one method and stick with it. They don’t, and that’s actually the point. The kitchen uses whatever is fastest and most food-safe for storage. Room service uses whatever keeps food presentable in transit. Buffets use whatever protects food from guest contact and temperature loss.
There’s also a common assumption that plastic wrap is a lazy or temporary fix. In professional kitchens, cling film is a primary tool used dozens of times every single day. It’s not a workaround. It’s built into the system.
And the cloche, many guests assume it’s just for looks. It genuinely serves a purpose, trapping heat, blocking air, and protecting the dish all the way from the kitchen to your table.
Conclusion
Next time you’re at a hotel buffet or lifting that dome off your room service tray, you’ll know exactly what’s going on and why. Every wrap, lid, guard, and cover has a job. None of it is random. If there’s one thing worth taking home from all of this, it’s that covering food properly isn’t complicated. Hotels just do it consistently, and that consistency is what keeps everything safe, fresh, and worth eating. A little of that thinking goes a long way in your own kitchen too.
FAQs
Do hotels use plastic wrap to cover food?
Yes, constantly. It’s one of the most used tools in hotel kitchens. Commercial-grade cling film covers prepped ingredients, leftover portions, and storage containers before refrigeration throughout the day.
What is the dome cover used in room service called?
It’s called a cloche. The word comes from French and means bell, which fits the shape perfectly. Metal cloches are standard in most mid-range to luxury hotels for room service and formal dining.
How do hotels keep buffet food hygienic?
Through sneeze guards, chafing dish lids, and regular temperature monitoring. Food gets replaced on a timed rotation, and staff are trained on proper handling to reduce contamination risks.
Are hotel food covers reusable?
Many are. Cloches, chafing dish lids, and storage containers are all washed and reused. Disposable covers like cling film, foil, and plastic lids are single-use and more common in kitchen prep and quick-service settings.
What is the safest way to cover food at home like hotels do?
Use airtight containers for anything going in the fridge, cling film for short-term coverage, and foil for hot foods going into the oven. For serving, a simple plate placed on top of a bowl works fine in place of a cloche.

Honestly, the first time I tried to put together a cured meats for charcuterie board, I stood in the deli aisle for twenty minutes and just grabbed whatever looked familiar. The result? A board full of three different salamis that all tasted basically the same. Flat, repetitive, and a little embarrassing when guests started reaching for the crackers instead.
Here’s the thing: building a board that actually impresses people isn’t complicated. You just need to know which cured meats to pick and how they work together. This guide walks you through the best cured meats for a charcuterie board, how to balance flavors and textures, how much to buy, and what to pair with everything. By the end, you’ll have a system you can repeat every single time.
What Are Cured Meats for a Charcuterie Board?
Cured meats are meats preserved through salt, smoke, drying, or fermentation. They’re ready to eat straight from the package, no cooking needed, which is exactly why they work so well on a board. Think prosciutto, salami, chorizo, and pâté. Each one brings a different flavor and texture, and that variety is what makes a charcuterie spread worth eating.
The difference between fresh and cured meats
Fresh meat like chicken breast or raw sausage has a short shelf life and needs heat to be safe. Cured meats have gone through a preservation process that pulls out moisture and keeps bacteria in check, so they stay stable at room temperature long enough for a full gathering. Prosciutto is air-dried for months. Salami is fermented. Chorizo is smoked or dried. Same basic ingredient, completely different results depending on the method.
Why cured meats work best for boards
They don’t need cooking. They hold their texture at room temperature. They slice cleanly. And they come in a huge range of flavors, from mild and buttery to sharp, spicy, or melt-in-your-mouth soft. That variety is the whole point.
Read also: English Cut Short Ribs: The Complete Guide
The Best Cured Meats for Charcuterie Boards
Classic options
Prosciutto is probably the most recognized charcuterie meat out there. It’s Italian dry-cured ham, sliced paper thin, with a delicate salty flavor and a silky texture. It literally melts on your tongue. Think of it as your mild anchor meat, the one that makes everything else around it taste better.
Salami is a broad category, but most varieties are firm, slightly tangy, and moderately salty. Genoa salami is your safe crowd-pleaser. Widely available, not too aggressive, and it pairs well with almost every cheese on the planet.
Soppressata is similar to salami but coarser in texture with a slightly more rustic, peppery edge. It has a bit more personality than Genoa and works well when you want something that feels like a small upgrade without going fully spicy.
Bold and spicy choices
Spanish chorizo (not to be confused with raw Mexican chorizo) is a dry-cured sausage built around smoky paprika. Rich, slightly smoky, with a gentle heat depending on the variety. It adds real depth to a board.
Calabrese salami comes from southern Italy and brings actual spice. It uses Calabrian chili and has a pronounced kick. If your guests love heat, this is your move. If you’re unsure about your crowd, use a little and keep milder options nearby.
Rich and fatty meats
Capicola, also called coppa, comes from the neck and shoulder of the pig. It’s cured and spiced, usually with paprika or black pepper, and it’s richer and more marbled than prosciutto. Deeper flavor, more savory. It’s a great middle-ground meat that works for almost any board.
Mortadella is the underrated one. You might overlook it, and I get it, it looks basic. But once it’s on the board it disappears faster than anything else. It’s a large Italian sausage with pistachios and fat running through it, smooth and almost creamy in texture. Mild, fatty, and completely different from anything sliced thin.
Spreadable meats
Pâté is a smooth, rich paste made from liver, usually duck or chicken, blended with fat and aromatics. Intensely flavorful, totally spreadable, and it adds something interactive to the board. Put out a small ramekin with a butter knife and watch it go first.
Rillettes are chunkier. Made by slow-cooking meat in its own fat until it shreds into a rough paste. More rustic than pâté but equally delicious. Both are great options if you want the board to feel more like a real spread and less like a deli tray.
The Flavor-Texture Pairing Framework
Let’s be honest, this is the part most guides completely skip. Listing meats is easy. What actually makes a board work is understanding how those meats relate to each other.
I spent way too long at parties eating boards that had four meats and somehow still felt boring. Once I started thinking about balance instead of just variety, everything clicked.
How to balance flavors
Think in four categories: mild, salty, spicy, and rich. A well-built board has at least one from each. Here’s what that looks like in practice:
Mild: prosciutto or mortadella Salty: Genoa salami or soppressata Spicy: chorizo or Calabrese Rich: capicola or pâté
When every meat on your board falls into the same flavor category, things start tasting identical after the second or third bite. Contrast is what keeps people coming back for more.
How to mix textures
You want three textures represented: firm, soft, and spreadable.
Firm meats like salami and chorizo hold their shape, stack well, and have a satisfying chew. Soft meats like prosciutto and mortadella are tender and almost luxurious. Spreadable options like pâté or rillettes give the board a completely different kind of interaction.
If all your meats are firm sliced rounds, the board gets boring fast, regardless of how good each individual piece is.
The simple 4-meat formula
Pick one mild, one salty, one spicy, one rich. Make sure at least one is soft or spreadable. Done. This works for a casual weeknight, a dinner party, or a holiday gathering. Swap in different specific meats each time you build a board, but keep the same structure. It always comes out balanced.
How to Choose Cured Meats at the Store
What to look for in quality meats
Flip the package and check the ingredient list. Good cured meats have short lists, mostly meat, salt, and spices. Long lists with lots of preservatives and fillers usually mean lower quality. For whole muscle meats like prosciutto or coppa, look for even color and consistent marbling. Walk away from anything with a grayish tint or excessive liquid pooling in the package.
Pre-sliced vs deli counter
Pre-sliced vacuum packages are convenient and hold up well once opened. Deli counter slicing is better for delicate meats where freshness and slice thickness actually matter. If you’re buying a day or two ahead, pre-sliced is totally fine. But if you want the best texture possible, especially for prosciutto or mortadella, get it sliced fresh.
Budget vs premium picks
- Budget-friendly: Genoa salami, pepperoni, basic hard salami. Widely available, affordable, and genuinely good.
- Mid-range: soppressata, Spanish chorizo, mortadella. A step up in flavor without a big jump in price.
- Premium: imported prosciutto di Parma, ‘nduja, truffle salami, artisan pâté. Worth it for special occasions, but not necessary for everyday boards.
You really don’t need to spend a lot. One or two mid-range picks mixed with solid budget options makes a great board every time.
How Much Cured Meat Per Person?
Portion guide by group size
- As an appetizer before a meal: plan for 2 to 3 ounces of total meat per person.
- As the main event or a meal replacement: go up to 4 to 5 ounces per person.
- For 4 to 6 people as an appetizer, buying about 6 ounces each of three or four different meats is a solid starting point. That gives variety without waste.
- For larger groups of 10 to 15, scale to roughly 2.5 ounces per person across your full meat selection.
Adjusting based on what else is on the board
If the board is loaded with cheeses, crackers, fruits, and nuts, people naturally eat less of each individual thing. If meat is the clear star with minimal sides, buy more. When in doubt, get a little extra. Leftover prosciutto wrapped around fresh melon the next morning is never a problem.
Pairing Cured Meats with Cheeses and Sides
Best cheese pairings by meat type
- Prosciutto pairs beautifully with mild, creamy cheeses like fresh mozzarella, burrata, or brie. The salt in the meat and the fat in the cheese balance each other naturally.
- Salami works well with aged cheeses like sharp cheddar, aged gouda, or manchego. The tanginess of the salami meets the nuttiness of aged cheese in a way that just works.
- Chorizo and spicy meats need something cooling alongside them. Fresh goat cheese or a cream cheese-style spread is perfect. The heat needs contrast, not more intensity.
- Capicola or coppa goes nicely with provolone or fontina. Both have enough flavor to hold up without competing.
Pâté and spreadable meats work on their own or alongside a mild, creamy brie.
Fruits, nuts, and crackers
Marcona almonds, candied walnuts, and pistachios add crunch and a little sweetness. Fresh grapes, sliced fig, or dried apricots give a fruity contrast that cuts right through fatty meats.
For crackers, plain water crackers and thin crostini are the most versatile. They don’t fight with the meat’s flavor. Seeded or herbed crackers can work, but stick to one flavored variety so the board doesn’t get chaotic.
Whole grain mustard and honeycomb are small additions that make a surprisingly big difference. A swipe of mustard on a slice of salami is genuinely excellent.
Common Mistakes to Avoid
Using too many similar meats
Putting Genoa salami, hard salami, pepperoni, and soppressata on the same board isn’t variety. They’re all in the same flavor family. Your guests end up tasting the same basic profile four times. Pick one or two salamis and use the other slots for something actually different.
Ignoring texture variety
All firm sliced meats is the most common mistake people make. It turns a charcuterie board into a deli platter. Add at least one soft meat and one spreadable, even in small amounts.
Overcrowding the board
More is not always more. A board crammed with eight different meats in tiny amounts is harder to eat from, harder to arrange, and honestly just confusing. Four well-chosen meats with space to breathe is more impressive and more enjoyable than a chaotic pile of options.
Also skip anything that needs cooking, anything so pungent it steamrolls everything else, and novelty meats that don’t pair naturally with cheese and crackers.
What Most People Get Wrong About Charcuterie Meats
The biggest mistake is thinking more variety automatically means a better board. People see ten different meats and assume it’s impressive. In reality, a focused board with four meats that genuinely complement each other is almost always more satisfying to eat.
The second thing people miss?
The meat isn’t the whole story. Prosciutto next to mild mozzarella and plain crackers is fine. Prosciutto next to honeycomb, fresh figs, and a sharp aged parmesan is a completely different experience. Quality matters, yes, but the pairings are what take a board from decent to genuinely memorable.
Example Charcuterie Board Setups
Simple 2 to 3 meat beginner board
Good for a casual night in or a small gathering of 2 to 4 people. Use prosciutto, Genoa salami, and a small log of soppressata. Pair with aged cheddar, water crackers, grapes, and a handful of almonds. Simple, balanced, no stress.
Balanced 4-meat board using the framework
Prosciutto (mild, soft), Genoa salami (salty, firm), Spanish chorizo (spicy, firm), and a small ramekin of duck pâté (rich, spreadable). This hits all four flavor categories and all three texture types. Add brie, manchego, fruit, nuts, and crackers. This board works for any occasion, any crowd.
Premium entertaining board
Prosciutto di Parma, ‘nduja (a spreadable spicy Calabrian salami that’s incredible with crusty bread), truffle salami, and capicola. Add aged gouda, gorgonzola, honeycomb, Marcona almonds, sliced pear, dried fig, and high-quality crostini. This is the board for dinner parties and celebrations. Worth every extra dollar.
Conclusion
Here’s my honest takeaway after building more boards than I can count: the ones people remember aren’t the most expensive or the most packed. They’re the ones where everything on the board made sense together.
Pick one mild, one salty, one spicy, one rich meat. Mix your textures. Pair with intention. That’s the whole system, and it works every time. Start simple, nail the basics, and build from there. Your guests won’t miss the chaos. They’ll just keep reaching for more.
FAQs
What are the top 3 meats for a charcuterie board?
Prosciutto, salami, and one spicy or rich option like chorizo or capicola cover most situations. These three alone give you flavor and texture variety without overcomplicating things. They’re also easy to find at most grocery stores.
Can I make a charcuterie board on a budget?
Absolutely. Genoa salami, pepperoni, and hard salami from a regular grocery store all work great. Add a wedge of sharp cheddar and some crackers and you’ve got something genuinely enjoyable without spending much at all.
What meats should beginners start with?
Start with prosciutto and Genoa salami. They’re familiar, easy to find pre-sliced, and pair well with almost everything. Once you’re comfortable building around those two, add something with more character like chorizo or capicola.
How far in advance can I prepare cured meats?
You can arrange cured meats up to 2 hours before serving and keep them covered at room temperature. For longer prep, refrigerate them and bring everything out 30 minutes before guests arrive. Pre-sliced packages can be opened and arranged on the board an hour ahead with no issues.
Are there alternatives to pork-based cured meats?
Yes. Bresaola is beef-based, air-dried, lean, and mildly salty with an earthy flavor. Turkey and chicken-based salami are available in most stores too. For non-pork options, bresaola is the most natural fit for a charcuterie board and pairs just as well with cheese and crackers as anything pork-based.

Bullseye candy is one of those old-school treats that people instantly recognize but can rarely fully explain. It’s the small, chewy caramel piece with a soft white center, and it’s been sitting in candy dishes and bulk bins for decades. Most people know it by taste, not by name. This article breaks down exactly what bullseye candy is, what that mysterious cream center is actually made of, how the candy is manufactured, and what makes it different from other similar sweets.
What Is Bullseye Candy?
Bullseye candy is a two-layer chewy candy made of a soft caramel outer shell wrapped around a sweet, creamy white center. The combination of those two textures is what makes it stand out. It’s not a lollipop, not a hard candy, and not a plain caramel. It’s its own thing entirely.
The most well-known version is made by Goetze’s Candy Company under the name Caramel Creams. The “bullseye” name comes from the cross-section of the candy, which shows a white circle surrounded by caramel, much like a bullseye target.
Why It’s Also Called Caramel Creams
The official product name from Goetze’s is actually Caramel Creams, not Bullseye candy. The bullseye nickname came from customers describing what the candy looks like when you bite it in half. Over time, both names stuck, and today people use them interchangeably. If you walk into a bulk candy store and ask for either one, you’ll get the same thing.
The Brand Behind It: Goetze’s Candy Company
Goetze’s has been around since 1895, making it one of the older candy companies in the United States. They started in Baltimore, Maryland, and the Caramel Creams recipe has stayed largely the same since the early 1900s. The company is still family-owned, which is unusual for a candy brand that’s been operating for over 120 years. That consistency is part of why the candy has such a loyal following among people who grew up eating it.
Read also: White Chocolate Pretzels: The Complete Guide to Making Them Perfectly
What Is Inside Bullseye Candy?
The outer layer is soft caramel. The inside is a white cream filling. But what exactly is that cream? This is the part that confuses a lot of people.
The Outer Caramel Layer Explained
The outside of the candy is a classic soft caramel, made primarily from corn syrup, sugar, and dairy ingredients like skim milk or whey. It has a chew to it but isn’t sticky or hard. It bends before it breaks. The caramel is mild and buttery, not overly rich.
What makes this caramel different from a standard caramel square is the texture balance. It’s engineered to be soft enough to give way when you bite through it without pulling apart completely before you get to the center.
The Cream Center: What It’s Really Made Of
The white center is a fondant-style sugar cream. It’s not marshmallow, it’s not icing, and it’s not whipped cream. Think of it as a dense, smooth sugar paste with a slightly vanilla flavor. The main ingredients are sugar, corn syrup, and a small amount of fat or dairy to give it that smooth texture.
If you’ve ever made homemade fondant or worked with the inside of a cream-filled chocolate, the texture is similar. It’s soft, it melts slightly on the tongue, and it’s noticeably sweeter than the caramel surrounding it.
Common Myths About the Filling
A lot of people assume the center is marshmallow because it’s white and soft. It’s not. Marshmallow has a spongier, airier texture. The cream center in bullseye candy is denser and smoother.
Others think it might be nougat. Again, not quite. Nougat is typically firmer and sometimes contains egg whites or nuts. The bullseye cream center is purely a sugar-based fondant without any of that.
How Bullseye Candy Is Made
The manufacturing process is actually more interesting than you’d expect for such a simple-looking candy.
Making the Caramel Base
The caramel is cooked in large batches using a standard confectionery process. Sugar, corn syrup, and dairy are heated together until they reach a specific temperature that creates the chewy consistency. Too hot and it becomes brittle. Too low and it stays too soft to hold its shape. Once cooled slightly, the caramel is rolled into sheets or ropes, depending on the production method.
Creating the Cream Filling
The cream center starts as a cooked sugar syrup that gets beaten or worked until it crystallizes into a smooth, white paste. This process is similar to making fondant from scratch. The agitation causes tiny sugar crystals to form, which gives the filling that melt-in-your-mouth smoothness. A small amount of vanilla flavoring is typically added at this stage.
How the “Bullseye” Shape Is Formed
Here’s where it gets clever. The cream filling is shaped into a rope or log, and then the caramel is wrapped around it, encasing it completely. The whole thing is then cut into individual pieces. When you cut it cross-section, you see the white circle surrounded by caramel, which is where the bullseye name comes from.
Industrial machines handle this at scale, but the basic process is the same as it would be in a home kitchen. Wrap one thing around another, cut it into pieces.
What Does Bullseye Candy Taste Like?
If you’ve never had one, the taste is easier to understand once you know the structure.
Texture Breakdown: Chewy vs Creamy
The first bite gives you resistance from the caramel. It’s chewy but not tough. As you work through it, the cream center releases and the two textures mix together. The caramel stays in your mouth a bit longer while the cream dissolves faster. It creates a layered eating experience that’s different from chewing through a plain caramel or a plain cream candy on its own.
Flavor Profile and Sweetness Level
Both layers are sweet, but in different ways. The caramel has a slight dairy richness, almost buttery. The cream center is purely sweet with a hint of vanilla. Together, they’re noticeably sweet but not overwhelming. The dairy notes in the caramel balance out the pure sugar intensity of the cream.
It’s mild enough that you can eat several in a row without feeling like your teeth are dissolving, which is probably why they’ve always been popular in bulk candy settings.
How It Compares to Similar Candies
People often confuse bullseye candy with a few other classics, so it’s worth clearing up the differences.
Bullseye vs Tootsie Rolls
Tootsie Rolls are single-layer chocolate-flavored chews. There’s no filling, no contrast in texture. The chew is more uniform throughout. Bullseye candy is caramel, not chocolate, and the two-layer structure gives it a completely different eating experience. If someone likes Tootsie Rolls, they might enjoy bullseye candy, but they’re not really the same category.
Bullseye vs Filled Caramels
There are other filled caramels on the market, including some that use a liquid center or a harder fondant. The Goetze’s version sits in the middle. The cream is soft but not liquid, giving it a more controlled eating experience. Some filled caramels have a center that can be too runny or too hard. The bullseye version has a texture that holds up well at room temperature.
What Makes It Unique
The combination of a genuine dairy caramel and a smooth fondant center is harder to pull off than it looks. Many similar candies either use lower-quality caramel or a cream center that tastes artificial. The Goetze’s version has a mild but authentic flavor that’s stayed consistent for decades, which is rare in mass-produced candy.
Different Types of Bullseye Candy
Vanilla Cream: The Classic
The standard version uses a vanilla-flavored white cream center. This is the one most people think of when they hear the name. The wrapper is usually a warm caramel color with simple branding.
Chocolate Cream Variants
Goetze’s also makes a chocolate version called Chocolate Caramel Creams. The caramel outer layer is replaced with a chocolate-flavored chew, and the cream center stays the same. It’s a bit richer and darker in flavor. Some people prefer it, some find it too sweet. It’s harder to find than the original.
Limited or Seasonal Flavors
Goetze’s has occasionally released holiday packaging or seasonal variations, but the core recipe stays the same. You’re unlikely to find a dramatically different flavor at most retailers.
How to Store Bullseye Candy and Keep It Fresh
Shelf Life
Bullseye candy generally lasts around 12 months from the manufacturing date when stored properly. You’ll usually find a best-by date on bulk bags or retail packaging. The candy doesn’t go bad in a dangerous way, but the texture can change over time. Old pieces tend to get harder and less chewy, and the cream center can crystallize in a way that feels grainy instead of smooth.
Best Storage Conditions
Keep it at room temperature, away from heat and direct sunlight. Heat softens the caramel to the point where pieces stick together and lose their shape. Humidity can also affect the cream center. A sealed container in a cool, dry spot is ideal. The refrigerator works in very hot climates but can make the caramel firmer than intended.
Where to Buy Bullseye Candy
Online vs Local Stores
Bulk candy websites and Amazon carry Goetze’s Caramel Creams in bags ranging from small to very large. This is the easiest option if you want a specific quantity. Local options include candy shops, nostalgic candy stores, and some grocery store bulk sections. Big-box retailers occasionally carry them, especially around Halloween when classic candies get more shelf space.
How to Identify Authentic Products
The genuine Goetze’s product will have the Goetze’s name on the label. Watch for generic bulk candy labeled only as “caramel creams” or “bullseye candy” without a brand name. These imitations sometimes use a harder, less flavorful caramel and a cream center that’s more waxy than smooth. If the price seems too good for a large quantity, it’s worth checking the brand before you buy a pound of something that tastes off.
What Most People Get Wrong About Bullseye Candy
Most people assume the cream center is some kind of marshmallow or whipped filling. It’s not, and that misconception actually undersells how interesting the candy is. Fondant-style cream has a very different behavior in your mouth. It dissolves slowly and evenly, which is why the candy feels smooth rather than airy.
The other common misconception is that all bullseye-style candies are the same. They’re not. The Goetze’s version specifically uses a dairy-based caramel that has a noticeable richness. Generic versions often skip the dairy or use cheaper substitutes, and the flavor difference is easy to notice once you’ve had the real thing.
Conclusion
Bullseye candy is simpler than most people realize once you understand its two-part structure. A soft dairy caramel on the outside, a smooth fondant cream on the inside. The Goetze’s version has been doing this well for over a century, and the texture contrast is what keeps people coming back. If you’ve been buying generic versions and wondering why they don’t taste quite right, the brand matters more than you’d expect with this one. Stick with Goetze’s, store them somewhere cool and dry, and they’ll stay exactly as they should be.
FAQs
What is the white center in bullseye candy made of?
The white center is a fondant-style sugar cream, made primarily from sugar, corn syrup, and a small amount of dairy fat. It’s similar to the inside of a cream-filled chocolate but softer. It’s not marshmallow, not nougat, and not whipped cream.
Is bullseye candy gluten-free?
Goetze’s Caramel Creams do not contain wheat-based ingredients, but the company does not certify them as gluten-free due to potential cross-contact during manufacturing. If you have celiac disease or serious gluten sensitivity, contact the company directly before eating them.
Is it caramel or taffy?
It’s caramel. Taffy is pulled and aerated during production, which gives it a lighter, stretchier texture. Caramel is cooked differently and has a denser, chewier consistency with a dairy richness that taffy doesn’t have. Bullseye candy has none of the stretch you’d associate with taffy.
Does bullseye candy melt easily?
The caramel softens in warm temperatures. If you leave them in a hot car or near a heat source, they’ll stick together and lose their shape. They don’t melt like chocolate, but they do get noticeably softer above around 80 degrees Fahrenheit.
Can you make bullseye candy at home?
Yes, and it’s a fun project. You’d make a simple caramel using sugar, butter, and cream, and a fondant center using sugar syrup beaten until smooth. Roll the fondant into a log, wrap the caramel around it, let it firm up, and cut into pieces. It takes some patience but the results are close to the original.
-

 Food1 month ago
Cuts of Steak: Complete Guide to Beef Cuts
-

 Food1 month ago
What Is Andouille Sausage? Complete Guide
-

 Food7 days ago
Shirleys Coffee Shop Guam Locations Menu and Guide
-

 Drinks2 weeks ago
Easy Lychee Martini Recipe Sweet & Floral Cocktail
-

 Food1 month ago
Ultimate Tripas Recipe and Cooking Guide
-

 Food2 weeks ago
Italian Ice Flavoring Guide: Flavors, Bases, and Recipes
-

 Tech2 weeks ago
DemonScans Review: Is It Safe for Manga Readers?
-

 Food2 weeks ago
Black Pudding Guide: History, Recipe & Nutrition