
Food
How to Cook Whole Tilapia (Complete Beginner’s Guide)
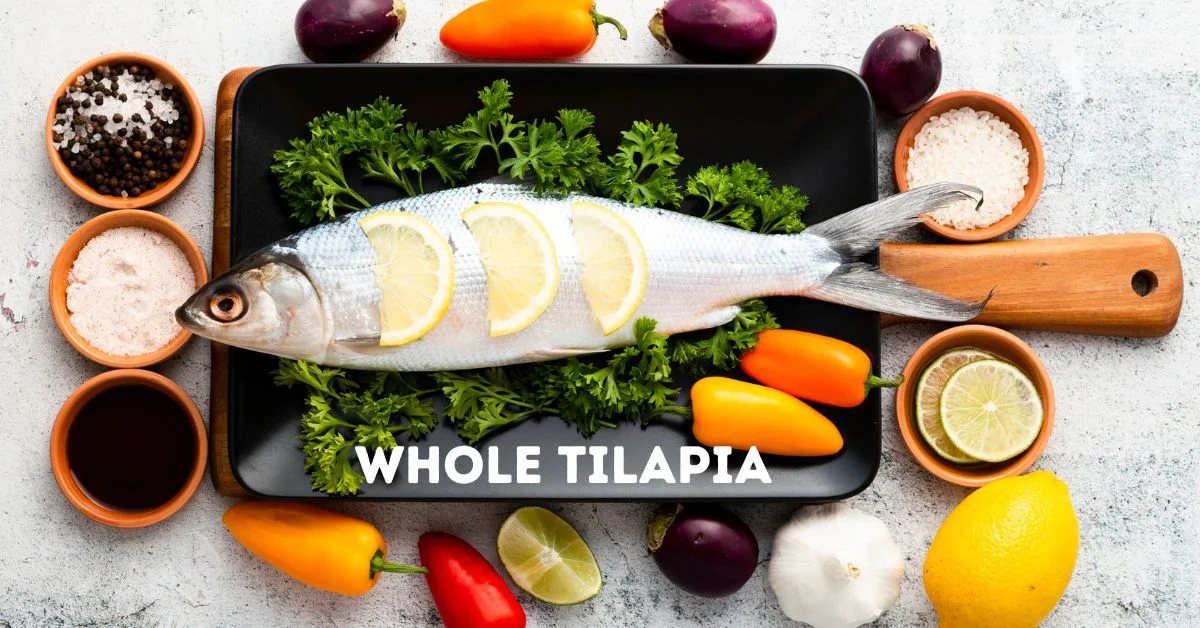
Let me be straight with you the first time I saw a whole tilapia at the market, head and all, I walked right past it and grabbed a fillet instead big mistake. Once I finally gave whole fish a proper shot, I realized I had been missing out on better flavor, juicier texture, and honestly a much cheaper meal. If you have been avoiding whole tilapia for the same reasons, this guide is for you. We are covering everything from picking the right fish at the store to actually eating it without losing a fight with the bones.
What Is Whole Tilapia and Why Cook It Whole
Whole tilapia means the fish comes to you with the skin, head, tail, and bones still intact, not broken down into fillets. A lot of people skip it because fillets feel more manageable. But here is the thing you are giving up a lot when you go that route.
Cooking a fish whole keeps moisture locked inside. The bones and skin act like a natural buffer during cooking, so the flesh stays juicy instead of drying out the way a thin fillet can. The flavor is also noticeably richer. If you have ever eaten a whole grilled tilapia at a good restaurant and compared it to a plain baked fillet, you already know what that difference tastes like.
On top of that, whole tilapia is usually cheaper. No processing means a lower price per pound, and with a bit of practice you get most of the meat off without much waste at all.
How to Choose the Best Whole Tilapia
Fresh vs Frozen
Fresh is the first choice if you have easy access to it. But frozen whole tilapia works perfectly well as long as it was handled right. A fish that was frozen quickly right after the catch can actually be in better shape than so-called “fresh” fish that has been sitting on ice at a market for four or five days.
If you are buying frozen, check for vacuum-sealed packaging with no visible ice crystals inside the bag. A lot of crystals usually means the fish thawed and refroze somewhere along the way, and that does real damage to the texture.
Signs of a Fresh Fish
Start with the eyes. Fresh tilapia has clear, slightly bulging eyes. Cloudy, sunken, or grey eyes are a hard no. Next, smell it. Fresh fish smells clean, almost like water. A sharp or sour fishy smell before you even cook it means the fish is past its prime.
Press the flesh with one finger. It should bounce back. If your fingerprint stays, the fish is already starting to break down.
Read also: Chicken Carcass: How to Turn It Into Rich Homemade StockRead more:
Ideal Size for Cooking
Stick to a fish between 1 and 2 pounds. Smaller ones cook fast and are easy to handle in any pan or oven. Larger fish cook unevenly at home unless you have a big setup. If this is your first time, go for something closer to 1 to 1.5 pounds.
Preparing Whole Tilapia Step by Step
Is It Already Gutted and Scaled
Good news: most whole tilapia at grocery stores and fish markets in the US comes already gutted and scaled. Peek inside the belly cavity. If it is clean with no organs, you are set. Run your fingers along the skin. Rough texture and flicking scales means it still needs scaling.
If you picked it up from an Asian or Latin grocery store, it is almost always cleaned and scaled at the counter. Just ask and they will handle it for you right there.
How to Clean a Whole Tilapia Safely
Rinse the fish under cold running water, both inside and out. Check the belly cavity with your fingers for any dark membrane lining the inside. That membrane tastes bitter if you leave it in. Scrape it out with a spoon under running water.
After rinsing, pat the fish completely dry with paper towels. I cannot stress this enough. A lot of people skip this step and then wonder why their fish sticks or comes out steamed instead of browned. Dry fish on a hot surface is what gives you that golden color and clean release.
How to Remove the Smell
Tilapia is one of the milder fish out there, so a strong smell before cooking usually means something is off with freshness. A light, clean smell is totally normal. To take the edge off, rub lemon or lime juice all over the fish inside and out and let it sit for about 10 minutes, then rinse and dry again. Some people use diluted white vinegar with the same result.
Do not soak the fish in water. It does nothing for the smell and just makes the flesh soft.
Scoring the Fish
Scoring means cutting 2 to 3 diagonal slashes through the skin and into the flesh on each side. Go deep enough to reach the bone, roughly half an inch. I spent a good while figuring out why my fish kept coming out bland in the middle before someone told me I was not scoring it properly. Those cuts let heat reach the thick parts faster and let seasoning actually get into the meat. Use a sharp knife and make confident cuts.
Best Seasoning for Whole Tilapia
Simple Salt and Spice Method
You do not need anything fancy. Salt, black pepper, garlic powder, and paprika rubbed all over the fish and inside the cavity is genuinely good. Season the inside. So many beginners coat only the outside and then complain the fish has no flavor. The inside matters just as much.
Marinades That Work Best
For more depth, try olive oil, minced garlic, lemon juice, cumin, and salt as a marinade. Let it sit in the fridge for 20 to 30 minutes. No longer than an hour though. The acid in lemon or lime starts breaking down the flesh if it sits too long, and you end up with a mushy texture before the fish even touches heat.
Want to go a different direction? Soy sauce, ginger, garlic, and sesame oil makes a lighter, cleaner flavor that works especially well for pan-frying or steaming.
Inside vs Outside Seasoning
Season both sides, push some into the scored cuts, and if you are using fresh aromatics like lemon slices, garlic cloves, or herbs, stuff them inside the belly cavity too. As the fish cooks, everything inside releases steam and flavor from the center outward.
3 Easy Ways to Cook Whole Tilapia
Oven-Baked (Easiest Method)
This is where I tell you to start. Preheat your oven to 400 degrees Fahrenheit. Line a baking sheet with foil, drizzle some oil on it, place your seasoned fish on top, and drizzle a little more oil over it.
Bake for 20 to 25 minutes depending on the size. A 1.5 pound fish is usually ready around 22 minutes. Press the thickest part near the head to check. The flesh should flake easily and look opaque white, not glassy. Want a little crispiness? Hit the broiler for the last 3 to 4 minutes.
Baking is forgiving. Nothing needs constant attention. It is genuinely the best place to start.
Pan-Fried (Crispy Skin Method)
This is where you get that golden, crackling skin. Use a wide skillet, cast iron if possible. Add enough oil to coat the bottom and get it hot over medium-high heat before the fish goes anywhere near it. Cold oil equals stuck fish.
Lay the fish away from you into the pan and press it gently for the first 30 seconds so the whole side makes contact. Cook 5 to 7 minutes on the first side without touching it. Flip once and give the other side 4 to 6 minutes. About 12 minutes total for a 1.5 pound fish.
Here is the rule: if the fish sticks when you try to flip, it is not ready. Give it another minute. When the skin is properly set, it releases on its own.
Grilled (Smoky Flavor Method)
Grilling gives you something the other methods just cannot. That smoky depth is hard to fake. Oil both the grill grates and the fish before cooking, and use a fish grilling basket if you have one. It keeps the fish from falling apart when you flip it.
Cook over medium-high heat for 5 to 6 minutes per side with the lid closed. Do not poke at it or move it around. Let the crust form first, then flip.
Common Mistakes and How to Fix Them
Fish Sticking to Pan
Two causes, almost every time: the oil was not hot enough, or the fish still had moisture on it. Get the oil shimmering before the fish touches the pan, and always dry the fish thoroughly first. That combination gives you crisp skin and a clean lift every time.
Mushy or Overcooked Texture
Tilapia cooks faster than most people expect. If yours keeps coming out wrong, start checking it a few minutes before the recipe suggests. Every oven and every fish is slightly different. The visual and texture test matters more than the clock.
Strong Fishy Smell After Cooking
This usually traces back to the fish not being fresh enough, or the cleaning step being rushed. If it is already cooked, a squeeze of fresh lemon right before eating does a good job of calming the smell. Next time, start with a fresher fish and clean it properly.
What Most People Get Wrong About Cooking Whole Tilapia
You might be wondering what the actual hard part of this is. Let me be honest: it is not the cooking. It is everything that happens before the fish hits the heat.
Skipping the drying step, not scoring the flesh, seasoning only the outside, putting fish in oil that is not hot enough. These are the small things that separate a meal you are proud of from one that is just okay. The recipe is almost secondary to the prep.
Also, a lot of beginners try to cut the head off before cooking because it makes them uncomfortable. That removes structure and flavor from the whole process. Leave it on. You can always remove it before serving if you want to.
How to Eat Whole Tilapia Without Struggling with Bones
How to Remove Bones Easily
Eat the top side first. Flake the meat gently away from the bones using a fork, working in sections. Once the top half is done, grab the spine carefully from the tail end and lift it. It usually comes out in one clean piece with the rib bones still attached. Flip to the bottom half and repeat.
Which Parts Are Edible
The main meat runs along the sides and the belly. Do not skip the cheeks, the small pockets of meat on either side of the head. They are tender and worth it. The tail and fins are not for eating. The crispy skin is totally fine if you enjoy it.
Serving Tips
Keep the sides simple. Lemon wedges, rice or flatbread, and something fresh like sliced tomatoes or cucumber salad. The freshness balances out the richness of the fish nicely. You really do not need to overthink this part.
Pro Tips for Better Results Every Time
For crispy skin: dry fish plus hot pan or oven, every single time. Rushing that setup is the number one reason skin comes out soft and disappointing.
To keep the flesh juicy pull it off the heat the moment the thickest part starts to flake. Tilapia is lean and it goes from perfectly cooked to dry faster than you expect.
For a flavor upgrade stuff the belly with sliced lemon, a few garlic cloves, and a sprig of fresh cilantro or thyme before cooking. The aromatics steam from the inside out as the fish cooks, and the difference is noticeable without adding any real effort.
Conclusion
Here is the thing about whole tilapia it rewards you for trying. It is affordable, forgiving for beginners, and tastes noticeably better than a plain fillet when it is done right. Pick up a fresh one, dry it well, season it properly inside and out, and just cook it. Do not overthink the method. Whichever one you try first, you will get a feel for the fish quickly. And once you do, you will probably wonder why you stuck with fillets for so long.
FAQs
Do I need to remove the head before cooking?
No. The head holds moisture in and helps the fish keep its shape during cooking. You can remove it before serving if it bothers you at the table, but keep it on while it cooks.
How long does it take to cook whole tilapia?
A 1 to 1.5 pound fish needs about 20 to 25 minutes in a 400 degree oven, 12 to 14 minutes in a pan, or 10 to 12 minutes on the grill. Larger fish need a bit more time. Always check by pressing the thickest part.
Can I cook it straight from frozen?
You can bake it from frozen, but the results are noticeably better when you thaw it first. A frozen fish leaks water as it cooks, which steams the flesh instead of browning it. Thaw in the fridge overnight or under cold running water for about 30 minutes.
Is whole tilapia healthy?
Yes. It is lean, low in fat, and has solid protein content. It does not have as many omega-3s as salmon or mackerel, but it is still a good, nutritious choice for a regular meal.
What is the easiest method for beginners?
Oven-baking, without question no flipping, no oil splatter to manage, and plenty of room for error. Start there and move to pan-frying once you feel more comfortable with the fish.
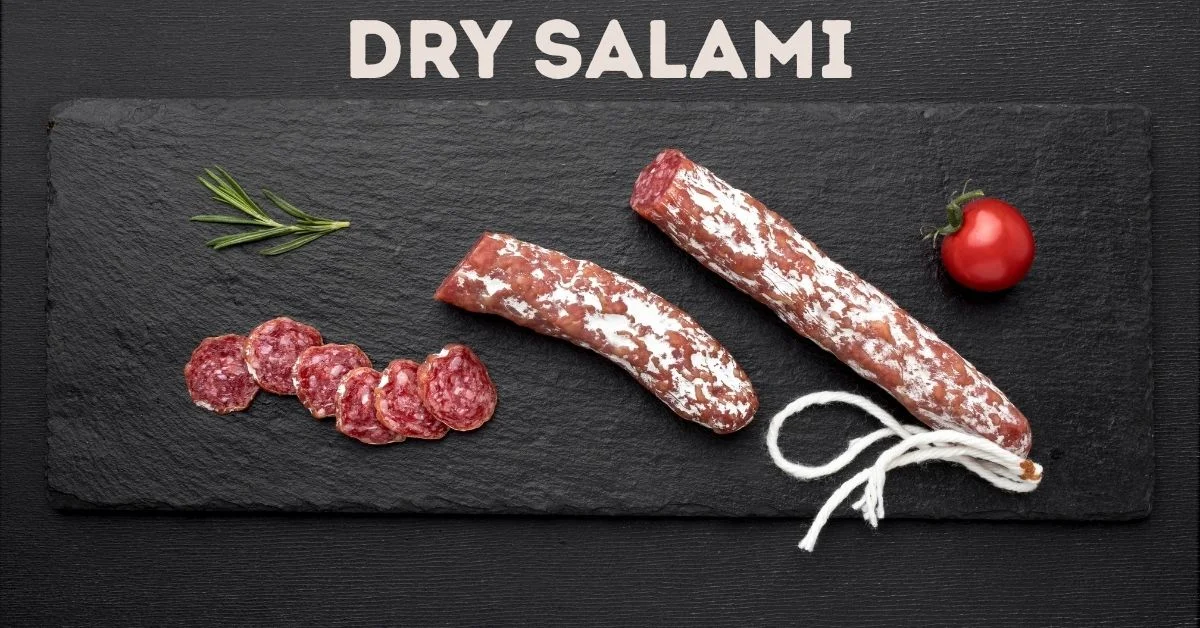
I used to stand in the deli aisle staring at different salami packages with absolutely no idea what I was actually buying. Dry salami, hard salami, Genoa, uncured… it all looked the same to me. I just grabbed whatever had a nice label and hoped for the best. If that sounds familiar, you are in the right place. I spent way too long figuring this out on my own, so let me save you the confusion and just walk you through everything you actually need to know.
What Is Dry Salami?
Dry salami is a cured, fermented sausage made from ground meat (usually pork) mixed with fat, salt, and spices, then left to air-dry for weeks or even months until it becomes firm, flavorful, and shelf-stable. It is not cooked with heat. Salt, acidity, and time do all the work of making it safe and delicious.
Think of it as meat preserved through a natural process that people figured out long before refrigerators were even a thing.
How It Differs from Fresh or Cooked Salami
Fresh salami is raw and needs to be cooked before eating. Cooked salami like bologna is made using heat. Dry salami is neither of those. It goes through fermentation and a long drying period, which drops the moisture level so low that harmful bacteria simply cannot survive. That process is what gives it that dense, chewy texture and the sharp, slightly tangy taste you recognize.
Why It Doesn’t Need Cooking
The curing process, especially the salt and acidic environment created by fermentation, kills or stops pathogens during production. By the time it reaches the store shelf, it is fully safe to eat straight from the package. No heating needed. That said, once you open it, you still need to handle and store it properly.
Read also: Louisiana Famous Fried Chicken Menu: Full Guide With Prices and Ordering Tips
How Dry Salami Is Made
The process sounds more complicated than it really is. Once you break it down, it is pretty simple.
Basic Ingredients
The core ingredients are honest and few: ground pork (sometimes beef or a mix), pork fat, salt, black pepper, garlic, and sometimes wine or red pepper. Good salami uses a short, clean ingredient list. If you flip the package over and see a wall of additives, that is usually a sign of a cheaper product.
Drying and Curing Process
After mixing and stuffing into casings, the sausage is fermented at a controlled temperature. Bacteria naturally convert sugars into lactic acid, which lowers the pH and kicks off preservation. Then it hangs to air-dry, slowly losing moisture over several weeks. Some salamis dry for 30 days. Others hang for six months or more. Longer drying means a firmer texture and a more concentrated, complex flavor.
You might notice a white coating on the outside. That is a natural mold called Penicillium. Completely normal, actually helpful, and more on that later.
Types of Dry Salami You Will Find
Italian vs Hard Salami
Italian-style dry salamis like Genoa, Finocchiona, and Soppressata tend to be softer and more aromatic. They often use spices like fennel seed or get finished with wine. Hard salami, which is more of an American-style product, is firmer, drier, and carries a sharper, more acidic punch. Both are dry-cured, but the texture and flavor profiles are pretty different.
Flavored Varieties
Once you move past the basics, you will find garlic salami, pepper-crusted salami, wine-cured varieties, and even truffle-flavored ones at specialty stores. These are great for pairing because the flavor is already built right in. Honestly, garlic salami on a sandwich needs very little else going on.
How to Choose Good Dry Salami
Here’s the thing: this is where most people get completely stuck. The packaging can be misleading, and not all salami is made the same way.
What to Look for on Labels
Start with the ingredient list. Good dry salami should have pork, salt, spices, and maybe a culture or starter. It should not have a long list of fillers, soy protein, or a bunch of preservatives you cannot pronounce.
Also check the fat content. Dry salami needs a solid amount of fat to stay moist and flavorful during drying. If you can see the slice through a window on the packaging, look for fat that is evenly distributed throughout. That is a good sign.
Signs of High-Quality vs Low-Quality Salami
Good salami feels firm but not rock-hard, shows a deep red color with white fat marbling, has a natural casing, and smells slightly tangy and aged when you open it.
Lower-quality salami tends to be soft or mushy in the package, shows a bright artificial red color, has liquid sitting inside the packaging, and often has a very long shelf life propped up by a bunch of additives.
Common Marketing Terms Explained
Let me clear up some label confusion that trips a lot of people up.
“Uncured” does not mean the salami skipped curing. It usually means the maker used celery powder or beet juice as a natural nitrate source instead of synthetic sodium nitrate. The salami is still fully cured. This label mostly appeals to people trying to avoid artificial preservatives, but in terms of safety and taste, both versions work fine.
“No nitrates added” is basically the same story. Celery powder naturally contains nitrates. If this distinction matters to you for health reasons, worth checking with your doctor. Otherwise, either option is perfectly good.
How to Store Dry Salami Properly
Before Opening
An unopened whole salami or sealed package can usually sit at room temperature in a cool, dry spot for weeks, sometimes months depending on the type. That is why you see them hanging in Italian delis with no refrigeration in sight. But if you are buying pre-sliced or vacuum-packaged salami from a regular grocery store, refrigerate it right away even before opening. Those products go through a different process and need the cold.
After Opening
Once opened, dry salami goes in the fridge, full stop. Wrap it in parchment paper or butcher paper first, then loosely cover with plastic wrap or put it in a container. Do not seal it completely airtight after cutting. It needs a little air to maintain its texture properly.
Common Storage Mistakes to Avoid
Wrapping it only in plastic wrap is a common one. Too airtight, traps moisture, and you end up with slimy salami. Leaving sliced salami uncovered in the fridge is another mistake because the edges dry out fast and it picks up every other smell in there. Freezing it without thinking it through also hurts the texture, even though it stays safe. And probably the most common mistake of all: assuming “it’s cured, so it’s fine” long after you should have finished it. Cured does not mean it lasts forever once it has been cut open.
How to Eat and Use Dry Salami
Simple Everyday Ways
You do not need a fancy board to enjoy dry salami. Fold a few slices into a panini with provolone and roasted red peppers. Chop some up and stir it into scrambled eggs. Layer it in a wrap with greens and mustard. Dice it and toss it with pasta, olive oil, and cherry tomatoes. It works anywhere you would normally reach for pepperoni, but with a lot more flavor going on.
Dry salami on pizza is genuinely great. It crisps at the edges in the oven and adds rich, salty depth without the grease pooling you sometimes get with pepperoni.
Charcuterie Board Basics
When you are building a board, slice the salami thin enough to fold or roll, roughly a quarter-inch or less. Put it near something creamy like brie or fresh mozzarella so people naturally grab both together. Then add something acidic close by: pickles, olives, or marinated peppers. That contrast between fatty, salty, and tangy is what makes a board actually work.
Pairing with Cheese and Drinks
Dry salami pairs really well with aged cheeses like Parmesan, aged cheddar, and manchego. The salt and fat in both play off each other nicely. For wine, a medium-bodied red like Barbera or Chianti is classic and never wrong. If you are more of a beer person, go for something malty rather than heavily hopped. For non-alcoholic options, sparkling water with a squeeze of lemon cuts right through the richness.
Dry Salami vs Other Salamis
Dry vs Genoa vs Hard Salami
Genoa salami is technically a type of dry salami, but it is softer and made specifically with pork and wine following a traditional Italian method. Hard salami is the firmer, more acidic American-style version. Dry salami is actually the broader category that covers both of these.
If you see “dry salami” on a label without any regional name attached, it is usually closer to hard salami in texture and sharpness.
Taste and Texture Differences
Genoa is soft, mild, slightly oily, with gentle garlic. Hard salami is firm, chewy, tangy with a stronger acidic punch. Soppressata has a coarser grind and a rustic feel, and comes in both soft and dried versions. Finocchiona is fennel-forward, softer, and very much a Tuscan thing.
Knowing these differences helps you grab the right one. Genoa makes sense on a delicate sandwich where you do not want it to overpower everything. Hard salami holds up much better on pizza or in cooked dishes where you need the flavor to come through.
What Most People Get Wrong About Dry Salami
Let’s be honest: the most common mistake is thinking “cured” means it lasts forever. It does not. Once you cut into it or open the package, dry salami starts oxidizing and losing its protective barrier. It should be eaten within two to three weeks of opening, and stored properly in the fridge the whole time.
The second mistake is throwing salami away because of the white coating on the outside. That is natural mold, not the bad kind. You can wipe it off with a cloth dampened in white wine vinegar or just peel the casing before eating. The salami underneath is completely fine.
Third mistake is buying pre-sliced salami well in advance. Pre-sliced loses flavor and moisture a lot faster than a whole piece does. If you can, buy whole. Or if you need it sliced, buy it closer to when you will actually eat it.
Safety Tips: When Is Dry Salami Bad?
Signs It Is Still Safe to Eat
A white powdery coating on the outside is normal, either natural mold or a salt bloom from the curing. Slightly firmer texture than when you first opened it is fine. A mild sour or tangy smell is completely expected. None of these are reasons to toss it.
Signs You Should Throw It Away
A slimy or wet texture on the cut surface is a red flag. Grey or green discoloration inside the meat is another one. A strong rotten smell that is clearly different from the usual tang means it is done. Fuzzy mold in green, black, or blue on any part of the meat means it goes in the bin.
You might be wondering how to tell the difference in borderline cases. The smell test is your most reliable tool. Dry salami that has gone bad smells unmistakably wrong. Trust your nose on this one.
Conclusion
Dry salami is one of those things that gets way more approachable once you understand a few basics. You do not need to be a charcuterie expert or an Italian grandmother to pick a good one. Just flip the package over, check the ingredient list, look for real marbling, and store it right once you get home. That is honestly most of it. Use it on your pizza, toss it in your pasta, build a board, or just eat a few slices standing in front of the fridge. No judgment here. Once you find a variety you love, you will wonder why you ever settled for whatever you were grabbing before.
FAQs
Does dry salami need refrigeration?
Whole, uncut dry salami can often sit at room temperature in a cool, dry spot. Once opened or sliced, always refrigerate it. Pre-packaged sliced salami from a regular grocery store should go in the fridge even before opening, since it is made differently from traditional whole salami.
Can you eat dry salami raw?
Yes, completely. It is not raw in the way fresh meat is. The curing and drying process makes it fully safe to eat straight from the package without any cooking.
How long does dry salami last after opening?
In the fridge, opened dry salami stays good for about two to three weeks if stored properly. Wrap it in parchment paper, keep it cold, and check for any signs of spoilage before eating. A whole, uncut cured salami can last much longer, sometimes several months.
Why is there white mold on dry salami?
That white coating is Penicillium, a natural mold used during the aging process. It protects the salami as it dries and adds subtle flavor. It is completely safe and actually a sign of traditional production. You can eat it or wipe it off, whichever you prefer.
Is dry salami healthy?
It is high in protein and fat, with decent amounts of B vitamins and minerals like zinc. It is also high in sodium, which is worth keeping an eye on if you have blood pressure concerns. In reasonable portions as part of a balanced diet, it is perfectly fine. Think of it as a flavorful addition to meals, not something to pile on every day.

I will be honest with you. The first time I looked up Louisiana Famous Fried Chicken online, I got almost nothing useful. No clear prices, no breakdown of what comes with what, just a vague idea that it existed. So I did the digging myself, and this guide is everything I wish I had found that day. Whether you are ordering for yourself or trying to feed a whole table without overspending, here is exactly what you need to know.
Louisiana Famous Fried Chicken Menu (Full Breakdown)
The menu covers a wide range of options including classic fried chicken pieces, combos, seafood, sides, and drinks. Most locations carry chicken combos starting around $10 to $14, family meals from roughly $20 to $45, and individual pieces starting as low as $2.49 depending on the cut.
Chicken Meals and Combos
The combo meals are where most people start, and honestly that makes sense. A standard combo comes with a chicken piece or pieces, one small side, a roll, and a drink.
Some of the most common combos include:
3-Piece Combo (Leg, Thigh, Wing): Around $10.99, comes with a side and a soft drink. 4-Piece Combo (Leg, Thigh, Wing, Breast): Typically around $13.99, a solid step up if you want the breast included. 10 Hot Wings: Around $15.99, great if you want all wings without mixing. Chicken Sandwich Combo: Comes with a small side and a soda. Louisiana style, with mayo, cheese, and pickles. A solid pick if you want something hand-held.
Prices can shift depending on your city or location. Always check your nearest store for exact figures.
Read also: Chicken Carcass: How to Turn It Into Rich Homemade Stock
Family Meal Deals
Family meals are where the real value lives. You get more food per dollar compared to buying individual combos.
10-Piece Dark Meat Combo (5 Legs, 5 Thighs): One of the most popular choices. Comes with two large sides and six rolls. The pieces are large and this can easily feed four to six people. 20-Piece Chicken Tender Deal: Comes with two large sides and six rolls. Good option if your group prefers tenders over bone-in pieces. Mixed 20-Piece (5 Legs, 5 Thighs, 5 Wings, 5 Breasts): The full spread. Comes with two large sides and six rolls. Best for larger gatherings where everyone has different preferences.
If you are feeding four or more and want variety, the mixed 20-piece is usually the smartest buy.
Individual Chicken Items
For smaller orders or add-ons, you can pick individual pieces. Pricing at most locations runs roughly like this:
Wing: $2.49, Leg: $2.49, Thigh: $2.49, Breast: $2.99, Tender: $2.99, Fish fillet: $2.99, Shrimp (per serving): $4.49
Gizzards are also available at some locations, usually as a 10-piece with fries and a roll for around $9.99. Not everyone knows about them, but regular customers swear by gizzards if you enjoy that deeper, richer flavor.
Side Dishes and Extras
Louisiana Famous Fried Chicken offers a solid lineup of Southern-style sides. The most common options include:
Mashed potatoes, red beans and rice, dirty rice, coleslaw, fried okra, corn fritters, potato salad, and french fries.
Sides usually come in small and large sizes. A small sits around $2.99 and a large around $4.99. For a family meal, two large sides covers most people comfortably.
Here is the thing: fried okra and dirty rice are the hidden gems here. A lot of people go straight for fries out of habit, but the okra and the red beans and rice are more unique and pair really well with the chicken.
Drinks and Add-ons
Most locations carry standard soft drinks and sometimes sweet tea. Combos usually include one can or fountain drink. Some locations offer jalapeño pepper sauce as an add-on for $1.00, and pepper cheese sticks or mozzarella sticks for around $3.99 for four pieces. Chicken egg rolls are another add-on worth knowing about, running around $8.99 and a fun option to share.
Popular Menu Items You Should Try First
Best-Selling Chicken Combos
The 10 Dark Meat Combo consistently shows up as the most ordered item across multiple locations. The pieces are big, the price is fair, and the sides round it out well. If you are trying Louisiana Famous Fried Chicken for the first time, this is your safest starting point.
The Leg and Thigh with 5 Shrimp and a side is another popular combo at around $10.99. It gives you a taste of both the chicken and seafood side of the menu, which is worth exploring since Louisiana Famous Fried Chicken takes its seafood seriously.
Most Ordered Side Dishes
Red beans and rice and mashed potatoes show up on nearly every order. Fried okra is frequently mentioned by regulars as a must-try. If you want the full Southern experience, skip plain fries on your first visit and go for one of those instead.
Customer Favorites for First-Time Visitors
Based on real customer feedback, first-timers tend to love the 10 Dark Meat combo, the hot wings, and the chicken sandwich. These three give you a solid feel for what the restaurant does best without overcomplicating your first order.
Best Value Orders (Save Money Guide)
Best Combo for One Person
Eating alone and want the best value? Go with the 3-Piece Combo at around $10.99. You get a leg, thigh, and wing with a side and a drink. Complete meal, no extra spending needed.
If you want a bit more, add an individual piece or a small side for under $3. Total comes to roughly $13 to $14 for a very filling meal.
Best Meal for Two People
For two people, the 10-Piece Dark Meat Combo is often the best call. It comes with two large sides and rolls, which is more than enough for two adults. You get five legs and five thighs, the pieces are quite large, and splitting it usually works out cheaper than two separate combos.
Best Family Deal
For a group of four to six, go with either the 20-piece mixed combo or the 20-piece tender combo. Both come with two large sides and rolls. If your group has mixed preferences, the mixed 20-piece covers everyone. If kids are involved, tenders are often the easier pick since there are no bones to deal with.
How to Get More Food for Less
Order family meals over individual combos whenever possible. The per-piece price drops a lot in the larger deals. Also, ordering larger sides instead of small ones is almost always better value when two or more people are sharing. A large red beans and rice at around $4.99 feeds two people easily, while two smalls at $2.99 each adds up faster.
Menu Prices Overview (What to Expect)
Average Price Range
Individual pieces: $2.49 to $4.49 Single combos (3 to 4 pieces with side and drink): $10.99 to $13.99 Wing specials (10 pieces): around $15.99 Family meals (10 to 20 pieces with sides and rolls): $20 to $45+ Sides: small around $2.99, large around $4.99
Budget vs Premium Choices
Budget: Go with a 3-piece combo, stay under $12. Skip the drink or order water to save a dollar or two.
Mid-range: The 10 Dark Meat Combo with two sides covers a full meal for one hungry person or a light meal for two, running around $20 to $25.
Premium: The mixed 20-piece family deal is the biggest option on the menu, usually $35 to $45 depending on location.
Are Combos Worth It?
Yes. Combos are almost always worth it compared to ordering pieces and sides separately. The drink and side inclusion adds about $5 to $6 in value when you look at individual prices, so you are basically getting them for free.
Differences in Menu by Location
Why Menus Vary
Louisiana Famous Fried Chicken is a franchise with independently owned and operated stores. Each location has some freedom to adjust its menu and pricing, which is something headquarters makes clear upfront.
Common Changes Across Branches
Some locations carry seafood gumbo, orange chicken, fried shrimp, or shrimp fried rice. Others do not. A Texas location might feature shrimp and fish combos more prominently, while a California location might lean more toward the chicken sandwich and rice dishes.
The core items, which are fried chicken pieces, combos, and classic sides, are nearly universal. Specialty items and pricing are where things differ.
How to Check Your Local Menu
The most reliable way is to check DoorDash, Uber Eats, or Google Maps with your specific address. These platforms pull live menu data from your nearest location. You can also search the restaurant name and your city, or just call ahead.
How to Order Louisiana Famous Fried Chicken
In-Store Ordering Tips
If you are going in person, decide your meal size before you reach the counter. Knowing whether you want a combo or family deal speeds things up. If you have never been, just say how many people you are feeding and ask which family deal makes the most sense. Most staff are happy to help.
Also, ask if anything is freshly made. At busier locations, chicken is cooked in batches. If you arrive right before a batch finishes, you might wait a few extra minutes but get noticeably fresher food. Worth it.
Online and Delivery Options
Most Louisiana Famous Fried Chicken locations are available on DoorDash and Uber Eats. Delivery pricing may be higher due to platform fees, so if you are close to the restaurant, pickup is usually the better deal. Check if your location has its own website for direct ordering, which can sometimes cut out the platform markup.
Customizing Your Order
Most combos allow some flexibility. You can usually swap a side, choose your wing sauce, or request extra rolls. Ask when ordering in person. Online platforms may show customization options per item, so check those before confirming your order.
Tips for First-Time Customers
What to Avoid Ordering First
Skip the gizzards on your very first visit unless you already know you like them. They are a great item, but the texture is an acquired taste. Same goes for anything listed as a specialty if your location carries unusual options. Stick to the core fried chicken on your first order, get a feel for the flavor, then branch out.
Portion Size Expectations
The portions here are generous. Really generous. A 10-piece dark meat combo is a lot of food, and a lot of first-timers make the mistake of each person ordering a full combo when one large family deal easily covers two adults. You will end up with way more food than you expected, which is not necessarily a bad thing if you like leftovers.
Spice and Flavor Tips
Louisiana Famous Fried Chicken leans toward a bold, well-seasoned Southern style. It is not overwhelmingly spicy by default, but the breading has real character. For more heat, go for hot wings or ask about spicy options. The chicken sandwich at some locations also has a good kick from the sauce. Mild options exist too, so just ask if spice is a concern.
What Most People Get Wrong About This Menu
Most people treat Louisiana Famous Fried Chicken like any other fast food stop and just order a combo without thinking. The mistake is not considering the family deals even when eating alone or with one other person.
Here is the thing: a 10-piece dark combo at roughly $20 to $25 with two large sides and six rolls often works out cheaper per piece than two separate 3-piece combos. If you enjoy leftovers or have a big appetite, you come out well ahead.
The other common mistake is ignoring the seafood side of the menu entirely. Many locations offer shrimp, fish fillets, and even gumbo. These items are under ordered simply because people associate the brand only with chicken. The leg and thigh plus shrimp combo at around $10.99 is one of the most underrated items on the menu for anyone who enjoys a bit of surf and turf.
Conclusion
Look, the menu is bigger than most people expect, and the value is genuinely there if you order smart. Do not just grab the first combo you see. Think about who you are feeding, check the family deals first, and do not sleep on the sides and seafood options. My honest advice: go with the 10 Dark Meat combo on your first visit, try the red beans and rice instead of fries, and see how it feels. Chances are you will be back sooner than you think.
FAQs
What is included in a combo meal?
A standard combo includes your chicken pieces, one small side like fries, red beans and rice, or coleslaw, and one soft drink. Some combos also include a roll. The exact contents vary slightly by location, so confirm when you order.
Are prices the same at every location?
No. Since all stores are independently owned and operated, prices differ by location. A combo that costs $10.99 in Texas might cost slightly more in California. Always check your nearest location’s menu through the app or restaurant page for accurate pricing.
Does the menu offer spicy and mild options?
Yes. Most locations carry both mild and spicy chicken, and the wing section often includes multiple sauce options like hot, jalapeño, honey BBQ, and lemon pepper. If you are sensitive to heat, stick to the standard fried chicken rather than the wing flavors.
What is the best meal for a family?
For four to six people, the 20-piece mixed combo with two large sides and rolls is the best all-around deal. It covers multiple preferences, gives you enough variety, and the per-piece price is lower than buying separate combos. If everyone prefers tenders, the 20-piece tender deal is just as strong.
Can you customize combo meals?
At most locations, yes. You can often swap sides, request specific cuts, or choose your wing sauce. In-person ordering gives you more flexibility than online ordering, though many delivery platforms now include basic customization options per item.
Does Louisiana Famous Fried Chicken offer delivery?
Yes. Most locations are available through DoorDash and Uber Eats. Coverage depends on your area, so enter your address on either platform to confirm. Some locations also accept phone orders for pickup if you want to skip delivery fees.
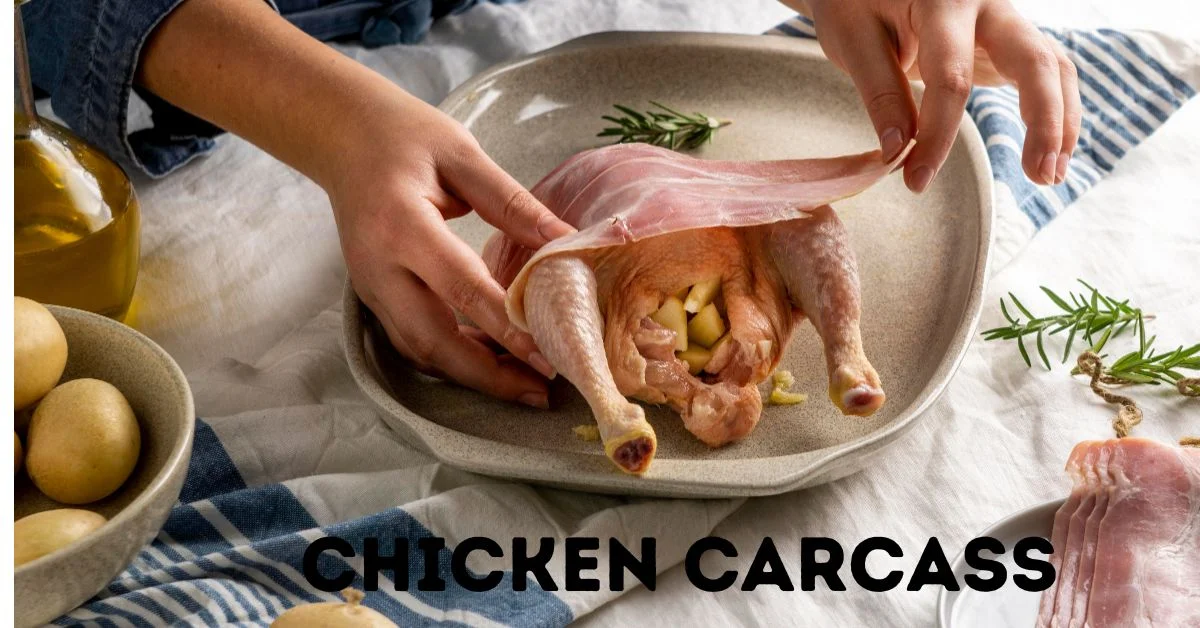
Let’s be honest, most of us have tossed a chicken carcass in the bin without a second thought. I did it for years. Then one cold evening I actually made stock from one and realized I had been throwing away something genuinely valuable every single time. That bony frame left over from your roast? It makes a deeply flavorful stock that puts anything from a carton to shame. In this guide I will walk you through exactly what to do with a chicken carcass, from the right water ratios to fixing common mistakes that nobody else talks about.
What Is a Chicken Carcass
A chicken carcass is the bony frame left behind after most of the meat has been carved off. It includes the backbone, ribcage, breastbone, wing tips, and any remaining cartilage or connective tissue. There is usually a little meat still clinging to the bones, and that is perfectly fine to use.
Which Parts Are Included
When you roast a whole chicken carcass and carve it, what stays behind is the carcass. It still holds the neck if it was tucked inside, the oyster meat near the back, and bits of skin. All of that adds flavor. You can also throw in the giblets if you have them, though the liver tends to make things bitter, so leave that one out.
Bought a rotisserie chicken? The leftover carcass works just as well. Actually, the roasted skin and caramelized bits add richer color and more depth than a raw carcass would.
Can You Use Leftover Roasted Chicken Bones
Yes, and it is one of the best starting points. Roasting breaks down connective tissue and concentrates flavor in the bones. Even a carcass that sat in the fridge overnight still makes great stock. Just avoid ones left out for more than two hours at room temperature.
Read also: What Is Chicken Base? A Simple Cooking Guide
Why a Chicken Carcass Makes Better Stock Than Raw Chicken
A lot of recipes suggest raw chicken pieces for stock. That works. But a roasted carcass has a real head start on flavor.
Flavor Depth from Roasted Bones
When bones get roasted, the Maillard reaction creates those brown, caramelized flavors. That carries directly into your stock and gives it a warm amber color and a richer taste. Raw bones produce a lighter, paler broth. Fine, but it lacks that depth.
Cost-Saving Benefits
You are essentially getting stock for free. Instead of spending $4 to $6 on a carton, you are using something you would have thrown away. One average carcass produces roughly 6 to 8 cups of stock depending on how concentrated you make it. That adds up fast if you cook regularly.
Ingredients and Exact Ratios for Perfect Stock
Here is the thing: getting the water-to-carcass ratio wrong is the most common reason stock turns out bland. I spent way too much time figuring this out the hard way, so here is what actually works.
Ideal Water-to-Carcass Ratio
Use one medium carcass from a 3 to 4 pound chicken per 10 to 12 cups of cold water. That gives you a well-flavored stock without being too thin or too concentrated. Want something more intense and gelatinous? Drop it to 8 cups. Go above 12 cups and you risk a watery result with weak flavor.
Optional Vegetables and Aromatics
You do not need much. Two stalks of celery, one large carrot, one halved onion, four cloves of garlic, a few peppercorns, and a couple of bay leaves. Fresh parsley stems or thyme add a nice layer but are not required. Keep aromatics simple. The carcass is already doing the heavy lifting.
What NOT to Add
Skip cruciferous vegetables like broccoli or cabbage. They turn stock bitter and give it a strange smell. Starchy vegetables like potato cloud the broth and add nothing useful. Also, hold off on the salt. If you reduce the stock later, salt concentrates too and things can go wrong fast. Season only at the end, or when you use it in a recipe.
Step-by-Step Chicken Stock Method
Stovetop Method
Place the carcass in a large pot and cover with cold water. Cold water matters here because it slowly draws out proteins and collagen rather than sealing them in. Bring it to a gentle boil, then immediately drop it to a low simmer. Skim any grey foam that rises during the first 10 to 15 minutes. That foam is coagulated protein, and removing it keeps your stock cleaner tasting.
Add your aromatics and let everything simmer uncovered for 3 to 4 hours. Do not let it boil hard. A rolling boil churns fat into the liquid and creates a cloudy, greasy result.
Strain through a fine mesh sieve when done. Press gently on the solids to get the last bit of liquid, then discard the bones and vegetables.
Slow Cooker Method
This is the truly hands-off approach. Place everything in the slow cooker, cover with water, and cook on low for 10 to 12 hours. The slow cooker never gets hot enough to boil, which actually produces a clearer stock. Set it before bed and wake up to a finished batch.
Pressure Cooker Shortcut
A pressure cooker or Instant Pot cuts the time down a lot. Add carcass, aromatics, and water, then cook on high pressure for 90 minutes followed by a natural release of 20 minutes. The result is slightly cloudier than the stovetop version, but the flavor is excellent and you are done in about two hours total.
How to Get Rich, Gelatinous Stock
A good stock should turn into a loose jelly when chilled. That wobble means collagen was properly extracted, and it gives body to any soup or sauce you make with it.
Cooking Time Explained
Three to four hours is the sweet spot on the stovetop. Under two hours and you have not pulled out enough collagen. Over six hours and the flavor starts going flat or slightly bitter. The pressure cooker at 90 minutes gets close to the same result in a fraction of the time.
How to Extract Maximum Collagen
Chicken feet and necks are the most collagen-rich parts. If you can grab those from a butcher, adding even one or two makes a real difference. The cartilage at the ends of bones is also packed with collagen, so do not trim it off before adding to the pot.
Roasting Bones for Deeper Flavor
Starting with raw bones? Toss them on a baking sheet and roast at 400 degrees F for 30 to 40 minutes until golden brown, then proceed with your stock as normal. This one step adds significant flavor depth that you can actually taste.
Common Problems and How to Fix Them
You might be wondering why your last batch of stock tasted like warm nothing. This is the section most recipes skip, and it is where most people hit a wall.
Why Your Stock Is Bland
Usually one of three things: too much water, not enough cook time, or the carcass had very little meat left on it. If your stock tastes thin after cooking, simmer it uncovered for another 30 to 45 minutes to reduce it. Concentration is your friend. You can also add a small splash of soy sauce or drop in a parmesan rind to boost savory depth without changing the flavor profile.
Why It Turns Cloudy
Cloudy stock almost always comes from boiling too hard. High heat emulsifies fat into the broth. If it happens, let the stock cool completely, strain it again, and refrigerate. The fat solidifies on top and can be lifted off, and the stock often clarifies once chilled. Running it through cheesecloth works well too.
How to Reduce Excess Fat
After straining, let the stock cool and refrigerate for a few hours. The fat rises and hardens on the surface as a white or yellow layer. Lift it off with a spoon. Simple and effective. If you need to defat it while still warm, use a fat separator jug or drag a folded paper towel across the surface.
Fixing Bitter or Overcooked Stock
Bitterness usually comes from cooking past the 6-hour mark, adding liver to the pot, or using too many woody herb stems. If your stock tastes bitter, it is tough to fully reverse. Your best option is to dilute it with fresh water and simmer briefly, or blend it into a dish with strong flavors like tomato or cream where the bitterness gets hidden.
Can You Reuse a Chicken Carcass
Second Batch Stock (Pros and Cons)
Technically yes, you can simmer the bones a second time. The second batch will be noticeably lighter in flavor, lower in collagen, and better suited as a base for cooking grains or light soups rather than as a proper stock. If you do use it twice, keep the second batch separate from the first.
When to Discard Bones
After one full cook of 3 to 4 hours, most of the collagen and flavor have been pulled out. The bones will be soft and crumbly, especially the smaller ones. At that point, they are done. Composting is a great option since softened bones break down quickly.
How to Store Chicken Stock Properly
Fridge vs Freezer Storage
In the fridge, stock lasts 4 to 5 days. In the freezer, it keeps for up to 6 months. Let it cool to room temperature before refrigerating, and always store it in airtight containers.
Portioning Tips for Daily Cooking
Freezing in 1-cup or 2-cup portions is the most practical approach. For smaller amounts, use a muffin tin (about half a cup each), freeze solid, then pop the portions out and store in a zip bag. That way you can grab exactly what a recipe calls for without defrosting an entire batch.
Shelf Life Guide
Room temperature: 2 hours maximum. Fridge: 4 to 5 days. Freezer: up to 6 months. If you notice any off smell, sliminess, or mold when reheating, throw it out.
Easy Ways to Use Chicken Stock
Soups and Stews
Chicken stock is the backbone of most soups. Use it instead of water when making vegetable soups, lentil soups, or any broth-based dish. The flavor difference is hard to miss.
Cooking Rice and Grains
Replace the water with stock when chicken carcass rice, quinoa, or farro. The grains absorb the flavor as they cook, and even a simple side dish becomes noticeably better.
Quick Sauces
Deglaze a hot pan with chicken stock after searing meat or vegetables. Let it reduce by half, add a little butter and fresh herbs, and you have a simple pan sauce in minutes. No recipe needed.
Homemade vs Store-Bought Stock
Cost Difference
A carton of quality chicken stock costs $4 to $6 and gives you about 4 cups. One chicken carcass produces 6 to 8 cups for essentially zero extra cost since it is a byproduct of a meal you already made. Even if you buy the vegetables and herbs specifically for the stock, you are still spending well under $2 per batch.
Taste and Nutrition
Homemade stock has no added sodium, no preservatives, and far more natural gelatin than commercial versions. Most store-bought stocks are thin and lean heavily on salt for flavor. Homemade stock has body, depth, and a richness that packaged products rarely come close to.
What Most People Get Wrong About This Topic
Most beginner mistakes with chicken carcass stock come down to heat and time. People assume more heat means faster and better results. The opposite is true. A hard boil breaks down fat and protein in a way that creates a cloudy, greasy broth and actually weakens the clean chicken flavor you are going for.
The other common mistake is adding too much water, thinking “more water equals more stock.” It does not. More water just dilutes what you have. It is always better to start with less water and reduce further if needed than to start too diluted and wonder why the result tastes like pale chicken water.
Conclusion
Next time you finish a roast chicken carcass, do not throw that carcass away. A pot, some water, a few vegetables, and a few hours is all it takes to make something genuinely good. Keep the heat low, get the ratio right, skim the foam early, and you will have homemade stock that makes every soup, sauce, and grain dish better. It is one of those small kitchen habits that quietly changes how everything tastes.
FAQs
How long should I boil a chicken carcass?
Do not boil it, simmer it. Three to four hours at a gentle simmer on the stovetop gives the best result. If using a pressure cooker, 90 minutes on high pressure is enough. Hard boiling makes the broth cloudy and reduces flavor quality.
Can I use a carcass with leftover meat?
Yes. Any meat still on the bones adds flavor. Just do not expect it to stay edible after a long simmer since the texture breaks down completely. It mixes into the liquid and gets strained out anyway.
Do I need to add vinegar?
It is optional. A tablespoon of apple cider vinegar is sometimes added because it slightly acidifies the water and may help draw minerals from the bones. The effect on flavor is minimal. If you prefer not to use it, skip it.
Why did my stock not gel?
Either the cook time was too short, there was not enough collagen-rich material like cartilage, feet, or neck, or too much water was used. Try a longer simmer next time, use less water, or add a chicken foot or two if you can get them.
Can I freeze the carcass before using it?
Yes, and honestly it is a great habit to build. Collect carcasses in a freezer bag over a few weeks and make a big batch all at once. Frozen carcasses go straight into the pot without thawing.
-

 Food2 days ago
Cuts of Steak: Complete Guide to Beef Cuts
-

 Food2 days ago
What Is Andouille Sausage? Complete Guide
-

 Food2 days ago
Shirleys Coffee Shop Guam Locations Menu and Guide
-

 Food2 days ago
Wagyu Beef Price per Pound: Complete Cost Guide
-

 Food2 days ago
Ultimate Tripas Recipe and Cooking Guide
-

 Tech6 days ago
DemonScans Review: Is It Safe for Manga Readers?
-

 Drinks2 days ago
Easy Lychee Martini Recipe Sweet & Floral Cocktail
-

 Food2 days ago
Italian Ice Flavoring Guide: Flavors, Bases, and Recipes