
Food
Green Tea Temperature Guide for Perfect Brewing
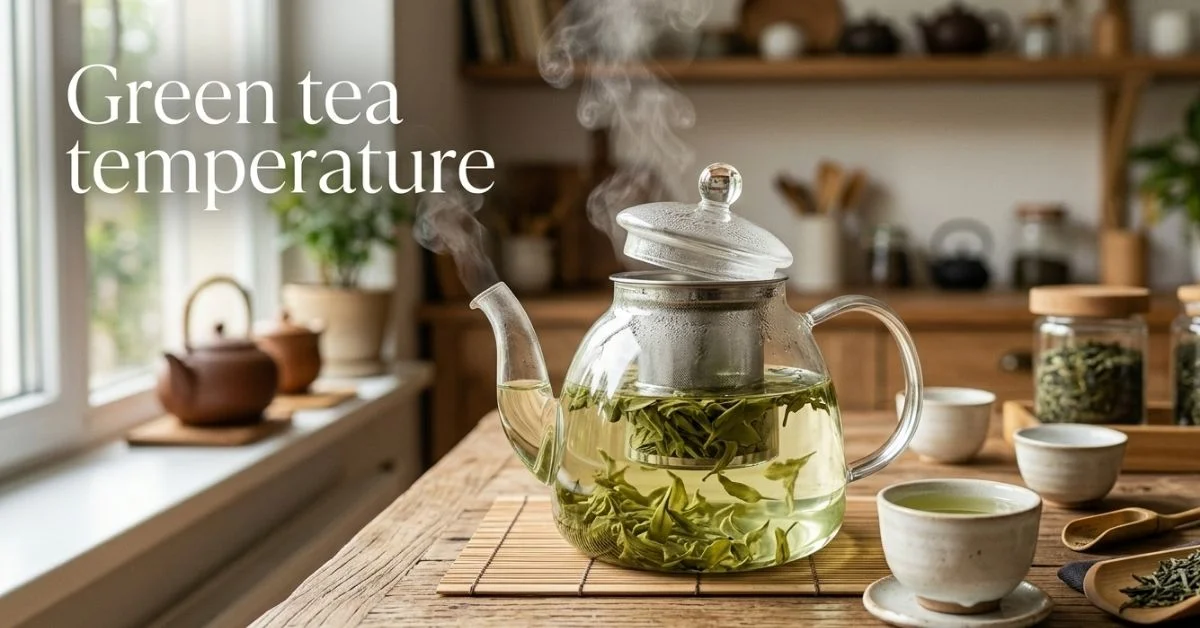
Green tea temperature plays a crucial role in how the tea tastes, smells, and feels when you drink it. Unlike black tea, green tea leaves are delicate and lightly processed. Because of this, the temperature of the water determines how quickly compounds such as catechins, amino acids, and caffeine are released from the leaves. When the water is too hot, these compounds extract very quickly and create a bitter, sharp flavor that many people dislike. When the temperature is balanced correctly, green tea becomes smooth, slightly sweet, and refreshing.
Another reason temperature matters is the structure of green tea leaves themselves. Many green teas contain tender young leaves that can easily become damaged by boiling water. High heat can cause tannins to release aggressively, which creates an astringent taste that feels dry on the tongue. A moderate temperature helps release pleasant flavors such as grassy, nutty, or slightly floral notes instead of overwhelming bitterness.
Brewing green tea at the right temperature also improves the overall drinking experience. The aroma becomes more complex, the color stays clear and bright, and the flavor remains balanced. Whether someone is preparing Japanese sencha or Chinese dragon well tea, temperature control is one of the most important steps for achieving a satisfying cup.
Read also: Toro Sashimi Guide: Cuts, Taste, and Preparation
Ideal Green Tea Temperature Range
Most green teas brew best between 70°C and 85°C, which equals roughly 160°F to 185°F. This temperature range allows beneficial compounds to dissolve into the water without pulling out too many bitter tannins. Staying within this range is the easiest way to ensure a smooth and enjoyable cup of tea every time.
Lower temperatures within this range tend to highlight sweetness and soft umami flavors. Higher temperatures can increase strength and caffeine extraction but also risk bitterness if the steeping time is too long. Because green teas vary in leaf size, growing conditions, and processing methods, the exact temperature may change slightly depending on the variety.
Here is a simple reference range many tea experts use when brewing green tea:
- 70–75°C for delicate Japanese green teas
• 75–80°C for most everyday green teas
• 80–85°C for stronger Chinese green teas
• Slightly cooler water for premium or shade grown teas
Using boiling water at 100°C is one of the most common mistakes people make when preparing green tea. Allowing the water to cool slightly before pouring over the leaves makes a significant difference in taste and smoothness.
Green Tea Temperature by Tea Type
Different green tea varieties respond differently to temperature because of their cultivation and processing methods. Japanese green teas are often steamed, which preserves delicate flavors that require lower brewing temperatures. Chinese green teas are typically pan roasted, which allows them to handle slightly hotter water.
Here are common temperature recommendations for popular green tea varieties:
- Sencha: 70–80°C
• Gyokuro: 50–60°C
• Dragon Well (Longjing): 75–80°C
• Jasmine Green Tea: 75–85°C
• Gunpowder Green Tea: 80–85°C
• Matcha: 75–80°C
Shade grown teas such as gyokuro contain high levels of amino acids that create a strong umami flavor. These teas require cooler water to maintain sweetness and avoid bitterness. Chinese roasted teas like dragon well can tolerate a slightly higher temperature because the roasting process stabilizes the leaves.
Understanding the characteristics of each tea helps adjust the temperature more precisely. With a little practice, people begin to recognize which temperatures produce the most pleasant flavor for their favorite tea.
What Happens If the Water Is Too Hot?
Using water that is too hot can quickly ruin the flavor of green tea. When boiling water hits the leaves, it forces tannins and polyphenols to extract too quickly. These compounds are responsible for bitterness and astringency, which can make the tea taste harsh or burnt.
The high heat can also damage delicate aromatic compounds responsible for floral and grassy aromas. Instead of a balanced flavor, the tea may taste flat, overly strong, or unpleasantly sharp. Even high quality tea leaves can taste poor when brewed with boiling water.
Some clear signs that the water temperature was too high include:
- Strong bitterness after the first sip
• Dry or rough sensation in the mouth
• Very dark yellow or brownish color
• Loss of natural aroma
Allowing water to cool for a minute or two after boiling is often enough to reach a suitable temperature. Many experienced tea drinkers simply wait before pouring, rather than using specialized equipment.
What Happens If the Water Is Too Cool?
Although overheating water is the most common problem, water that is too cool can also affect green tea. Low temperatures slow the extraction of flavor compounds, which may produce a weak or dull tasting cup. Instead of balanced sweetness and aroma, the tea may taste thin or watery.
Cool water prevents the leaves from fully opening and releasing their natural oils. This reduces the depth of flavor and aroma. While bitterness is less likely with cooler water, the tea may lack character and complexity.
Signs that water temperature was too low include:
- Pale color and weak aroma
• Mild or flat flavor
• Leaves that remain tightly curled
• Lack of lingering taste
Finding the right temperature allows the leaves to open gradually and release flavors in a balanced way. This is why experienced tea drinkers often adjust temperature depending on the tea variety and brewing method.
How Steeping Time Works with Temperature
Temperature and steeping time work together when brewing green tea. When water is hotter, tea compounds dissolve more quickly, so the steeping time should be shorter. When water is cooler, a slightly longer steep helps extract enough flavor from the leaves.
Balancing these two factors allows people to control taste and strength. Adjusting time instead of temperature can also help fix minor brewing mistakes.
Typical steeping guidelines include:
- 70°C water with 2–3 minute steep
• 75–80°C water with 1.5–2 minute steep
• 80–85°C water with 1–1.5 minute steep
These times apply mainly to loose leaf tea. Tea bags often brew faster because the leaves are smaller and release compounds quickly. Adjusting steeping time helps maintain flavor balance even if the temperature varies slightly.
How to Judge Green Tea Temperature Without a Thermometer
Not everyone has a temperature controlled kettle, but it is still easy to estimate the right water temperature. Traditional tea preparation methods often rely on visual cues and timing instead of precise measurements.
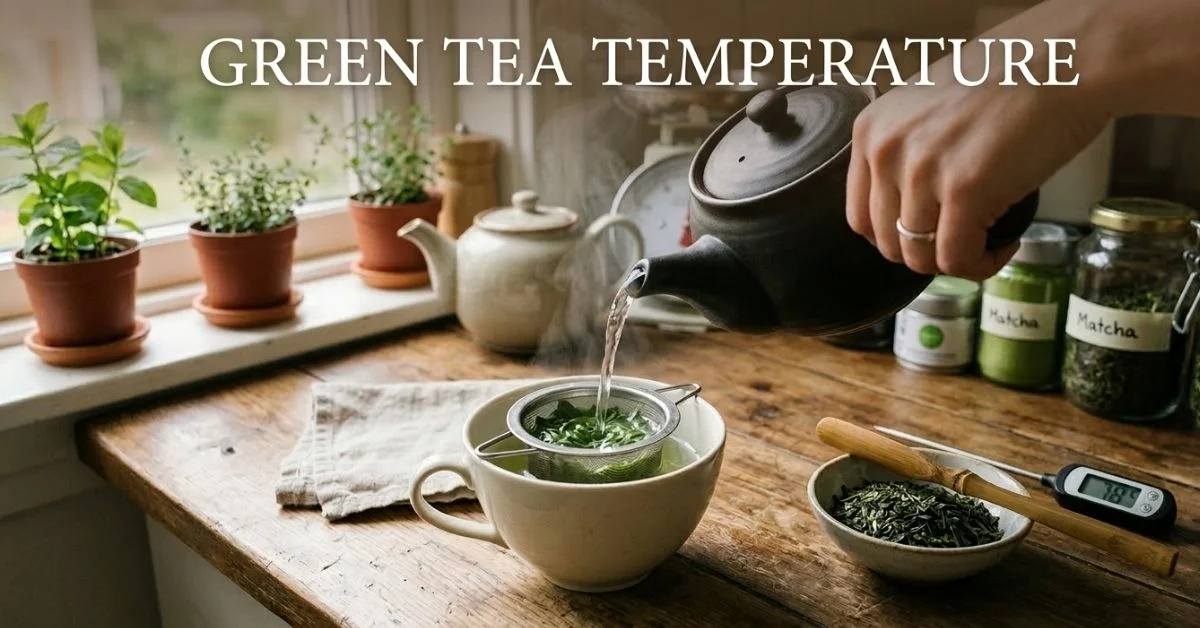
One simple method is to allow boiled water to cool naturally before pouring. Waiting for one or two minutes usually lowers the temperature enough for most green teas. The exact cooling time depends on the room temperature and the kettle size.
Another traditional technique involves observing bubbles forming in the water during heating. Smaller bubbles indicate lower temperatures, while large rolling bubbles signal boiling water.
Helpful temperature cues include:
- Tiny bubbles like fish eyes around 70°C
• Slightly larger bubbles around 80°C
• Rapid boiling bubbles near 100°C
Using these visual signs allows people to brew green tea accurately even without specialized equipment.
Loose Leaf vs Tea Bags at Different Temperatures
Loose leaf tea and tea bags behave differently when exposed to hot water. Loose leaf tea typically contains larger leaves that release flavor more gradually. Because of this, it works well with moderate temperatures and longer steeping times.
Tea bags often contain smaller leaf fragments called tea dust or fanning’s. These particles extract flavor quickly, which means they can become bitter faster if the water is too hot. Lower temperatures or shorter steeping times often work better when brewing tea bags.
Some differences between loose leaf and tea bags include:
- Loose leaf offers smoother flavor and better aroma
• Tea bags brew faster due to smaller leaf particles
• Loose leaves allow multiple infusions
• Tea bags are convenient but less complex in taste
Choosing loose leaf tea usually provides a better experience because the leaves can open fully and release their natural flavor slowly.
Cold Brew Green Tea and Temperature Differences
Cold brewing is another way to prepare green tea that completely avoids high temperatures. Instead of hot water, cold brewing uses room temperature or refrigerated water to slowly extract flavors from the leaves.
This method produces a smoother and sweeter drink because bitterness compounds dissolve less easily in cold water. Many people enjoy cold brew green tea during warm weather because it is refreshing and mild.
A simple cold brew process includes:
- Add 1 teaspoon loose green tea per cup of water
• Use cold filtered water
• Refrigerate for 6–8 hours
• Strain and serve chilled
Cold brewing highlights subtle sweetness and soft floral notes that sometimes disappear when using hot water. It is a gentle brewing method that works well with many green tea varieties.
Green Tea Temperature and Health Benefits
The temperature used for brewing green tea can influence how beneficial compounds are extracted from the leaves. Green tea is known for containing catechins, antioxidants that support overall wellness. Water that is moderately hot helps dissolve these compounds effectively without destroying delicate flavors.
Higher temperatures may extract more catechins and caffeine, but they also bring out stronger tannins. Lower temperatures preserve sweetness and amino acids such as L-theanine, which contribute to green tea’s calming effect.
Balancing temperature allows drinkers to enjoy both flavor and potential health benefits. Many experts suggest staying within the standard 70–85°C range because it provides a balanced extraction of antioxidants while maintaining a pleasant taste.
Common Green Tea Brewing Mistakes
Even experienced tea drinkers sometimes make simple mistakes when brewing green tea. Most of these problems are related to temperature or steeping time. Learning to avoid these mistakes helps improve every cup.
Common mistakes include:
- Using boiling water directly on green tea leaves
• Steeping the tea longer than three minutes
• Using too much tea for a small cup
• Brewing low quality tea leaves
• Reusing leaves too many times
Correcting these issues is usually simple. Lowering the temperature slightly or reducing steeping time often transforms a bitter cup into a smooth and enjoyable drink.
Tips for Brewing the Perfect Cup of Green Tea
Preparing excellent green tea becomes easier with a few practical habits. Temperature control remains the most important factor, but other small adjustments can improve flavor and aroma.
Helpful brewing tips include:
- Use fresh filtered water whenever possible
• Measure about one teaspoon of tea per cup
• Warm the teapot or cup before brewing
• Avoid squeezing tea bags after steeping
• Experiment with slightly different temperatures
Trying different brewing styles helps people discover their personal preference. Some enjoy lighter and sweeter tea, while others prefer stronger flavors. Adjusting temperature and time makes it easy to customize each cup.
Conclusion
Green tea temperature is one of the most important factors in creating a smooth and enjoyable cup of tea. Most green teas brew best between 70°C and 85°C, which prevents bitterness while allowing natural flavors and beneficial compounds to develop. By adjusting temperature based on tea type, steeping time, and brewing method, anyone can improve the taste and quality of their tea. With a little practice, finding the ideal green tea temperature becomes simple and leads to consistently better results.
FAQs
What is the best temperature for brewing green tea?
Most green teas brew best between 70°C and 85°C (160°F–185°F).
Why does green tea taste bitter sometimes?
Bitterness usually happens when water is too hot or the tea is steeped too long.
Can I use boiling water for green tea?
Boiling water is not recommended because it extracts too many tannins and creates bitterness.
How long should green tea steep?
Most green teas should steep for about 1–3 minutes depending on temperature.
Can green tea be brewed more than once?
Yes, high quality loose leaf green tea can usually be steeped two or three times.
Does colder water reduce caffeine in green tea?
Cooler water extracts caffeine more slowly, which can slightly reduce the caffeine level.

Picture someone in your head who eats “super healthy.” Chances are you imagined green smoothies, expensive powders, and a fridge that looks like a farmer’s market. That version exists, but it is not what being a super foodie actually means for most people.
A super foodie is someone who genuinely loves food and also pays attention to what it does for their body. Not obsessively. Not expensively. Just intentionally. This guide will walk you through what that looks like in real life, what their kitchen looks like, and how you can start without changing everything at once.
The Real Meaning of “Super Foodie”
A super foodie is not on a diet. They have not banned entire food groups or memorised a list of approved ingredients. They have just built a way of eating that is both satisfying and nourishing at the same time.
They get excited about food the way a regular foodie does, but they also care about how it makes them feel. That combination is what sets them apart.
Think of it as a middle ground. A regular foodie chases flavour and new experiences. A health nut chases rules and results. A super foodie genuinely wants both, and they have figured out that the two do not have to compete.
Featured Snippet Answer
A super foodie is someone who loves exploring food and also makes thoughtful choices about nutrition. They are not on a strict diet or following a set of rules. They simply eat with curiosity and intention, choosing whole, nourishing foods most of the time while still enjoying what they eat.
Read also: Vegetable du Jour: What It Means and How to Use It
Foodie vs. Health Nut vs. Super Foodie
These three get mixed up all the time, but the difference is actually pretty clear once you look at how each one thinks about food.
A regular foodie eats for pleasure, culture, and experience. If something tastes amazing, they will eat it. Nutrition rarely enters the conversation.
A health nut approaches food more like a system. Macros, food groups, rules, and outcomes. Enjoyment can feel like a secondary concern.
A super foodie does not fit cleanly into either. They get genuinely excited finding a new ingredient like black garlic or moringa. But they also want to know it offers something real nutritionally. They read labels sometimes, but they also cook just for the joy of it. They prioritise whole foods, but they will eat a great taco without guilt or mental calculation.
The mindset is the real difference. A super foodie does not treat health and enjoyment as a trade-off.
The 3 Core Traits That Define a True Super Foodie
Curiosity comes first. Super foodies are always discovering something new, whether that is an ingredient they have never cooked with or a cuisine they have not explored yet. They do not eat the same rotation of ten meals and call it done.
Intention comes second. This does not mean every meal is planned or calculated. It means there is awareness behind the choices. Over time they have learned what actually makes them feel better, and that knowledge quietly shapes what they reach for.
Flexibility comes third, and this one matters most for longevity. A super foodie does not spiral after eating something indulgent. They do not stress at dinner parties or avoid restaurants because the menu is not “clean” enough. Their approach works with real life, which is exactly why it sticks.
Why Becoming a Super Foodie Is Harder Than It Looks
This part rarely gets talked about. Most content just lists superfoods or explains their benefits. Nobody really addresses why people try this lifestyle for a couple of weeks and then quietly abandon it.
The honest answer is that there are some real friction points at the start, and knowing about them upfront makes a big difference.
The “Healthy but Boring” Trap
When people decide to eat better, they usually default to the same small set of “safe” foods. Plain chicken. Brown rice. Steamed broccoli. On repeat. Nutritionally it works fine. Motivationally it falls apart within days.
The super foodie approach only works long term if the food is actually enjoyable. Treating healthy eating like punishment is the fastest way to fail at it. If your meals feel like something you are tolerating rather than something you chose, the habit will not last.
The shift is treating nutritious ingredients the same way a foodie treats a new restaurant. With interest and curiosity rather than obligation. Try black bean pasta. Roast turmeric-spiced chickpeas. Make avocado toast with a poached egg and chili flakes. The goal is food you look forward to that also happens to be good for you.
Why Superfoods Alone Do Not Make You a Super Foodie
Buying a bag of chia seeds and sprinkling them on everything does not make someone a super foodie. That just makes them someone who bought chia seeds.
The identity is not about consuming a checklist of approved ingredients. It is about how you relate to food overall. Someone eating a balanced, colourful, mostly whole-food diet with genuine cooking knowledge is far more of a super foodie than someone adding spirulina powder to an otherwise ultra-processed lifestyle.
Superfoods are tools. They are not the whole approach.
The Budget Problem and How Real Super Foodies Handle It
Healthy eating has earned a reputation for being expensive, and in some cases that is fair. But most of the expensive stuff is optional, not essential.
Frozen berries are just as nutritious as fresh ones and cost significantly less. Lentils, oats, eggs, tinned sardines, and frozen spinach are genuinely among the most nutrient-dense foods available anywhere, and none of them are hard on the wallet. The fancy powders and boutique supplements are additions, not requirements.
If cost is a concern right now, build the foundation on affordable whole foods. The extras, if you ever want them, can come much later.
The Super Foodie Kitchen
You do not need a full kitchen overhaul. You mostly need a few reliable staples and a willingness to make some quiet swaps over time.
10 Pantry Staples Every Super Foodie Keeps Stocked
Rolled oats are one of the most flexible and nutritious breakfast options you can have. Lentils and chickpeas offer plant-based protein and fibre at a very low cost. Tinned wild salmon or sardines give you omega-3s with zero effort. Olive oil is the everyday cooking fat that genuinely earns its place on the shelf.
Dark leafy greens like spinach, kale, and rocket work in almost any meal. Walnuts, flaxseed, and pumpkin seeds add healthy fats and texture wherever you need them. Garlic and ginger are flavour staples that also bring real nutritional value. Turmeric is cheap and useful in more dishes than most people realise. Frozen mixed berries go into smoothies, yoghurt, or oats with no effort. And eggs remain one of the most affordable, complete, and versatile foods available.
These ten cover the majority of what a super foodie actually eats on a regular basis.
What to Ditch and What to Swap
Small swaps are more sustainable than dramatic overhauls. A few simple changes, made consistently, produce real results over time.
Swap white rice for cauliflower rice, or start by using a mix of both. Replace sugary breakfast cereal with overnight oats or a quick egg scramble with vegetables. Use Greek yoghurt instead of sour cream. Choose sparkling water with lemon over fizzy drinks. Reach for dark chocolate over milk chocolate when something sweet sounds good.
None of these feel like a big sacrifice in the moment. Over months, they add up to something significant.
How to Eat Like a Super Foodie Without Overhauling Your Life
Trying to change everything at once is the most common mistake, and also the one most likely to end in giving up. Lasting habits do not usually come from a total reset.
A Day in the Life of a Super Foodie
Mornings tend to start with something quick and filling. Overnight oats with frozen berries, a handful of walnuts, and a spoon of almond butter. Or scrambled eggs with spinach on whole grain toast. Either takes under ten minutes and keeps hunger away for hours.
Lunch is often leftovers from the night before, a big salad with tinned salmon and olive oil, or a batch of lentil soup made over the weekend. The common thread is that it is real food, not something from a packet with a long list of ingredients that are hard to identify.
Dinner is where flavour becomes the priority. Roasted vegetables with spiced chickpeas. A simple stir-fry with ginger, garlic, and whatever greens need using. A salmon fillet with sweet potato and broccoli. Nothing technically difficult. Just real ingredients cooked with some thought.
Snacks are planned rather than grabbed out of desperation. A banana with peanut butter. A small handful of mixed nuts. Greek yoghurt with honey. These keep blood sugar stable and prevent the kind of hunger that tends to lead to poor choices.
5 Simple Habits to Start This Week
Add one vegetable to every meal, even if it is just a handful of spinach stirred into pasta or eggs. Drink water first when you feel hungry between meals before reaching for anything else. Cook in batches on the weekend so weekday meals take almost no effort. Pick one new ingredient to try this week and just one so it stays manageable. Replace one ultra-processed snack each day with something whole, like fruit, nuts, or yoghurt.
None of these feel transformative individually. Combined over time, they genuinely are.
Super Foodie Meal Ideas That Actually Taste Good
Shakshuka, which is eggs poached in spiced tomato sauce, takes around twenty minutes and is genuinely satisfying. Turmeric-roasted cauliflower with tahini drizzle sounds impressive but uses four ingredients. A grain bowl with farro, roasted sweet potato, avocado, and a boiled egg is filling and colourful. Black bean tacos with pickled red onion and lime yoghurt taste like something from a decent restaurant. Miso-glazed salmon with edamame and brown rice comes together in under twenty minutes.
These are not sad, pale health meals. They are genuinely good food that happens to be nutritious.
Super Foodie Recipes for Beginners
Quick Breakfasts Under 10 Minutes
Overnight oats require no cooking at all. Combine half a cup of rolled oats with your milk of choice, a tablespoon of chia seeds, a spoon of nut butter, and whatever fruit you have available. Leave it in the fridge overnight and breakfast is already done by morning.
A green smoothie with frozen spinach, frozen mango, a banana, and almond milk takes about three minutes to blend. The banana and mango completely overpower the spinach flavour, which is genuinely useful for anyone who struggles to eat greens.
Scrambled eggs with cherry tomatoes and baby spinach takes around eight minutes on medium heat. Add a pinch of chili flakes and a slice of whole grain toast and you have a breakfast that holds you for four to five hours.
Snacks That Pull Double Duty
Apple slices with almond butter give you fibre, healthy fat, and natural sugar together. A small portion of hummus with cucumber and carrot sticks is filling and almost effortless to prepare. A handful of mixed seeds and dried fruit travels well and needs no preparation at all. Greek yoghurt with a teaspoon of honey and some walnuts takes thirty seconds and covers protein and healthy fats in one go.
One-Bowl Dinners Worth Making
A lentil and vegetable stew with tinned tomatoes, red lentils, spinach, cumin, and garlic takes thirty minutes and easily makes four servings. A Buddha bowl using whatever roasted vegetables you have, a protein, some cooked grains, and a simple tahini dressing comes together in about twenty minutes. Spiced chickpea and sweet potato curry with tinned coconut milk is one of the most satisfying things you can make on a tight budget.
What Most People Get Wrong About Being a Super Foodie
The most common misconception is that it is all about which specific foods you eat. People spend energy worrying about whether they are getting enough of the right superfoods and completely miss what actually matters.
No single food makes or breaks anyone’s health. What matters is the consistent pattern over weeks and months. Someone eating varied, colourful, mostly whole food around 80 percent of the time, and enjoying whatever they like the rest of the time, will do far better than someone who eats perfectly for three weeks and then crashes back to old habits entirely.
The other mistake is waiting until you feel ready or informed enough to begin. People research extensively, follow countless health accounts, and buy books, but never actually change what they eat. The real learning comes from cooking and trying things. Buying one new ingredient this week and cooking one new recipe is more valuable than another hour of reading about nutrition.
Conclusion
Being a super foodie is not a phase or a strict programme. It is just a way of relating to food that treats eating as something worth doing well, without making it stressful or joyless.
Pick one small thing to change this week. One swap, one new ingredient, one home-cooked meal you would not normally make. That is a more honest starting point than any dramatic reset.
FAQs
Is being a super foodie expensive?
It does not have to be. Lentils, eggs, oats, frozen vegetables, sardines, and bananas are among the most nutritious foods available and also among the most affordable. The expensive side of healthy eating is entirely optional. Starting with affordable whole foods is enough.
Do I need to give up my favourite foods?
No, and in most cases you should not try to. Cutting out foods you genuinely enjoy tends to backfire. The super foodie approach focuses on adding more good things rather than eliminating what you love. When your diet is already full of satisfying, nourishing food, the less healthy stuff naturally takes up less space over time.
What is the difference between superfoods and regular healthy food?
Superfoods is mostly a marketing label applied to foods with high concentrations of specific nutrients. Many ordinary vegetables and fruits offer comparable benefits. Broccoli, carrots, and apples are not marketed as superfoods but they are excellent for your health. The label is not worth chasing.
Can kids or seniors follow a super foodie lifestyle?
Yes, and the core of it looks the same for any age. Colourful whole foods, minimally processed meals, and genuine enjoyment of eating are good principles at every stage of life. Children who grow up around varied, interesting food tend to develop much healthier relationships with eating long term.
How long before I notice a difference?
Most people notice improved energy and digestion within two to three weeks of eating more whole foods consistently. Changes in weight, skin clarity, and mood typically take a few months to become obvious. The timeline varies, but the direction stays consistent as long as the habits do.
Let me be honest with you I spent a good amount of time ruining quesadillas at home before I figured out what was actually going wrong. They would come out soggy, or the filling would slide out the moment I tried to flip them, or the cheese would barely melt while the outside was already burnt. Sound familiar? If you have been trying to recreate that perfectly stuffed, crispy, melty quesadilla rellena you had at a Mexican restaurant, this guide is going to clear up every bit of confusion. We are going to cover the right ingredients, the best filling combinations, and the actual technique that makes it work every single time.
Featured Snippet Answer
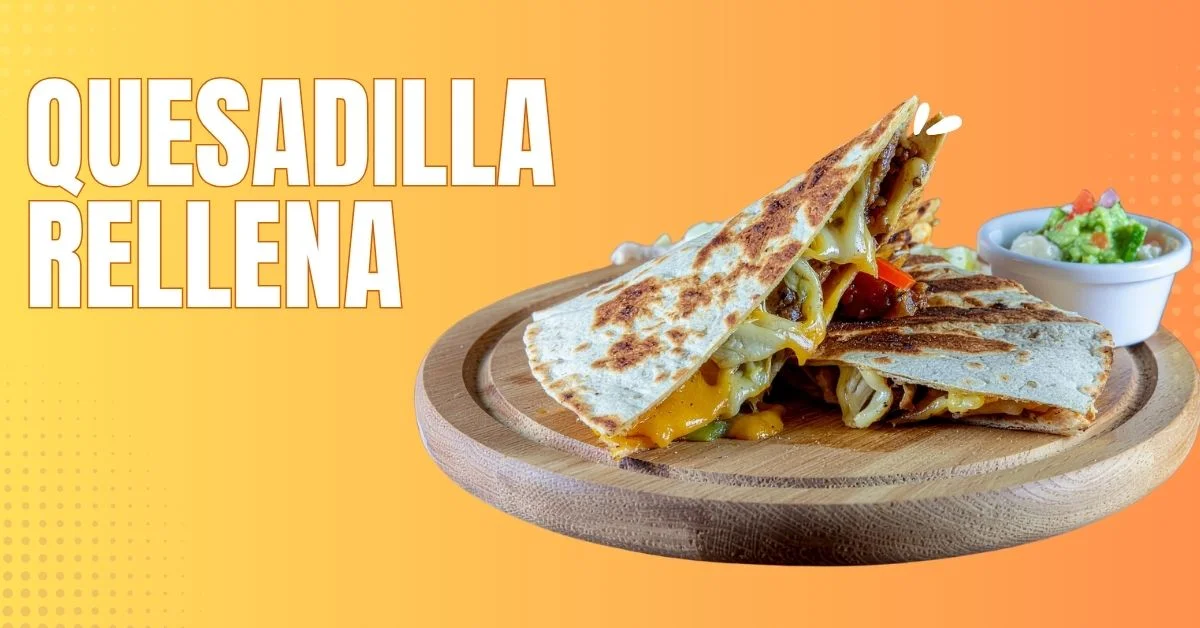
A quesadilla rellena is a stuffed quesadilla filled with a generous layer of cheese, meat, vegetables, or a combination of all three. Unlike a basic quesadilla, the rellena version focuses on a thick, flavorful filling sealed inside a tortilla and cooked until the shell is crispy and the inside is fully melted through.
What Makes a Quesadilla “Rellena” Different
Rellena vs. regular quesadilla
“Rellena” simply means “stuffed” or “filled” in Spanish, so technically every quesadilla is a little rellena. But in real life, a quesadilla rellena is something you put real effort into, where the filling is the main event rather than just a thin layer of cheese melted between two tortillas. A regular quesadilla is quick and minimal, often thrown together with whatever is left in the fridge. A rellena version has a proper filling prepared separately with seasoning, and the whole thing is assembled carefully so nothing leaks out during cooking. That distinction sounds small at first but it honestly changes everything about the final result.
Read also: Vegetable du Jour: What It Means and How to Use It
Why the filling ratio changes everything
Here is the thing most people do not hear enough. Going too heavy on the filling is where everything falls apart, literally. When you overstuff, the tortilla cannot press flat against the pan, the edges cannot seal, and everything spills the moment you try to flip it. A good rule of thumb is to fill no more than half the volume the tortilla can naturally hold when folded, generous but manageable, not crammed to the absolute limit.
Ingredients You Need
Best tortilla type to use
Flour tortillas are the go-to choice for quesadilla rellena because they are more flexible, seal better at the edges, and hold up under a heavier filling without cracking apart. If you prefer corn tortillas for that more authentic flavor, use smaller ones and keep the filling lighter so they do not split when you fold them. For the best surface area, a 10-inch flour tortilla is ideal, and store-bought works perfectly fine as long as it is fresh and the edges have not dried out before you start.
Cheese options that melt properly
Not all cheese melts the same way, and this detail matters way more than most people think. Oaxaca cheese is the top pick because it stretches beautifully without turning greasy and has a mild flavor that works with almost any filling. Chihuahua cheese is rich and creamy with a slightly buttery taste that makes the inside feel genuinely indulgent. Monterey Jack is the easiest to find and melts evenly every time, making it a solid and reliable option. Mozzarella works in a pinch and gives you that satisfying stringy pull when you cut through. One small tip worth remembering is to skip the pre-shredded cheese when you can, because the anti-caking powder coating that keeps it from clumping also stops it from melting as smoothly in the pan.
Filling combinations ranked by popularity
Oaxaca cheese with rajas and corn is the classic that shows up on most Mexican restaurant menus. Seasoned ground beef with cheese and jalapeños is the heartier option that most home cooks try first. Chile relleno style with roasted poblano peppers and white cheese is the more traditional preparation and honestly one of the most rewarding to make. Shredded chicken with black beans and salsa gives you something lighter but still very satisfying. Mushrooms with epazote and cheese work beautifully as a vegetarian version that does not feel like a compromise at all.
The Mistakes Most People Make
This is the part most recipe sites skip entirely, and I genuinely think it is the main reason your homemade version never quite matches what you get at a good restaurant. I spent way too long making the same mistakes before someone finally explained the technique properly, so let me save you that frustration.
Over-stuffing and why your quesadilla falls apart
If you pile in too much filling, the tortilla edges simply cannot reach each other, and when you go to flip it, everything pushes out from the sides and you end up with a messy pan. Fill one half of the tortilla, leave at least a half-inch border along the curved edge before folding, and that border is what seals the whole thing and keeps it together during cooking.
Wrong heat level means soggy or burnt
Many home cooks crank up the flame thinking it will crisp up faster, but what actually happens is the shell chars while the inside stays cold and unmelted. Medium heat is the right call every time, giving the tortilla time to slowly turn golden while the interior heats all the way through in about three to four minutes per side. On the other end, heat that is too low gives you a pale and limp shell with zero crispiness, so the pan should be hot enough that the tortilla sizzles gently the moment it touches the surface.
The sealing technique most home cooks skip
After folding the tortilla over the filling, press down gently with a wide spatula for the first 30 seconds on each side, which helps the edges fuse together and stops the filling from shifting around while it cooks. If you are working with a particularly wet or heavy filling, pressing the edges lightly together before the quesadilla even goes in the pan gives you extra security against any leaks.
Step-by-Step: How to Make Quesadilla Rellena
Preparing your filling in advance
Never add raw filling straight from a hot pan into your tortilla because if your meat or vegetables are still steaming, they will create moisture inside and soften the shell from the inside out before it even has a chance to crisp. Cook your filling first, let it cool for a few minutes, and then start assembling, because this single step alone makes a dramatic difference in the final texture.
Assembling without overfilling
Lay your tortilla flat and spread cheese over one half only, leaving a half-inch border around the edge, then add your filling on top of the cheese layer and keep it even without piling it too high. Add a thin second layer of cheese on top of the filling because this top layer acts as a binder that holds everything together once it melts. Fold the empty half over the filled side and press gently along the edges before it goes anywhere near the pan.
Cooking it on a skillet
Heat a dry skillet or comal over medium heat with no oil needed unless your pan is not non-stick, then place the folded quesadilla in the pan and press lightly with a spatula. Cook for three to four minutes until the bottom is a nice even golden and the curved edge looks firm and set, then flip carefully using a wide spatula and cook another three minutes on the second side. You will know it is done when both sides are evenly golden and the cheese is just starting to ooze very slightly at the edges.
How to flip without losing the filling
Slide your widest spatula fully under the quesadilla before lifting, then flip in one confident and committed motion rather than hesitating halfway through. If your quesadilla is on the larger side, use two spatulas to support the full length of it, because a slow and uncertain flip is almost always the reason the filling slides out.
Best Filling Variations to Try
Classic cheese and chile relleno style
Roast the poblanos directly over a gas flame or under the broiler until the skin is charred all over, then place them in a covered bowl for 10 minutes so the steam loosens the skin. Peel them, remove the seeds, and cut into strips called rajas, then add these inside the quesadilla with Oaxaca or Chihuahua cheese for a filling that is smoky, slightly spicy, and deeply satisfying.
Quesadilla rellena con carne
Season ground beef with cumin, garlic, a pinch of chili powder, and salt, then cook until fully browned and let it cool slightly before using. Adding a layer of refried beans as the base inside the tortilla before adding the beef makes the whole filling more cohesive and adds a creaminess that pairs really well with the crispy shell.
Vegetarian version with roasted vegetables
Roast zucchini, bell pepper, and red onion with olive oil, salt, and cumin at high heat until slightly caramelized and tender, then let them cool before adding inside the tortilla with Monterey Jack cheese. A spoonful of black beans adds extra texture and protein, making this version feel genuinely complete rather than like a side dish pretending to be a meal.
Spicy version for heat lovers
Combine chorizo cooked in a dry pan with diced jalapeños and pepper Jack cheese, and since the chorizo releases its own fat during cooking, no extra oil is needed at all. The result is intensely flavorful with a slow heat that builds after a few bites, so serve with cold crema on the side to balance out the richness.
What to Serve With Quesadilla Rellena
Salsas and dips that complement it
Salsa roja is the classic pairing and works with almost every filling combination you can think of, while avocado crema made from blended avocado, sour cream, lime juice, and salt cuts through the richness of a heavier filling beautifully. Pico de gallo works really well on the side when the filling is on the spicier end, since the fresh tomato and cilantro give a cooling contrast without competing with the main flavors.
Side dishes that round out the meal
Mexican rice with a tomato base is the most natural partner on the plate, and refried black beans with a sprinkle of cotija cheese add a creamy and salty contrast that works really nicely alongside it. A simple cabbage slaw dressed with lime juice and salt gives you something light and crunchy to balance all that richness, and pickled jalapeños on the side let everyone at the table adjust the heat level to whatever they prefer.
What Most People Get Wrong About Quesadilla Rellena
Let’s be honest, most people treat a quesadilla rellena like a regular quesadilla and just throw in more filling, and that is the core misunderstanding right there. The difference is not just in quantity but in technique, because a properly made quesadilla rellena needs the filling to be pre-cooked and slightly cooled before assembly, cheese layered on both sides of the filling rather than only underneath, and steady moderate heat throughout the entire cooking time. Most people also skip the resting step entirely, but after the quesadilla comes off the heat, letting it sit for a full minute before cutting allows the cheese to firm up slightly so the filling stays in place when you slice through instead of sliding out everywhere.
Conclusion
Here is what I want you to take away from all of this. Making a great quesadilla rellena at home is completely within reach, but the small details are what separate a good one from one that falls flat. Cool your filling before assembly, layer cheese on both sides of it, keep the heat steady at medium, and let it rest for one minute before you cut into it. That last step sounds almost too simple to matter, but it genuinely changes things.
Start with the classic roasted poblano and cheese version to get comfortable with the technique, and once that clicks, move into heartier fillings like carne or spicy chorizo. You will find that each time you make it, something improves just slightly without you even trying. And the day you bite into one that genuinely rivals your favorite restaurant version, you will wonder why you ever doubted yourself in the kitchen.
FAQs
Can I use store-bought tortillas for quesadilla rellena?
Yes, store-bought flour tortillas work great as long as they are soft and pliable. Warm them briefly in a dry pan for about 20 seconds per side before assembling so they fold without cracking.
How do I keep my quesadilla rellena from getting soggy?
Let your filling cool completely and drain any extra liquid from vegetables or beans before assembling. A dry and properly heated skillet also helps create the crispy exterior that keeps the shell firm.
Can I make quesadilla rellena ahead of time and reheat it?
You can prepare the filling up to two days in advance and store it in the fridge. If you have leftover cooked quesadilla, reheat it in a dry skillet over low to medium heat rather than the microwave, which turns the shell rubbery within minutes.
What is the best cheese for melting inside a quesadilla rellena?
Oaxaca cheese is the best option because it melts slowly, stretches without turning greasy, and works with almost any filling. If you cannot find it, Monterey Jack melts cleanly and is available almost everywhere.
Is quesadilla rellena the same as a chile relleno quesadilla?
Not exactly. A chile relleno quesadilla uses a roasted pepper filling specifically, while quesadilla rellena is a broader term covering any generously stuffed quesadilla with all kinds of different fillings.
Let’s be honest, the first time I saw squid ink tonnarelli on a menu, I almost skipped it. Jet black pasta sounds like something that belongs in a Halloween dinner, not a Tuesday night at home. But the moment I tried it, I completely understood why Italians have been making it for centuries. If you have been curious about this pasta but unsure where to start, you are in the right place. This guide covers what it actually tastes like, how to cook it without messing it up, and which sauces actually work.
What Is Squid Ink Tonnarelli?
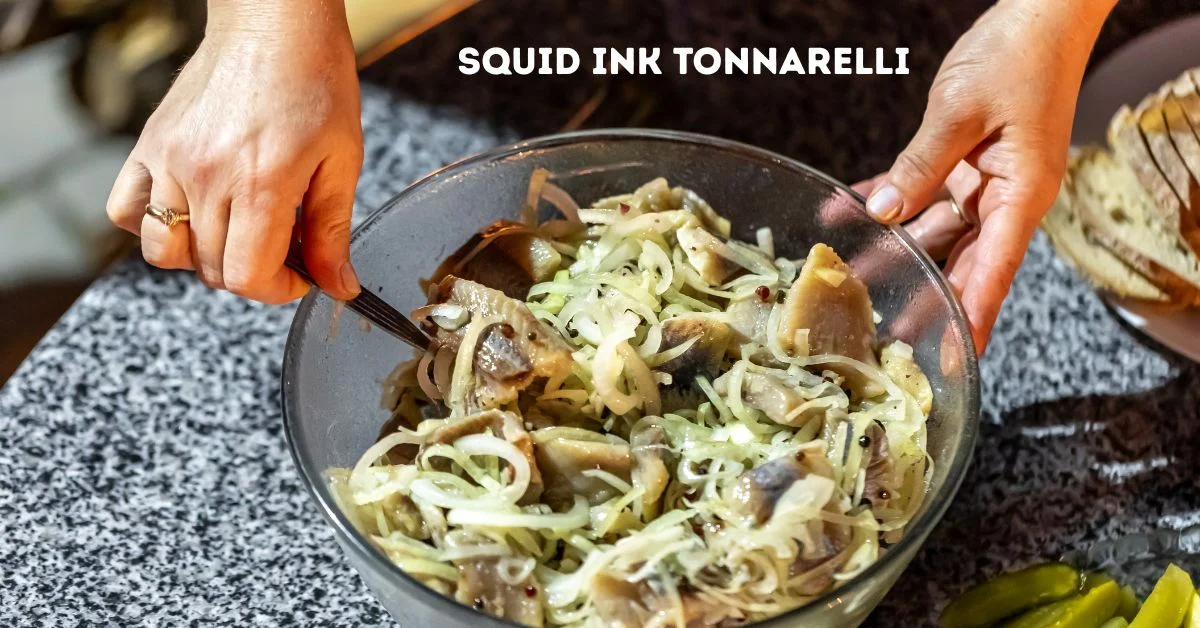
Tonnarelli is a thick, square-cut pasta from central Italy, particularly from Rome and the Lazio region. Think of it as a slightly chunkier, square version of spaghetti. When squid ink gets mixed into the dough during production, the pasta turns a deep, almost dramatic black and picks up a subtle briny quality from the ink.
It belongs to the same family as spaghetti alla chitarra but has a denser chew and holds sauce better because of its square edges. Coastal Italian cooks have been using squid ink for centuries, originally because it was a byproduct of cleaning fresh squid during fishing. Over time, it became a beloved ingredient in its own right.
Here is the thing most people miss. The ink actually builds a faint oceanic flavor directly into the dough itself. That means the pasta is already doing some of the flavor work before you even add a sauce, which changes how you should think about seasoning the whole dish.
What Does Squid Ink Tonnarelli Actually Taste Like?
This is the question almost every first-timer asks, and the honest answer is that it tastes much milder than you probably expect.
The flavor is subtle, slightly salty, and faintly briny. It does not taste like fish. A better way to describe it is that it tastes like sea air rather than any specific seafood. If you have ever eaten a fresh oyster or tasted the liquid inside a steamed clam, you have a rough idea of the base note the ink adds. It is there, but it is gentle.
The texture is where tonnarelli really earns its reputation. It has a satisfying firm chew, holds sauce beautifully along its square edges, and stays al dente without turning mushy if you cook it right.
Is it too fishy for beginners? No, and this surprises most people. The ink is used in small amounts during pasta production, so it seasons the dough rather than dominating it. If you enjoy simple seafood pasta at all, you will almost certainly enjoy this. If you are still not sure, start with a garlic and olive oil sauce the first time. It lets you taste the pasta itself before you bring in stronger flavors.
Read also: Pork Side Meat: A Beginner’s Guide to Cooking It Right
Ingredients You Need
Fresh vs packaged squid ink tonnarelli
I spent more time than I should have searching for fresh squid ink tonnarelli the first time, only to realize that dried pasta works just as well for everyday cooking. A good quality Italian brand holds its shape, delivers excellent flavor, and is far more forgiving at the stove. Fresh squid ink tonnarelli is available at specialty stores or Italian delis and cooks in about two to three minutes, but it is more delicate and easier to overcook.
For a weeknight dinner, dried pasta is the smarter choice. Fresh pasta is worth seeking out when you have a little more time and attention to give.
Key supporting ingredients
You do not need many ingredients to make this pasta shine. The dish is built on simplicity, and the more you overload it, the more you risk drowning out the flavor that makes it interesting in the first place.
Good extra virgin olive oil is essential because it forms the base of almost every sauce that works well here. Garlic, lightly cooked rather than browned, adds warmth without competing with the pasta. Seafood like clams, shrimp, scallops, or cuttlefish echo the oceanic note already present in the pasta. Dry white wine brings brightness and acidity to seafood sauces and lifts the overall dish. Fresh parsley added at the end gives a clean, herbal finish that cuts through the richness.
How to Cook Squid Ink Tonnarelli Step by Step
Boiling time and texture control
Start with a large pot and plenty of water. This matters more than people think because crowded pasta cooks unevenly and sticks together. Bring the water to a full, rolling boil before adding the pasta.
Add salt to the boiling water, but go slightly lighter than you normally would. Squid ink tonnarelli already carries a faint saltiness from the ink, and most seafood sauces add more salt on top. It is easy to end up with an oversalted dish if you season the water the same way you would for plain pasta.
Dried squid ink tonnarelli typically takes 8 to 10 minutes. Check the packet and start tasting two minutes before the suggested time. You are looking for pasta that is still firm in the center with just a little resistance when you bite through it.
Before you drain the pasta, scoop out a full cup of the cooking water and set it aside. That starchy liquid is one of the most useful things in your kitchen at that moment. It helps bind the sauce, loosen it if it gets too thick, and makes everything coat the pasta evenly.
How to avoid overcooking
The biggest mistake with this pasta is finishing the cooking in the pot instead of in the pan. Drain the pasta when it is still slightly underdone, then transfer it directly into your sauce pan with a splash of the reserved pasta water. Let it finish cooking in the sauce for one to two minutes. This way the pasta absorbs the sauce instead of just sitting on top of it, and you never end up with a mushy result.
When to add sauce
Your sauce should already be ready and waiting in the pan before the pasta finishes boiling. This is not a dish where you boil the pasta, set it aside, and then start making the sauce. The timing matters. Have your garlic already cooked, your seafood ready, and your sauce simmering gently so the moment you drain the pasta, it goes straight into the pan.
Best Sauces for Squid Ink Tonnarelli
Seafood-based sauces are the classic pairing
Clams in white wine are probably the most traditional match. The briny clam juice and dry wine create a light broth that soaks into the pasta and mirrors the oceanic quality of the ink. Shrimp with garlic and olive oil is another natural fit. Scallops work beautifully if you sear them separately and use the pan drippings as part of your sauce base.
The reason seafood works so well here is not just tradition. It is practical flavor logic. The ink already tastes like the sea, so pairing it with seafood creates a unified dish where everything points in the same direction. Introducing a completely unrelated protein creates a disconnect that is hard to resolve at the table.
Light garlic and olive oil options
Aglio e olio with squid ink tonnarelli is one of the simplest and most satisfying combinations you can make. Cook thinly sliced garlic in olive oil over low heat until it softens and turns golden but not brown. Toss in the drained pasta with a splash of pasta water, a pinch of chili flakes, and fresh parsley. That is genuinely all you need. The simplicity lets the pasta itself do the talking.
Tomato vs cream, what works and what does not
Light tomato sauce can work if you use a fresh, bright version rather than a heavy cooked-down marinara. The acidity cuts through the richness of the ink and adds some contrast. Use it sparingly though. A small amount of tomato in a mostly olive oil base works better than making tomato the dominant element.
Cream sauce is the one pairing that most Italian cooks would steer you away from, and for good reason. Cream coats the palate and mutes the subtle oceanic flavor that makes squid ink pasta worth eating in the first place. If you want to use cream, use only a small amount as a finishing touch rather than building the whole sauce around it. Heavy cream sauces paired with squid ink pasta tend to taste muddy rather than refined.
Common Mistakes to Avoid
Overpowering the natural flavor
The most common mistake is treating squid ink tonnarelli like a blank canvas and piling on strong flavors. It is not a blank canvas. The pasta itself has character, and the best thing you can do is let it show. Avoid strong cheeses like pecorino or parmesan on top because the sharpness competes with the delicate ink flavor. Avoid very spicy sauces for the same reason. The goal is complement, not competition.
Using the wrong sauce
Any sauce that is too heavy, too rich, or too strongly flavored will overwhelm what makes this pasta special. This is not the pasta to pair with a slow-cooked meat ragu or a very assertive, garlicky sauce. Keep things light, keep them coastal, and you will not go wrong.
Overcooking the pasta
Squid ink tonnarelli loses its pleasant chew quickly. Once it goes past al dente, it turns soft and the flavor of the ink becomes less distinct. The finish-in-the-pan method described earlier solves this entirely. Drain it early, finish it in the sauce, and serve immediately.
Adding too much salt
Because the pasta and seafood sauces both carry natural salinity, it is easy to oversalt this dish without realizing it until you sit down to eat. Season at the end rather than the beginning, and taste constantly. A dish that is slightly undersalted can be fixed at the table. One that is oversalted cannot be rescued.
Restaurant vs Homemade Version
You might be wondering why squid ink tonnarelli at a restaurant always seems to taste better than what you make at home. The main difference is usually the precision of the timing and the quality of the seafood, not some secret ingredient you are missing.
Restaurant kitchens have everything prepped and ready so the pasta goes from boiling water to sauce to plate in under three minutes. The sauce is often built from a fresh seafood stock that takes hours to prepare. The portions are precise and the pasta is served immediately.
At home, you can get genuinely close by keeping a few things in mind. Make sure your sauce is completely ready before you start boiling the pasta. Use the best quality seafood you can find because there is nowhere to hide with a simple sauce. Serve the moment the pasta hits the plate because this dish does not wait well.
One trick that genuinely makes a difference at home is finishing the pasta with a small drizzle of very good olive oil right before serving. It adds a glossiness to the dish and a fresh flavor that lifts everything noticeably.
Where to Buy Squid Ink Tonnarelli
Online vs local stores
Specialty Italian grocery stores often carry dried squid ink tonnarelli, particularly in cities with a strong Italian food culture. If you cannot find it locally, it is widely available online through Italian importers and specialty food retailers. Look for brands that list semolina flour and squid ink as the main ingredients with no artificial coloring or additives.
What to look for in quality
Good quality squid ink pasta should be a deep, even black color with no gray or faded patches. The package should feel solid and the pasta should look clean without any cracks or broken pieces. A short ingredient list is usually a good sign. Italian-made pasta from a reputable brand almost always outperforms cheaper alternatives.
Simple Squid Ink Tonnarelli Recipe
Quick 20-minute version
Ingredients for two people: 200g dried squid ink tonnarelli, 3 garlic cloves thinly sliced, 250g clams or shrimp, 100ml dry white wine, 3 tablespoons extra virgin olive oil, a small handful of fresh parsley, salt to taste.
Heat the olive oil in a wide pan over medium heat. Add the garlic and cook gently for one to two minutes until it softens without browning. Add the seafood and pour in the white wine. Cook for two to three minutes until the clams open or the shrimp are just pink. Keep the pan on low while your pasta finishes.
Boil the tonnarelli in lightly salted water until just under al dente, reserve a cup of the pasta water, then transfer the pasta directly into the pan. Toss everything together for one to two minutes, adding pasta water a splash at a time until the sauce coats the pasta evenly. Finish with fresh parsley and a drizzle of olive oil. Serve immediately.
Optional upgrades for better flavor
Add a small amount of fresh chili or chili flakes with the garlic if you want a little heat. A squeeze of lemon right at the end brightens the whole dish. If you can find fresh cuttlefish or squid, cooking it in the sauce instead of clams or shrimp deepens the connection between the ink in the pasta and the seafood in the sauce.
What Most People Get Wrong About This Pasta
Most home cooks approach squid ink tonnarelli the same way they approach any other pasta, which means they season the water heavily, cook the pasta fully in the pot, and add whichever sauce they have planned without adjusting for the pasta’s own character. The result is a dish that tastes fine but misses the point entirely.
The other thing people consistently get wrong is the salt. Because the dish looks bold and dramatic, people assume it needs bold seasoning. It does not. The ink, the seafood, the pasta water, and the olive oil all contribute flavor. The cook’s job is mostly to get out of the way and let those elements work together.
Conclusion
Squid ink tonnarelli is one of those dishes that rewards you for keeping things simple. The pasta does most of the work on its own, and your job is really just to not get in the way. Season lightly, pair with seafood or simple garlic oil, and get it to the plate while it is still hot. Once you cook it a couple of times, you will stop seeing it as intimidating and start seeing it for what it actually is, one of the easiest impressive meals you can put together at home. Give it a shot, and I think you will be glad you did.
FAQs
Is squid ink pasta safe to eat?
Yes, it is completely safe. Squid ink has been used in cooking for centuries and is approved as a food ingredient in both Europe and the United States. It is simply the natural pigment from squid, used in small amounts to color and lightly flavor the pasta dough.
Does it taste very fishy?
No. The flavor is subtle and briny rather than strongly fishy. Most people who are nervous about trying it are surprised by how mild it actually is. It adds a faint oceanic quality rather than the aggressive fish flavor people expect.
Can vegetarians eat squid ink pasta?
No, squid ink comes from squid, which is an animal. It is suitable for pescatarians who eat seafood but not for those following a vegetarian or vegan diet. Some specialty stores sell pasta colored with other natural ingredients as an alternative.
Why is it black in color?
The black color comes from melanin in the squid ink, which is the natural pigment that squid produce and release as a defense mechanism. When mixed into pasta dough, it colors the pasta evenly and adds a very mild flavor alongside the dramatic appearance.
Can I make it from scratch at home?
Yes, you can. You will need fresh pasta dough made from semolina flour and eggs, with squid ink mixed in during the kneading stage. Squid ink is sold in small sachets at most specialty grocery stores and online. Making it from scratch gives you control over the thickness and texture, though dried pasta is a perfectly good alternative for everyday cooking.
-

 Tech1 week ago
Instatroid Explained: Easy & Safe Instagram Viewer Guide
-

 Food1 week ago
Cuts of Steak: Complete Guide to Beef Cuts
-

 Food1 week ago
What Is Andouille Sausage? Complete Guide
-

 Food1 week ago
Wagyu Beef Price per Pound: Complete Cost Guide
-

 Food1 week ago
Shirleys Coffee Shop Guam Locations Menu and Guide
-

 Food1 week ago
Ultimate Tripas Recipe and Cooking Guide
-

 Tech2 weeks ago
DemonScans Review: Is It Safe for Manga Readers?
-

 Food1 week ago
Italian Ice Flavoring Guide: Flavors, Bases, and Recipes