
Food
Pink Strawberries: Types, Taste & Growing Guide

If you have seen strawberries with a soft pink color and wondered whether they are just unripe or something completely different, you are not alone. Many people confuse pink strawberries with unripe red ones, or mix them up with white strawberries or pineberries. They are actually a unique group of strawberry varieties with their own taste, look, and growing needs.
In this guide, you will learn exactly what pink strawberries are, which varieties are worth growing, how they taste, and how to grow them at home even if you are a complete beginner. You will also find out where to buy plants, what mistakes to avoid, and how to use them once you harvest them.
What Are Pink Strawberries?
Pink strawberries are real, naturally occurring strawberry varieties that stay pink even when fully ripe. They are not unripe red strawberries. Their color comes from reduced levels of a pigment called anthocyanin, which is responsible for the deep red color in regular strawberries. When this pigment is naturally lower, the fruit stays pink or light red at full ripeness.
Featured Snippet Answer:
Pink strawberries are fully ripe strawberries that naturally stay pink in color due to lower anthocyanin levels. They are not unripe or hybrid fruits. These varieties have their own distinct flavor, often sweeter and less tart than red strawberries, and are grown mainly as ornamental or specialty garden plants.
Why Some Strawberries Stay Pink
The pink color is a genetic trait. Some strawberry varieties simply do not produce as much red pigment as standard ones. This is not a defect. It is just how these plants are built. The fruit ripens fully and is perfectly edible, often with a surprisingly sweet flavor.
A gardener in the UK who switched to growing Tristan strawberries noted that neighbors kept asking if the fruits were ripe because they expected red. After tasting them, most changed their minds quickly.
Read also: Italy Traditional Breakfast: What Locals Actually Eat
Key Visual Features
Pink strawberries are usually slightly smaller than typical red strawberries. Their skin is a soft blush to medium pink. Many varieties also produce pink or rose-colored flowers, which makes them attractive as ornamental plants. The flesh inside is often pale pink or cream-colored, lighter than red varieties.
Popular Pink Strawberry Varieties
Not all pink strawberries are the same. There are several named varieties, each with slightly different traits.
Berried Treasure Pink
This is one of the most popular varieties for home growers. It was bred specifically as an ornamental strawberry that also produces edible fruit. The plant grows in a compact mound, making it perfect for containers and hanging baskets. The berries are small but sweet, and the flowers are a pretty rose-pink color. It is widely available online and in garden centers.
Tristan Strawberry
Tristan is a everbearing variety, meaning it produces fruit across a long season rather than just in one flush. The berries are firm and have a rich, sweet strawberry flavor. The plant also produces attractive pink flowers that look great in borders and patio pots. Many growers choose Tristan for both its fruit and its visual appeal.
Toscana Strawberry
Toscana is a day-neutral variety bred in Europe that has become popular worldwide. It produces medium-sized pink berries with an intense, sweet flavor. Many growers describe the taste as more aromatic than standard red strawberries. Toscana also has a long fruiting season and performs well in containers, which makes it a top choice for balcony and patio gardeners.
Other Pink-Flowering Types
Some strawberry plants are classified as pink mainly because of their flower color rather than their fruit. Varieties like Pink Panda are grown primarily as ground cover with edible but smaller fruit. It is worth knowing this difference before buying so you get what you actually want.
What Do Pink Strawberries Taste Like?
This is the question most people ask before committing to growing them.
Flavor Profile Compared to Red Strawberries
Pink strawberries are generally sweeter and less tart than standard red varieties. Red strawberries have a sharp, tangy note that balances their sweetness. Pink varieties tend to taste milder and more purely sweet. Some people describe the flavor as almost candy-like, especially in varieties like Toscana.
Sweetness and Texture
The texture of pink strawberries is similar to red ones but can feel slightly softer. They are juicy but not overly watery. Because they tend to have higher sugar content relative to acidity, they taste very pleasant fresh off the plant. They are not as firm as commercially grown red strawberries, so they are best eaten soon after picking.
Pink vs Red vs White Strawberries: Key Differences
Many buyers confuse pink strawberries with white strawberries or pineberries. Here is a clear comparison.
Featured Snippet Answer:
Pink strawberries stay pink when ripe and taste sweet with low tartness. Red strawberries are the most common type with a classic sweet-tart flavor. White strawberries, like pineberries, are almost fully white with red seeds and have a pineapple-like taste. Each is a distinct variety, not a different ripeness stage.
| Feature | Pink Strawberries | Red Strawberries | White Strawberries |
| Color when ripe | Pink to blush | Deep red | Cream to white |
| Flavor | Sweet, mild | Sweet and tart | Fruity, pineapple notes |
| Size | Small to medium | Medium to large | Small to medium |
| Availability | Specialty/rare | Widely available | Rare |
| Best use | Fresh, ornamental | Fresh, cooking | Fresh only |
Which Type Should You Grow?
If you want the best yields and easiest care, red strawberries win. If you want something beautiful, sweet, and a little different for your garden or patio, pink strawberries are excellent choices. White strawberries like pineberries are the rarest and most difficult to find.
How to Grow Pink Strawberries at Home
Good news for beginners: most pink strawberry varieties are not significantly harder to grow than regular red ones.
Best Climate and Conditions
Pink strawberries grow well in USDA hardiness zones 4 to 9. They prefer a temperate climate with warm summers and cool winters. Most varieties are tolerant of light frost once established. In very hot climates, they benefit from afternoon shade to protect the flowers and fruit.
Soil and Sunlight Requirements
These plants need at least six hours of direct sunlight per day. Full sun gives you the best fruit production. The soil should be well-draining, slightly acidic with a pH between 5.5 and 6.5, and rich in organic matter. Adding compost before planting helps a lot. Avoid heavy clay soils as they hold too much moisture and can cause root rot.
Growing in Pots vs Garden Beds
Pink strawberry varieties like Berried Treasure and Toscana are especially well suited to containers. A pot that is at least 30 cm wide and has drainage holes works well for two to three plants. Container growing lets you control soil quality easily and move plants if needed. In garden beds, space plants 30 to 40 cm apart to allow good airflow.
A home gardener in a small London flat grew three Toscana plants in a window box and harvested enough berries for regular snacking throughout the summer. Containers really do work.
Step-by-Step Planting Guide
- Choose a container or garden spot with good sunlight.
- Fill with a mix of quality potting soil and compost.
- Plant the strawberry so the crown (where the leaves meet the roots) sits at soil level, not buried.
- Water well after planting.
- Mulch around the base to keep moisture in and weeds out.
- Wait for flowers and then fruit. Most plants fruit within 60 to 90 days of planting.
Care and Maintenance
Watering and Fertilizing
Water consistently but do not let roots sit in soggy soil. About 2.5 cm of water per week is a good target. During fruiting, water needs increase slightly. Feed plants with a balanced fertilizer every two weeks during the growing season. Once flowers appear, switch to a fertilizer lower in nitrogen to encourage fruit rather than leaves.
Pollination Tips
Most pink strawberry varieties are self-fertile, meaning one plant can produce fruit on its own. However, having more than one plant nearby increases yields. In a garden setting, bees and other insects handle pollination naturally. For indoor or balcony plants, gently brush the center of each flower with a soft paintbrush or cotton swab to transfer pollen manually. This small step makes a noticeable difference in how much fruit you get.
Pest and Disease Control
Common pests include slugs, aphids, and spider mites. Check plants regularly and remove pests by hand or with a diluted neem oil spray. Grey mold (botrytis) is the most common disease, especially in wet weather. Good airflow between plants and avoiding wetting the leaves when watering helps prevent it.
Common Growing Mistakes to Avoid
Overwatering
This is the number one mistake beginners make. Overwatered strawberries develop yellow leaves, root rot, and poor fruit set. Always check soil moisture before watering. The top couple of centimeters of soil should feel dry before you water again.
Planting in Shade
Strawberries need sun. A plant placed in full shade will produce lush green leaves and very little fruit. If your chosen spot gets less than five hours of sunlight, consider a different location or grow under a grow light indoors.
Neglecting Pollination
Many first-time growers are confused when their plant flowers but produces no fruit. The most likely cause is pollination failure. For outdoor plants, attract pollinators by planting nearby flowers like lavender or marigolds. For indoor plants, manual pollination is essential.
When and How to Harvest Pink Strawberries
Signs of Ripeness
The tricky part with pink strawberries is knowing when they are ready because you cannot rely on the fruit turning red. Signs of ripeness include a consistent all-over pink color with no white or green patches, a slightly soft feel when gently pressed, and a sweet strawberry scent. The berries will also detach easily from the plant when they are ready.
Harvesting Tips
Pick berries in the morning when they are cool and firm. Use scissors or pinch the stem just above the fruit rather than pulling. Handle them gently as they bruise easily. Eat or refrigerate within two days for the best flavor and texture.
Where to Buy Pink Strawberry Plants
Online Stores vs Local Nurseries
Online retailers like Amazon, Etsy, and specialist plant nurseries carry varieties like Toscana, Tristan, and Berried Treasure. Online is often the better route because local garden centers may not stock these specialty varieties. When ordering online, check seller reviews and confirm the plants will be shipped at the right time for your climate.
Price and Availability
Pink strawberry plants typically cost between 5 and 15 dollars per plant depending on the variety and seller. They are more expensive than standard red strawberry plants but not wildly so. Seeds are sometimes available and are cheaper, but growing from plugs or runners is faster and more reliable. Availability peaks in spring, so order early in the season.
How to Use Pink Strawberries
Fresh Eating
The simplest way to enjoy pink strawberries is fresh, straight from the plant. Their sweetness makes them excellent on their own, with yogurt, or sliced over cereal or oatmeal.
Desserts and Decoration
Pink strawberries look stunning on cakes, tarts, and dessert platters because of their unusual color. Bakers use them as garnish on cream cakes and cheesecakes where the soft blush color stands out beautifully. They also work well in fruit salads where their color adds visual interest.
Garden Aesthetic Uses
Because many pink strawberry varieties also have pink flowers, they are often used as ornamental edible plants in borders, window boxes, and hanging baskets. They offer a combination of beauty and practicality that few other plants match.
Conclusion
Pink strawberries are a real and rewarding option for home gardeners who want something a little different. They are not difficult to grow, they look beautiful in pots and borders, and the fruit is genuinely delicious. Whether you choose Toscana for its intense flavor, Tristan for its long season, or Berried Treasure for its compact size, you are getting a plant that earns its place in any garden. Start with a couple of plants in a sunny spot or a container, follow the basic care steps, and you will have fresh pink strawberries to enjoy within a season.
FAQs
Are pink strawberries natural or man-made?
Pink strawberries are natural. They exist because some strawberry plants naturally produce less red pigment than others. Breeders have selected and cultivated these plants over time, but they are not genetically modified or artificial in any way.
Are pink strawberries the same as pineberries?
No. Pineberries are white strawberries with red seeds and a fruity, pineapple-like flavor. Pink strawberries are fully pink and taste like a sweeter version of a regular strawberry. They are different varieties with different flavors.
Can complete beginners grow pink strawberries?
Yes. Most pink strawberry varieties are beginner-friendly, especially when grown in containers. The key requirements are good sunlight, well-draining soil, and consistent watering. Varieties like Berried Treasure are specifically bred for easy home growing.
Do pink strawberries produce as many berries as red ones?
Generally, red strawberry varieties bred for commercial production will out-yield pink ones. However, everbearing types like Tristan and day-neutral types like Toscana produce a steady supply throughout the growing season, which many home growers prefer over one large harvest.
How long does it take for pink strawberry plants to fruit?
Most plants will begin producing fruit within 60 to 90 days of planting if conditions are good. Young plants in their first year sometimes produce fewer berries as they establish roots. Second-year plants typically fruit more heavily.
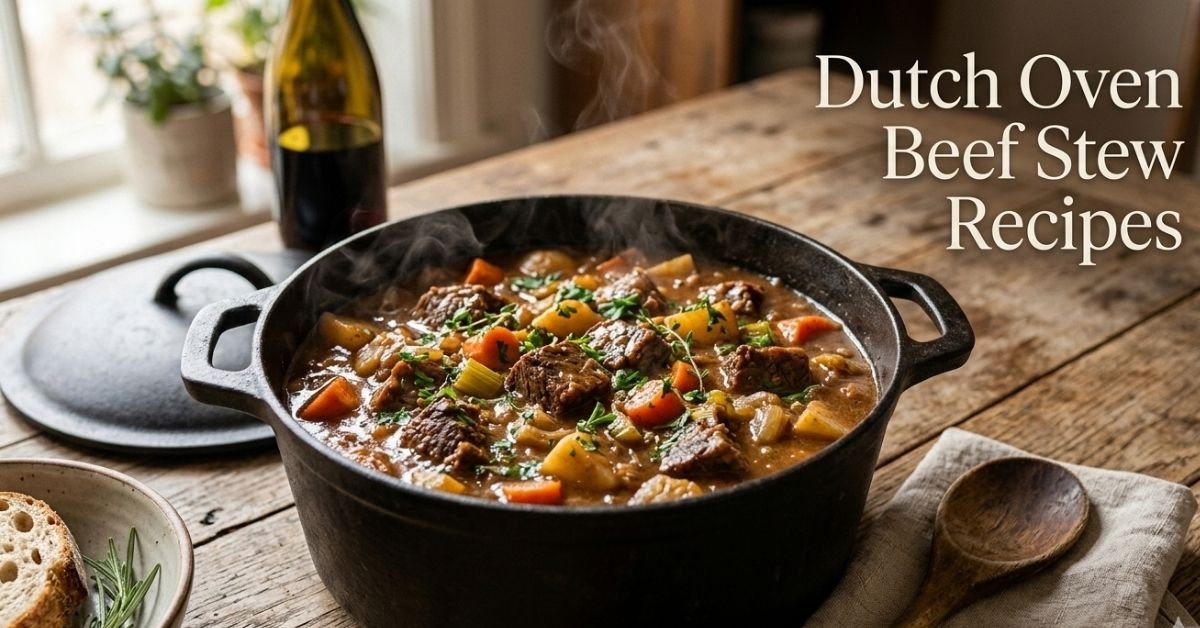
Dutch Oven Beef Stew Recipes are loved because they create deeply flavorful meals with very simple cooking methods. A Dutch oven is a heavy cast iron pot that holds heat evenly and slowly cooks ingredients until everything becomes tender. When beef, vegetables, broth, and herbs simmer together in one pot, the flavors blend beautifully and produce the classic comfort food many families enjoy during colder seasons.
Another reason these recipes are popular is their reliability. Even beginner cooks can produce a rich and satisfying stew with just a few techniques. Browning beef cubes, sautéing onions and garlic, then slowly simmering everything with potatoes and carrots creates a dish that tastes like it has been cooking all day. The thick gravy, tender meat, and soft vegetables make it a complete meal in a single pot.
Dutch oven cooking also reduces cleanup and simplifies meal preparation. Instead of using multiple pans, everything cooks together in the same pot. This style of cooking has been used for generations because it saves time while still delivering rich flavor and texture. Once the stew is in the oven or gently simmering on the stove, the cook can relax while the dish slowly develops its depth of flavor.
Read also: Babbalucci Bill Bakers and Kings County Imperial
Best Cuts of Beef for Tender Stew
Choosing the right cut of beef is one of the most important steps in Dutch Oven Beef Stew Recipes. Tougher cuts actually work best because slow cooking breaks down their connective tissue and transforms them into soft, flavorful meat. Cuts that come from hardworking muscles contain more collagen, which melts during cooking and thickens the stew naturally.
Chuck roast is the most common choice for stew. It contains the right balance of fat and muscle fibers, which helps it stay juicy while cooking for long periods. Other excellent options include bottom round roast, brisket pieces, and beef shoulder cuts. These meats become tender when braised slowly in broth or wine.
Good beef stew starts with evenly cut cubes so they cook at the same speed. Meat pieces about one to one and a half inches work well. Before cooking, it helps to pat the beef dry and season it with salt and pepper. This step helps the meat brown properly, which builds the deep savory flavor that makes stew taste rich and satisfying.
Essential Ingredients for Classic Beef Stew
Most Dutch Oven Beef Stew Recipes Oven Beef Stew Recipes share a group of traditional ingredients that build the foundation of flavor. The combination of beef, vegetables, herbs, and broth creates the classic taste people expect from a hearty stew. While variations exist, the following ingredients appear in many successful recipes.
Common ingredients include:
• Beef chuck roast cut into cubes
• Olive oil for browning
• Yellow onion and garlic
• Carrots and potatoes
• Beef broth or stock
• Tomato paste for depth of flavor
• Fresh thyme and bay leaves
• Worcestershire sauce
• Salt and black pepper
• Flour or cornstarch for thickening
These ingredients work together to create layers of flavor. The vegetables add sweetness and texture while the herbs provide aroma. Tomato paste gives a mild richness that strengthens the broth, and the thickening agent transforms the liquid into a comforting gravy that coats every bite.
Step by Step Method for Dutch Oven Beef Stew
Cooking stew in a Dutch oven follows a simple method that builds flavor gradually. The key steps are browning, sautéing, simmering, and slow braising. Each stage adds another layer of taste and helps produce tender meat and rich gravy.
Follow these basic steps:
• Heat olive oil in the Dutch oven over medium heat
• Brown beef cubes in small batches until golden
• Remove beef and sauté onions and garlic
• Stir in tomato paste and cook briefly
• Deglaze the pot with broth or red wine
• Return beef to the pot with herbs and seasonings
• Add carrots and potatoes
• Cover and cook slowly in oven at 325°F for about 2 hours
During the slow cooking process, the beef becomes tender and the vegetables soften without falling apart. The broth thickens naturally as collagen from the meat melts into the liquid. When finished, the stew should have a rich color, thick gravy, and tender chunks of meat.
How to Make the Gravy Thick and Rich
One of the defining features of great Dutch Oven Beef Stew Recipes is the rich gravy that coats every ingredient. Achieving the right thickness depends on both cooking time and thickening methods. As stew simmers, gelatin from the beef slowly thickens the broth, but additional techniques can improve the final texture.
Many cooks use a simple roux made from butter and flour. Cooking the roux briefly before adding liquid removes the raw flour taste and creates a smooth gravy. Another option is a cornstarch slurry, which mixes cornstarch with cold water before stirring it into the stew near the end of cooking.
The goal is a gravy that is thick enough to coat a spoon but still fluid enough to pour easily. Stirring occasionally while simmering prevents sticking and ensures the gravy thickens evenly throughout the pot.
Vegetables That Work Best in Beef Stew
Vegetables add sweetness, nutrition, and color to Dutch Oven Beef Stew Recipes. Choosing vegetables that hold their shape during long cooking is important. Some vegetables soften too quickly, while others develop deeper flavor as they simmer in broth.
Popular stew vegetables include:
• Yukon Gold or red potatoes
• Carrots sliced into thick rounds
• Celery pieces for aroma
• Pearl onions or chopped onions
• Mushrooms for extra umami flavor
• Frozen peas added near the end
These vegetables absorb the savory broth and become flavorful without losing their texture. Potatoes help thicken the stew slightly as they release starch, while carrots add natural sweetness that balances the savory beef.
Cooking in the Oven vs Stovetop
Dutch Oven Beef Stew Recipes can be prepared either in the oven or on the stovetop. Both methods produce excellent results, but each approach has small advantages depending on the cook’s preference.
Cooking in the oven provides steady heat from all directions. This helps the stew cook evenly and prevents scorching on the bottom of the pot. The oven method also requires less stirring because the heat remains consistent throughout the cooking process.
Stovetop cooking is more flexible and allows easy monitoring of the stew. Some cooks prefer to adjust the simmer level or add ingredients gradually. As long as the heat stays low and gentle, the stovetop method can produce the same tender beef and rich broth as oven cooking.
Substitutions for Wine, Gluten, and Other Ingredients
Many traditional Dutch Oven Beef Stew Recipes include red wine because it adds acidity and complexity. However, some cooks prefer to skip alcohol or need substitutions due to dietary needs. Fortunately several alternatives can provide similar depth of flavor.
Common substitutions include:
• Extra beef broth instead of red wine
• Balsamic vinegar for mild acidity
• Tomato juice for subtle sweetness
• Cornstarch instead of flour for gluten free thickening
• Sweet potatoes instead of white potatoes
• Coconut aminos instead of Worcestershire sauce
These adjustments allow the recipe to fit different diets without losing the essential stew flavor. The key is maintaining balance between savory broth, tender beef, and vegetables that complement the rich gravy.
Make Ahead and Freezing Tips
One advantage of Dutch Oven Beef Stew Recipes is that they store and reheat extremely well. In fact, stew often tastes better the next day because the flavors continue blending as it rests in the refrigerator.
To store stew safely, allow it to cool slightly before transferring it to airtight containers. Refrigerated stew usually stays fresh for three to four days. When reheating, gently warm it on the stovetop with a splash of broth to restore the consistency.
For longer storage, stew freezes well for up to three months. Freeze portions in freezer safe containers so they can be thawed easily for quick meals. Thaw overnight in the refrigerator before reheating to maintain the best texture.
Common Mistakes When Making Beef Stew
Even simple Dutch Oven Beef Stew Recipes can go wrong if a few key mistakes occur during cooking. Learning these common problems helps ensure every batch turns out rich, tender, and flavorful.
Mistakes to avoid include:
• Skipping the step of browning the beef
• Crowding the pot while searing meat
• Cooking at too high a temperature
• Adding vegetables too early
• Over thickening the gravy
Browning beef properly is especially important because it creates the flavorful crust that forms the base of the stew. Cooking slowly at low heat allows the meat fibers to break down gradually, which is what creates the tender texture everyone expects from a classic stew.
Serving Ideas and Side Dishes
Dutch Oven Beef Stew Recipes are already filling, but the right side dishes can make the meal even more satisfying. Bread is one of the most popular companions because it absorbs the rich gravy.
Popular serving options include:
• Crusty artisan bread or baguette
• Buttery dinner rolls
• Creamy mashed potatoes
• Simple green salad
• Steamed green beans
Fresh herbs such as parsley or thyme sprinkled over the stew brighten the flavor and add color. Some cooks also enjoy pairing the dish with a glass of red wine or dark beer, which complements the savory richness of the beef and gravy.
Healthy Notes and Nutrition Considerations
While Dutch Oven Beef Stew Recipes are hearty comfort foods, they can also provide balanced nutrition. Beef contains protein, iron, and important vitamins that support energy and muscle health. Vegetables like carrots and potatoes contribute fiber, potassium, and antioxidants.
To make the stew lighter, cooks can trim excess fat from the beef before cooking and increase the proportion of vegetables. Using low sodium broth also helps control salt levels without sacrificing flavor.
Because the stew cooks slowly, nutrients from vegetables and herbs remain in the broth rather than evaporating. This makes each serving nourishing as well as satisfying, especially during cooler months when warm meals are most comforting.
Conclusion
Dutch Oven Beef Stew Recipes remain one of the most comforting and dependable meals in home cooking. The combination of tender beef, hearty vegetables, and rich gravy creates a dish that is simple yet deeply satisfying. With the right cut of meat, proper browning, and slow cooking, anyone can prepare a stew that tastes flavorful and balanced. The recipe is flexible enough to include substitutions, dietary adjustments, and make ahead storage. By understanding the basic techniques and avoiding common mistakes, cooks can enjoy a classic one pot meal that brings warmth and comfort to the table.
FAQs
What is the best cut of beef for beef stew?
Chuck roast is usually best because it becomes tender during slow cooking.
How long should beef stew cook in a Dutch oven?
Most recipes cook for about 2 hours at 325°F until the meat becomes tender.
Can I make beef stew without wine?
Yes, simply replace wine with beef broth or a small amount of balsamic vinegar.
How can I thicken beef stew without flour?
Use a cornstarch slurry mixed with cold water and stir it into the hot stew.
What potatoes are best for beef stew?
Yukon Gold or red potatoes hold their shape and add creamy texture.
Can beef stew be frozen?
Yes, it freezes well for up to three months when stored in airtight containers.
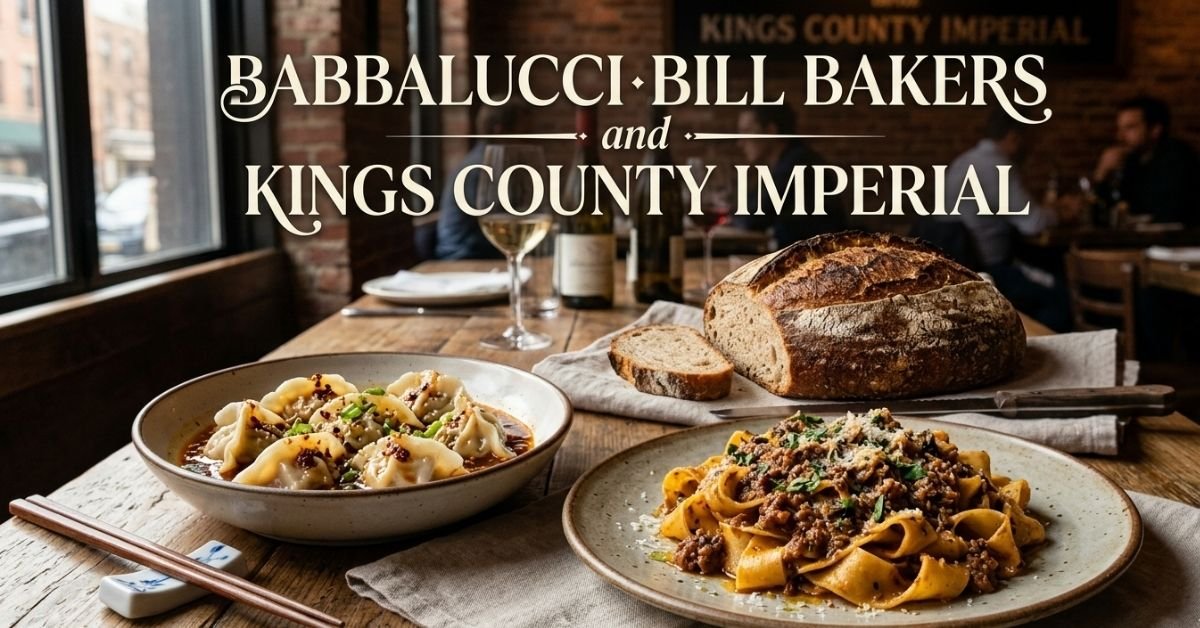
Brooklyn has become one of the most exciting dining areas in New York City. Food lovers visit neighborhoods like Williamsburg and Greenpoint not only for trendy cafes but also for deeply rooted culinary traditions. The search for Babbalucci Bill Bakers and Kings County Imperial usually begins when people want to compare three very different dining experiences that represent Italian cooking, artisan baking, and regional Chinese cuisine. Each place offers a unique approach to food, and together they reflect how diverse the Brooklyn dining landscape has become.
The three establishments serve very different purposes even though they are often compared online. One focuses on handmade pasta and Italian hospitality, another celebrates slow fermented sourdough bread and pastries, while the third brings bold regional Chinese dishes served family style. Many visitors researching these restaurants are trying to decide which one fits their plans for a meal, a date night, a group dinner, or even a casual brunch outing. Understanding the background of each restaurant helps clarify why they are frequently mentioned together.
When comparing restaurants, several practical factors matter to diners. Menu variety, price range, reservations, atmosphere, and dietary options all play a role in decision making. This guide explains each restaurant clearly so that readers can understand not only what they serve but also how the experience feels when dining there. By looking at these elements in detail, visitors can choose the place that best matches their expectations.
Read also: At Black Tap, Burgers and Beer Are Served With a Side of Nostalgia
Babbalucci Italian Restaurant and Its Handmade Pasta Tradition
Babbalucci is known for authentic Italian cooking rooted in classic regional recipes. The restaurant focuses heavily on handmade pasta, seasonal ingredients, and a relaxed but elegant dining environment. When guests step inside, they usually notice a warm interior with rustic wood details and a cozy neighborhood feeling that reflects traditional Italian trattorias. The dining experience tends to be slower and more relaxed compared with casual eateries, which makes it a good place for long meals with friends or family.
The menu at Babbalucci highlights simple ingredients prepared carefully rather than complicated dishes. Fresh pasta is the centerpiece, and chefs often make varieties like tagliatelle, rigatoni, or pappardelle by hand. Sauces are usually based on slow cooked meats, olive oil, herbs, and tomatoes, allowing the pasta texture to shine. Many diners appreciate the balance between traditional Italian flavors and the freshness expected from modern New York kitchens.
Some menu highlights commonly associated with this restaurant include:
- Handmade pasta with seasonal sauces
- Wood fired pizzas with thin crispy crust
- Fresh salads with Italian olive oil and herbs
- Italian desserts such as tiramisu or panna cotta
- A curated wine list featuring regional Italian wines
These elements make Babbalucci appealing for diners who want a comfortable sit down dinner with authentic Mediterranean flavors. The restaurant is particularly popular for date nights or small celebrations where people want to enjoy several courses slowly.
Bill Bakers and the Art of Slow Fermented Sourdough
Bill Bakers offers a completely different experience from a traditional restaurant. Instead of a full dinner menu, this bakery focuses on artisan bread made using slow fermentation techniques. Many people search for Bill Bakers because sourdough bread has become extremely popular among food enthusiasts who appreciate the flavor and health benefits of natural fermentation.
The bakery specializes in long fermented dough that develops complex flavors over time. This process typically involves mixing flour, water, and a natural starter culture, then allowing the dough to rest for many hours. During fermentation, natural bacteria and yeast create subtle sour notes and improve the bread’s texture. The result is crusty bread with a soft, airy interior that many people consider superior to commercial loaves.
Customers often visit the bakery for items such as:
- Classic sourdough loaves baked daily
- Rustic country bread with whole grains
- Butter croissants and pastries
- Sandwich bread for breakfast or lunch
- Seasonal baked goods made with local ingredients
Because it operates primarily as a bakery, Bill Bakers usually attracts customers earlier in the day. People often stop by for fresh bread, pastries, or a quick breakfast rather than a full evening meal. For visitors interested in baking culture or artisan bread, it represents one of Brooklyn’s respected spots for high quality sourdough.
Kings County Imperial and the Bold World of Regional Chinese Cuisine
Kings County Imperial represents another side of Brooklyn dining with its focus on regional Chinese cooking. Unlike traditional American Chinese restaurants that simplify flavors, this establishment highlights dishes inspired by different regions of China. The menu features dumplings, noodles, stir fried vegetables, and meat dishes served family style so guests can share several plates at the table.
The atmosphere tends to be lively and energetic, making it a popular destination for groups. Bright interiors, open seating areas, and busy kitchens contribute to a vibrant dining environment that contrasts with the quieter setting of Italian restaurants. Guests often enjoy ordering multiple dishes and sharing them, which makes the experience more social.
Common dishes that attract diners include:
- Hand rolled dumplings with pork or vegetables
- Spicy Sichuan style noodles
- Stir fried seasonal vegetables
- Braised meats served with rice
- Dim sum style appetizers for sharing
Because the restaurant emphasizes family style dining, portions are usually larger than individual restaurant plates. This approach encourages guests to explore different flavors together rather than ordering separate meals.
Comparing Menu Styles and Culinary Philosophy
One of the most interesting aspects of comparing Babbalucci Bill Bakers and Kings County Imperial is how differently each place approaches food. The Italian restaurant focuses on traditional European techniques with careful attention to pasta texture and wine pairing. The bakery celebrates fermentation science and simple ingredients transformed through patience and skill. The Chinese restaurant highlights bold spices and shared dishes that encourage group dining.
These contrasting philosophies make the comparison unique. Instead of competing directly, each establishment fills a different role within Brooklyn’s dining culture. Someone looking for a quiet pasta dinner will naturally gravitate toward the Italian restaurant, while a morning bread lover will choose the bakery. Groups wanting lively shared plates will prefer the Chinese dining experience.
Understanding these differences helps diners choose the right place based on the occasion rather than assuming one is better than the others. The best choice depends on mood, time of day, and dining preferences.
Typical Price Ranges and What Diners Can Expect
Pricing is often a major factor when choosing between restaurants. While menus change frequently, general price ranges give diners a good idea of what to expect. The Italian restaurant typically falls into the mid range category because fresh pasta, wine, and table service increase overall costs.
The bakery usually has lower prices since customers purchase bread or pastries rather than full meals. However, artisan sourdough can still cost more than supermarket bread because of the labor intensive baking process. The Chinese restaurant often sits between the two depending on how many dishes guests order for sharing.
Typical dining expectations include:
- Babbalucci dinner per person often ranges from moderate to higher casual dining prices
- Bill Bakers bread and pastries usually remain affordable for everyday purchases
- Kings County Imperial meals depend on group sharing but usually stay moderate
Because portions and ordering styles differ, comparing exact prices is difficult. Group dining at the Chinese restaurant can become more economical because several people share dishes.
Atmosphere and Dining Experience Differences
Atmosphere plays a huge role in the dining experience. Babbalucci offers a relaxed and intimate setting with soft lighting and comfortable seating. Guests often stay longer because the meal unfolds gradually through multiple courses. This environment suits romantic dinners or quiet conversations with friends.
Bill Bakers feels more like a neighborhood bakery where customers quickly stop in for bread or pastries. The focus is on freshness rather than long dining experiences. Many people buy items to take home or enjoy with coffee nearby rather than staying inside for extended meals.
Kings County Imperial delivers a vibrant restaurant environment where noise and conversation fill the room. The energetic atmosphere makes it ideal for groups celebrating birthdays or gatherings with friends. Sharing dishes naturally encourages social interaction and lively dining.
Reservation Availability and Wait Times
Reservations are another important factor when comparing these places. The Italian restaurant often accepts reservations because guests expect table service and longer meals. Booking ahead is usually recommended during weekends when demand increases.
The bakery rarely requires reservations because it operates primarily as a retail shop. Customers simply walk in and purchase baked goods. However, popular items sometimes sell out quickly, especially during busy mornings.
The Chinese restaurant may accept reservations depending on location and day. Larger groups often benefit from reserving tables in advance since shared dining requires enough space for multiple dishes.
Delivery, Takeout, and Convenience Options
Modern diners often care about delivery and takeout options. Each establishment handles these services differently based on the type of food they serve. Pasta dishes from the Italian restaurant may be available for takeout, although they taste best when eaten fresh at the restaurant.
The bakery naturally works well for takeout because bread and pastries travel easily. Many customers purchase several items and enjoy them later at home or work. This convenience makes the bakery popular for quick breakfast stops.
Chinese dishes from Kings County Imperial often adapt well to delivery because stir fried foods and dumplings maintain their flavor during transport. Shared portions also make takeout convenient for family meals.
Dietary Options and Ingredient Considerations
Dietary flexibility has become increasingly important in modern restaurants. Each establishment offers different possibilities depending on its cuisine. The Italian restaurant sometimes includes vegetarian pasta or salads that highlight seasonal vegetables and olive oil.
The bakery may offer whole grain bread options and occasionally gluten conscious recipes, although sourdough still contains wheat. Customers with strict dietary restrictions should always check ingredient lists before purchasing baked goods.
The Chinese restaurant often includes vegetable dishes, tofu options, and rice based meals that suit many dietary preferences. Because the menu is diverse, guests can usually find dishes that accommodate different tastes within the same group.
Which Restaurant Fits Different Dining Occasions
Choosing between these three establishments becomes easier when considering the purpose of the visit. Each place excels in a particular situation depending on what diners expect from the experience.
Common dining occasions include:
- Romantic dinner or relaxed evening meal
- Morning coffee with fresh bread
- Group celebration with shared plates
- Casual neighborhood food exploration
- Weekend brunch style outings
- Matching the restaurant to the occasion helps ensure that guests enjoy their experience fully.
Cooking Inspiration from These Restaurants
Although most people visit restaurants to enjoy professional cooking, the dishes can also inspire home cooking. Italian pasta techniques, sourdough baking methods, and Chinese stir frying skills all provide useful lessons for food lovers.
Home cooks often learn valuable ideas such as:
- Using simple ingredients for flavorful pasta sauces
- Allowing bread dough to ferment slowly for better taste
- Cooking vegetables quickly in hot pans to preserve texture
- Balancing spices and acidity in Asian dishes
- Serving meals family style for social dining experiences
- These techniques show how restaurant food can influence everyday cooking habits.
Brooklyn Dining Culture and Culinary Diversity
The presence of Babbalucci Bill Bakers and Kings County Imperial in the same food conversation demonstrates Brooklyn’s incredible culinary diversity. Few neighborhoods combine Italian pasta traditions, artisan baking culture, and regional Chinese cooking within such close distance. This variety allows diners to explore global flavors without leaving the borough.
Food tourism in Brooklyn continues to grow because visitors enjoy discovering small restaurants that focus on craft and authenticity. Each establishment contributes something different to the dining ecosystem. Together they show how immigrant traditions, modern culinary techniques, and local ingredients can blend into one vibrant food culture.
Conclusion
The comparison of Babbalucci Bill Bakers and Kings County Imperial highlights three very different dining experiences within Brooklyn’s thriving food scene. One offers comforting Italian pasta and wine, another celebrates artisan sourdough baking, and the third delivers bold regional Chinese dishes served family style. Rather than competing directly, they complement each other by serving different tastes and occasions. Understanding their menu styles, atmosphere, and dining approach helps visitors choose the right place for their plans. Anyone exploring Brooklyn restaurants will find that this trio represents the diversity and creativity that makes the borough one of the most exciting food destinations in New York City.
FAQs
Which restaurant is best for group dining?
Kings County Imperial is usually best because its family style dishes are designed for sharing.
Does Bill Bakers require reservations?
No, it operates as a bakery where customers typically walk in to buy bread or pastries.
Is Babbalucci good for date night?
Yes, the relaxed Italian atmosphere and wine selection make it popular for romantic dinners.
Which place is cheapest?
Bill Bakers is usually the most affordable because customers buy individual baked goods.
Do these restaurants offer vegetarian options?
Yes, all three offer some vegetable based dishes or bakery items suitable for vegetarian diets.
Which is best for trying Brooklyn food culture?
Visiting all three gives a broad experience of Brooklyn’s Italian, bakery, and Chinese culinary traditions.

Stepping into Black Tap instantly takes you back to the charm of old-school diners while keeping the modern twist of a craft burger joint. The retro atmosphere is warm and playful, with vibrant murals, classic tunes playing softly in the background, and booths that invite groups to linger over plates of juicy burgers and cold beers. Every detail, from the checkered floor to neon signs, adds a nostalgic touch that makes visiting more than just a meal—it’s a mini escape into the past. The staff also enhances this feeling, with friendly service that feels personal, as if you are visiting a familiar neighborhood diner rather than a busy modern restaurant.
Read also: Trenness Woods Black Places to Hit in Harlem
Burgers That Bring Back Memories
Black Tap’s burgers are not just meals; they are a celebration of comfort food done right. Using fresh, high-quality ingredients, each burger is crafted with care. The patties are juicy and perfectly seasoned, while toppings like melted cheddar, crispy bacon, and house-made sauces take classic flavors up a notch. Options include Wagyu beef, prime burgers, and vegetarian selections to suit every preference. Customers often recall childhood memories of diner trips when biting into a Black Tap burger, proving that the taste alone can evoke a sense of nostalgia. The combination of perfectly toasted buns, fresh produce, and rich flavors creates a satisfying bite that feels both familiar and indulgent.
The Craft Beer Experience
Pairing these flavorful burgers with craft beer is part of the Black Tap charm. They offer a range of locally brewed and international beers that complement the richness of their burgers. From crisp lagers to hoppy IPAs, every pint is selected to enhance the flavor profile of the meal. Beer options include classics like Stella Artois, Brooklyn Lager, and seasonal brews that rotate throughout the year. Guests often enjoy sampling different styles of beer alongside various burgers, discovering flavor combinations that bring a new dimension to their meal. The combination of a refreshing beer and a perfectly cooked burger is a throwback to simpler times, when a night out meant hearty food, laughter, and shared stories.
CrazyShakes: Sweet Nostalgia in a Glass
No visit to Black Tap is complete without trying their famous CrazyShakes. These extravagant milkshakes are over-the-top creations with layers of ice cream, whipped cream, sauces, and toppings like cookies, candy, or even slices of cake. Each shake is a fun, indulgent treat that reminds guests of classic ice cream parlor days. Flavors such as Brooklyn Blackout, Strawberry Shake, and Cookies ‘N Cream Supreme are crowd favorites, giving both adults and kids a chance to relive playful, nostalgic moments. Beyond the taste, these shakes are designed for sharing and snapping pictures, making them as much a visual treat as a culinary one.
Atmosphere and Decor
The interior design plays a huge role in the nostalgic feel of Black Tap. Vintage posters, retro lighting, and diner-style seating bring back memories of the 50s and 60s while still feeling fresh and modern. Even small touches like old-school jukebox graphics, classic black-and-white tiles, and quirky wall art add to the immersive experience. Some locations feature neon signage and photo-friendly areas that encourage guests to take pictures and share their experience. Guests often comment on how the environment makes them pause, smile, and enjoy the meal in a relaxed, fun setting. The playful music selection, with hits from past decades, further enhances the nostalgic vibe, creating a multi-sensory experience that keeps people coming back.
Menu Highlights Beyond Burgers
While burgers steal the spotlight, Black Tap also offers wings, sandwiches, and specialty fries. Wings come in a variety of flavors, from classic Buffalo to spicy Mexican Hot Wings. Sides include crispy fries, onion rings, and house salads, allowing for a complete, satisfying meal. The menu also features unique creations like the All-American Burger, The Mexico City Burger, and chicken sandwiches with house sauces. Each menu item maintains the same attention to flavor and quality, keeping the nostalgia alive while catering to modern tastes. Customers appreciate the flexibility of substitutions, such as swapping fries for sweet potato fries or adding specialty sauces to elevate their meal.
Locations That Keep Nostalgia Close
Black Tap has multiple locations, including New York City, Las Vegas, Dallas, Singapore, and London. Each restaurant retains the signature decor and menu offerings, ensuring that visitors worldwide can enjoy the same nostalgic experience. Whether stopping by the SoHo spot for lunch or visiting the Vegas location for dinner, guests can expect consistent quality and the comforting atmosphere that makes Black Tap memorable. Some locations also feature exclusive local menu items and seasonal specials, giving guests a reason to explore multiple locations.
Special Events and Happy Hours
Many locations host happy hours and special events that heighten the nostalgic vibe. These events often include beer specials, limited-edition shakes, or themed nights that encourage a communal dining experience. Celebrating with friends over classic foods and drinks, while surrounded by playful retro decor, brings a sense of joy and connection reminiscent of past decades. Seasonal events, like holiday-themed shakes or summer burger specials, add excitement and variety, making each visit feel fresh and unique.
Customer Experience and Reviews
Guests consistently praise Black Tap for both food quality and ambiance. Online reviews highlight not only the delicious burgers and inventive shakes but also the fun, engaging environment. Families, groups of friends, and solo diners alike find the restaurant welcoming and lively. Many note how stepping inside feels like a break from the busy pace of modern life, offering a small, enjoyable retreat filled with taste and memory. Some visitors share stories of bringing their kids to experience the same ice cream and burgers they enjoyed in their youth, creating multi-generational memories.
Tips for Visiting
-
Timing: Visiting during off-peak hours ensures seating without long waits.
-
Must-Try Items: Don’t miss the CrazyShakes and signature Wagyu burgers.
-
Pairings: Match your burger with a craft beer for the ultimate nostalgic experience.
-
Kids-Friendly: The playful decor and fun shakes make it great for children.
-
Photos: Snap pictures with the retro decor and shake creations—they make perfect memories.
-
Special Requests: Staff are accommodating for dietary restrictions, including vegan and gluten-free options.
-
Planning Ahead: Check online menus and events to make the most of your visit.
Conclusion
At Black Tap, Burgers and Beer Are Served With a Side of Nostalgia, making every visit a mix of great food, fun, and cherished memories. From juicy burgers and craft beers to extravagant CrazyShakes, the restaurant offers a full sensory experience. The retro decor, playful atmosphere, and attention to detail make it more than just a meal—it’s a trip back in time where flavors, laughter, and nostalgia come together. Every bite and sip is a chance to relive joyful moments, making Black Tap a must-visit for anyone seeking comfort food with a twist of memory.
FAQs
What is Black Tap known for?
Black Tap is known for its craft burgers, CrazyShakes, and nostalgic diner vibe.
Where is Black Tap NYC located?
The main NYC location is in SoHo at 529 Broome Street.
How much do CrazyShakes cost?
CrazyShakes range from $15 to $20 depending on the flavor and toppings.
Are there vegan options at Black Tap?
Yes, some locations offer vegan burgers and plant-based menu items.
What beers are available at Black Tap?
They offer a mix of local craft beers, lagers, IPAs, and international options.
Can I make a reservation?
Reservations are available at select locations, usually through the website or dining apps.
-

 Food1 month ago
Cuts of Steak: Complete Guide to Beef Cuts
-

 Food1 month ago
What Is Andouille Sausage? Complete Guide
-

 Food1 week ago
Shirleys Coffee Shop Guam Locations Menu and Guide
-

 Drinks2 weeks ago
Easy Lychee Martini Recipe Sweet & Floral Cocktail
-

 Food1 month ago
Ultimate Tripas Recipe and Cooking Guide
-

 Food2 weeks ago
Italian Ice Flavoring Guide: Flavors, Bases, and Recipes
-

 Tech2 weeks ago
DemonScans Review: Is It Safe for Manga Readers?
-

 Food2 weeks ago
Black Pudding Guide: History, Recipe & Nutrition