
Food
Quaker Oatmeal Chocolate Chip Cookies (Chewy Recipe + Tips)
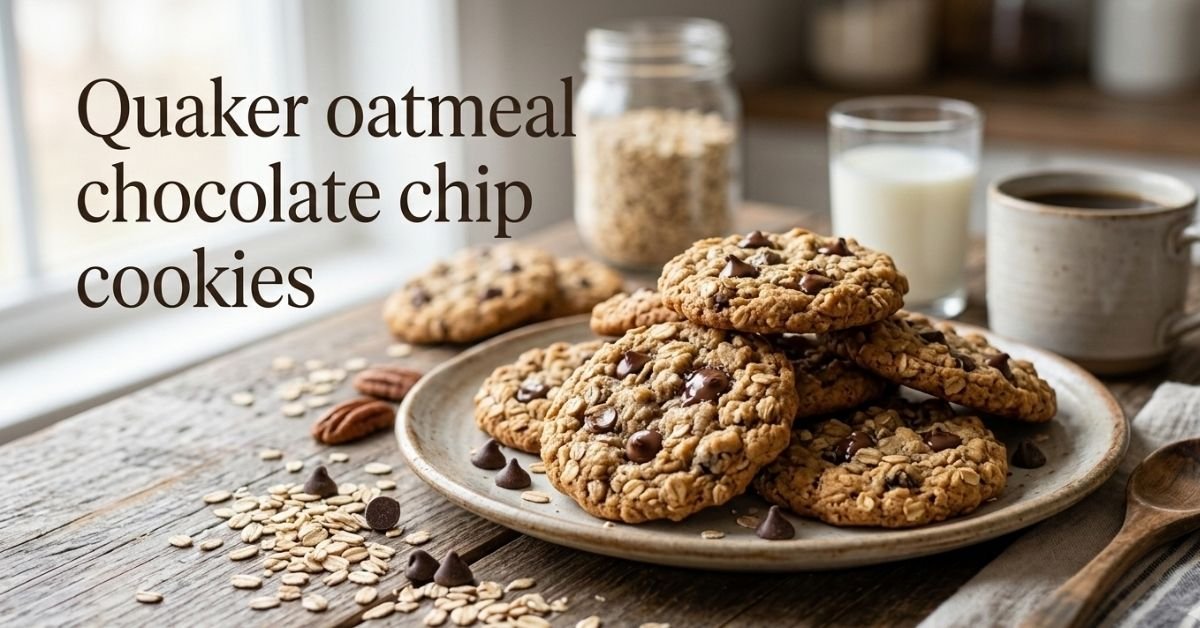
Nothing beats the warm, comforting smell of freshly baked cookies, and Quaker oatmeal chocolate chip cookies are a timeless favorite for families everywhere. With their chewy texture, sweet chocolate chips, and wholesome oats, they bring a perfect balance of flavor and nostalgia. Whether you’re baking them for a snack, dessert, or a special occasion, this guide will show you step by step how to make them perfectly every time. From the right ingredients to tips for chewy or crispy cookies, you’ll have everything you need to create delicious, homemade cookies that everyone will love.
Read also: Chili mac recipe Pioneer Woman (Easy & Family Friendly)
Quaker Oatmeal Chocolate Chip Cookies Recipe Guide
Ingredients You Will Need
Making the perfect Quaker oatmeal chocolate chip cookies starts with having the right ingredients. Using quality items makes a big difference in taste and texture. Here’s what you need:
-
1 cup (2 sticks) margarine, softened
-
1 cup brown sugar, packed
-
1/2 cup granulated sugar
-
2 large eggs, at room temperature
-
1 teaspoon vanilla extract
-
1 1/2 cups all-purpose flour
-
1 teaspoon baking soda
-
1 teaspoon ground cinnamon (optional for flavor)
-
1/2 teaspoon salt
-
3 cups Quaker old fashioned oats
-
1 1/2 cups semi-sweet chocolate chips
-
1 cup chopped nuts (optional, walnuts or pecans)
It’s important to measure ingredients accurately and use room temperature eggs and margarine. This helps your cookies bake evenly and gives them that chewy texture everyone loves. For those who prefer nut-free cookies, simply skip the nuts.
Step-by-Step Instructions for Chewy Cookies
Follow these steps to get soft, chewy Quaker oatmeal chocolate chip cookies every time.
-
Preheat your oven to 375°F and line baking sheets with parchment paper.
-
In a large bowl, beat the margarine and both sugars until the mixture is creamy.
-
Add eggs one at a time, beating well after each addition. Stir in vanilla extract.
-
In a separate bowl, combine flour, baking soda, cinnamon, and salt. Mix well.
-
Gradually add the dry ingredients to the wet mixture, mixing just until incorporated.
-
Stir in Quaker oats, chocolate chips, and nuts if using. Make sure the ingredients are evenly distributed.
-
Drop rounded tablespoonfuls of dough onto the prepared baking sheets, spacing them about 2 inches apart.
-
Bake 9–10 minutes for chewy cookies. For crispier cookies, bake 11–12 minutes, watching closely.
-
Let cookies cool on the baking sheet for 2–3 minutes before transferring to a wire rack.
Following these steps carefully ensures cookies maintain their shape and texture. Remember, underbaking slightly helps keep the cookies soft in the center, while overbaking makes them crisp.
Choosing the Right Oats
The type of oats you use can affect the texture of your Quaker oatmeal chocolate chip cookies. Old fashioned oats give a chewier texture and hold their shape well. Quick oats can be used if you prefer a softer cookie, but they tend to spread more and lose some chewiness. For the classic Quaker experience, old fashioned oats are recommended.
Tips for Perfect Texture
Texture is key to enjoying oatmeal chocolate chip cookies. Here are practical tips to get it right every time:
-
Keep your margarine and eggs at room temperature to ensure smooth mixing.
-
Do not overmix the dough after adding flour; this prevents tough cookies.
-
Slightly underbake to keep cookies soft and chewy in the center.
-
Flatten cookie dough slightly with your hand before baking to encourage even cooking.
-
Store cookies in an airtight container to retain softness. Adding a slice of bread helps maintain moisture.
These tips cover common mistakes and help maintain the perfect chewy consistency.
Making Variations and Substitutions
Quaker oatmeal chocolate chip cookies are versatile. You can create different flavors by trying substitutions:
-
Swap semi-sweet chocolate chips with milk or dark chocolate for a different taste.
-
Use butterscotch or peanut butter chips for variety.
-
Replace margarine with butter for richer flavor or coconut oil for a dairy-free version.
-
For nut-free households, simply omit nuts or use seeds like sunflower or pumpkin seeds.
These substitutions keep the base recipe intact while letting you personalize the flavor to suit your family’s preferences.
Storage and Freezing
Proper storage keeps your cookies fresh and soft longer. Here’s how:
-
Store baked cookies in an airtight container at room temperature for up to one week.
-
Freeze unbaked cookie dough by rolling into balls, placing on a tray, and freezing. Once frozen, transfer to a freezer bag for up to three months.
-
To bake frozen dough, add one extra minute to the baking time.
-
You can also freeze baked cookies for up to three months. Thaw at room temperature before serving.
Using these methods ensures you always have fresh cookies ready without compromising texture or flavor.
Nutrition Notes
Quaker oatmeal chocolate chip cookies are a treat, and understanding their nutrition can help with portion control. A typical cookie contains:
-
Calories: 150–170
-
Fat: 7–9 grams
-
Carbohydrates: 20–22 grams
-
Fiber: 1–2 grams
-
Sugar: 12–14 grams
-
Protein: 2 grams
These numbers vary depending on ingredient swaps, such as using butter or margarine, adding nuts, or using mini chocolate chips.
High Altitude Adjustments
Baking at high altitudes can affect cookie texture. Here’s what to do:
-
Increase oven temperature by 15–25°F.
-
Reduce sugar slightly to prevent spreading.
-
Add an extra tablespoon of flour per cup to maintain structure.
-
Check cookies a minute or two earlier than usual to avoid overbaking.
Following these adjustments keeps your cookies from becoming too flat or dry when baking in high altitude areas.
Troubleshooting Common Issues
Even simple recipes can have hiccups. Here’s how to fix common problems:
-
Cookies spread too much: Use cold dough and check margarine temperature.
-
Too dry: Slightly underbake and store properly to retain moisture.
-
Flat cookies: Add a bit more flour or slightly chill dough before baking.
-
Chewy edges but raw centers: Ensure even oven heat and don’t overload baking sheet.
These fixes cover most beginner and intermediate baker mistakes, helping you achieve consistent results.
Scaling for Large Batches
If you need more cookies for a party or holiday, scaling the recipe is easy:
-
Double or triple all ingredients proportionally.
-
Mix dough in larger bowls or divide into batches for even mixing.
-
Use multiple baking sheets to avoid crowding the oven.
-
Adjust baking time slightly if cookies are larger than usual.
Scaling the recipe maintains the texture and taste as long as spacing and timing are considered carefully.
Make-Ahead Dough Tips
Preparing dough in advance can save time.
-
Make dough a day ahead and store in the fridge for richer flavor.
-
Divide into portions and freeze to bake later.
-
Thaw dough overnight in the fridge before baking.
-
Pre-portioned dough balls make baking consistent and fast.
These tips are perfect for planning ahead, whether for school lunches or holiday gatherings.
Serving Suggestions
Quaker oatmeal chocolate chip cookies are perfect for snacking or dessert.
-
Serve warm with a glass of milk for classic comfort.
-
Pair with ice cream for a quick cookie sundae.
-
Crumble over yogurt or oatmeal for added sweetness and texture.
-
Include in lunch boxes or party platters for easy treats.
These ideas make cookies versatile beyond just a snack on the counter.
Conclusion
Quaker oatmeal chocolate chip cookies are simple to make and a favorite for any household. Following the official recipe and these tips ensures soft, chewy cookies every time. From ingredient selection to baking adjustments, variations, and storage, this guide covers everything you need. Whether baking for family or a crowd, these cookies bring comfort and deliciousness in every bite, keeping the tradition alive.
FAQs
What kind of oats are best for Quaker oatmeal chocolate chip cookies?
Old fashioned oats give the classic chewy texture.
Can I use quick oats instead of old fashioned?
Yes, but cookies will be softer and may spread more.
How do I keep Quaker oatmeal cookies soft?
Store in an airtight container and add a slice of bread to retain moisture.
Can I substitute margarine with butter?
Yes, butter adds richer flavor, but keep the same measurement.
Are Quaker oatmeal cookies gluten-free?
Traditional Quaker oats contain gluten; use certified gluten-free oats for a gluten-free option.
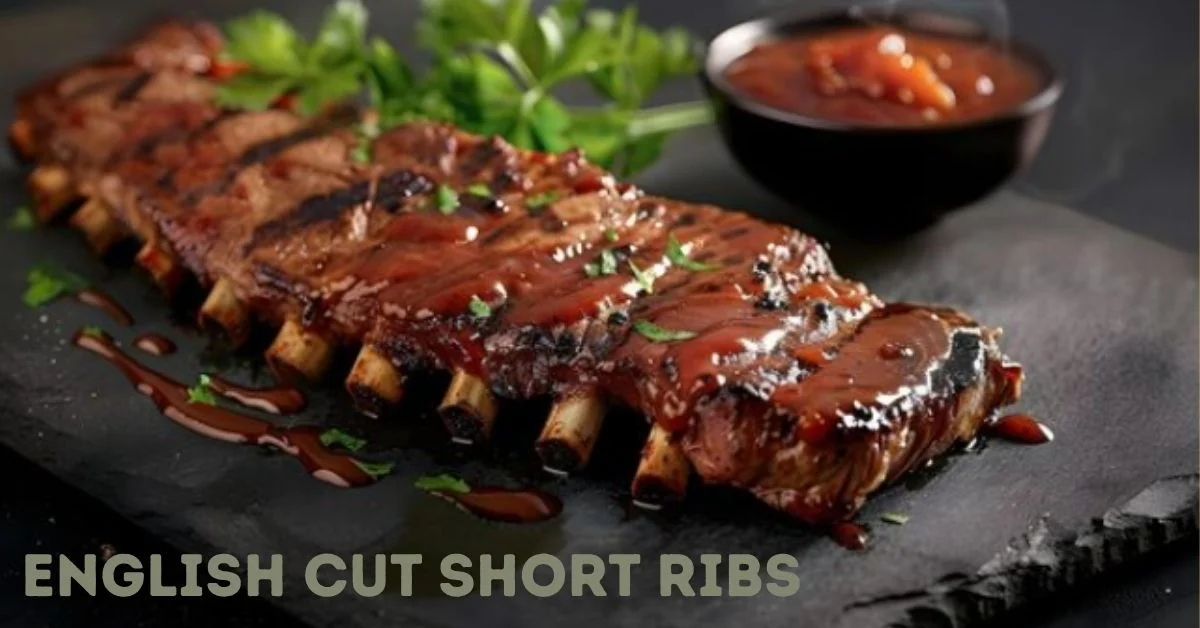
English cut short ribs are one of the most flavorful and satisfying beef cuts you can cook, yet many home cooks have no idea what they are or how to prepare them properly. If you have ever stood at a butcher counter feeling confused about which short rib to pick, this guide will clear that up completely.
In this article you will learn exactly what English cut short ribs are, how they differ from other cuts, how to buy the best ones, which cooking methods work best, how long to cook them, and how to avoid the most common mistakes. By the end you will have everything you need to cook short ribs that are tender, rich, and deeply flavorful.
What Are English Cut Short Ribs?
Definition and Key Characteristics
English cut short ribs are a specific style of cutting beef short ribs where the meat is sliced parallel to the bone rather than across it. Each piece contains one bone with a thick slab of beef sitting on top of it. The bone runs lengthwise along the bottom of the cut, and the meat on top is typically two to four inches thick.
This cut comes from the chuck, brisket, or plate section of the cow, all of which are areas that carry a lot of connective tissue and fat. That is exactly why they taste so good when cooked low and slow. The collagen in that connective tissue breaks down over time and turns into gelatin, which gives the braising liquid that silky, rich texture and makes the meat fall off the bone.
Featured Snippet Answer: English cut short ribs are beef ribs sliced parallel to the bone, leaving one bone per piece with a thick rectangular slab of beef on top. They come from the chuck or plate section of the cow and are best cooked low and slow to break down their tough connective tissue into tender, flavorful meat.
Where They Come From on the Cow
Short ribs as a category come from the lower rib cage area of the cow. More specifically, English cut short ribs are typically cut from ribs six through eight in the chuck section, or from the plate section closer to the belly. The chuck area produces slightly more marbling and a richer flavor, while plate short ribs tend to be larger with more fat on top.
The location matters because these muscles do a lot of work during the animal’s life. Heavy-use muscles develop more connective tissue and intramuscular fat, which is exactly what makes them taste so much better than lean cuts when braised or slow cooked.
How They Look: Easy Identification Guide
Many people struggle to identify English cut short ribs at first glance. Here is what to look for.
Each piece is a thick rectangular block of meat with one flat bone running along the bottom. The bone is usually three to four inches long. The meat sits directly on top of the bone and is dark red with visible white fat marbling throughout. There is often a thick fat cap on one side.
Compare this to flanken cut, where you see thin strips of meat with multiple small bone cross sections running across the piece. If you see one bone per piece with thick meat on top, that is English cut.
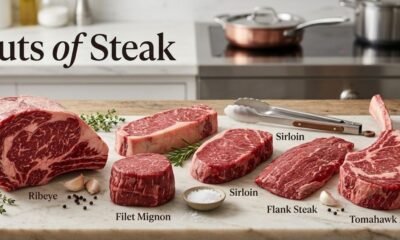
Read also: Cuts of Steak: Complete Guide to Beef Cuts
English Cut vs Flanken Cut Short Ribs
Key Differences in Cutting Style
The difference between these two cuts comes entirely down to the direction of the knife.
English cut: sliced parallel to the bone, one bone per piece, thick meat slab on top.
Flanken cut: sliced perpendicular to the bone, multiple thin bone cross sections per strip, thin meat around them.
English cut pieces are thick and chunky, usually one and a half to two inches tall. Flanken cut strips are thin, usually half an inch to one inch, and they look more like a rack when laid flat.
Texture and Cooking Differences
Because English cut pieces are thick, they need long, slow cooking to fully break down the collagen and become tender. You cannot rush them. Braising in liquid for three or more hours is the standard approach, and they reward patience with extraordinary texture.
Flanken cut ribs, being thinner, can actually be grilled or pan seared at high heat in a short amount of time. Korean galbi is the most well known example. The thin cut means the heat penetrates quickly and the meat cooks through without needing hours in a pot.
Which Cut Is Better for Different Recipes
Use English cut when you are braising, slow cooking, or smoking. They are the right choice for classic red wine braises, hearty winter stews, and low and slow BBQ where you want thick, pull apart meat.
Use flanken cut when you want short ribs on the grill, for quick Korean BBQ style cooking, or in recipes where thin strips work better with bold marinades.
Most recipes titled simply “braised short ribs” are written for English cut. If a recipe does not specify, it almost certainly means English cut.
How English Cut Short Ribs Are Butchered
Bone-In vs Boneless Options
English cut short ribs come in both bone-in and boneless versions. Bone-in is the traditional and far superior choice for braising and slow cooking.
The bone contributes flavor to the braising liquid as it cooks. Bone-in pieces also hold their shape better during long cooking times. Many chefs specifically seek out bone-in for the final presentation too. A thick rib sitting on its bone looks impressive on a plate.
Boneless short ribs, sometimes called beef chuck short ribs, are the same meat with the bone removed. They work fine in slow cookers or pressure cookers where presentation matters less. They are also slightly easier to portion and serve. But if you can get bone-in, choose those.
Thickness and Portion Sizes Explained
Standard English cut short ribs are cut to about two to three inches thick per piece, with one bone running the full length. Each piece typically weighs around half a pound before cooking.
Some butchers cut them thinner at one and a half inches. These cook slightly faster but do not have quite the same visual impact when served. Ask your butcher for at least two inch thickness if you have the choice.
For a main course serving, plan on one to two pieces per person depending on how rich the rest of the meal is. They are very filling thanks to the fat content and richness of the sauce they typically produce.
How to Buy the Best English Cut Short Ribs
What to Look for at the Butcher or Store
Color is the first thing to check. Look for deep red meat with bright white fat. Avoid pieces that look gray or brown on the surface, as that is a sign of oxidation and age.
Marbling matters a lot with this cut. You want to see white flecks of fat running through the meat, not just a fat cap on top. Intramuscular fat is what keeps the meat moist and flavorful during the long cooking time.
Look for pieces that are relatively uniform in size. If you are cooking multiple pieces in the same pot, uneven sizes mean some pieces will be done before others. Consistency matters for even cooking.
USDA Grades and Meat Quality
USDA Prime is the top grade and has the most marbling. It is ideal for short ribs if you can find it and afford it. Specialty butchers, warehouse clubs, and high end grocery stores sometimes carry Prime grade.
USDA Choice is the most common grade you will find in regular grocery stores. It has less marbling than Prime but still produces excellent results when braised properly. Most recipes are written with Choice grade meat in mind.
USDA Select has the least fat and marbling. It can work but the final result will be noticeably less rich. If Select is the only option, consider adding extra fat to your braise through olive oil or butter.
Questions to Ask Your Butcher
Do not hesitate to talk directly to the butcher. Here are the most useful questions to ask.
Ask for English cut specifically, not just short ribs. Butchers appreciate when customers know what they want. If you say flanken or just short ribs, you may get something different.
Ask what section the ribs came from, chuck or plate. Chuck tends to have better flavor. Plate ribs are larger and often sold as beef plate ribs rather than short ribs, though the distinction blurs.
Ask about thickness. Request at least two inches if possible.
Ask if they have Prime grade in the back, especially if you are cooking for a special occasion. Sometimes Prime cuts are not on display but are available on request.
Best Ways to Cook English Cut Short Ribs
Braising: The Most Popular Method
Braising means cooking the meat partially submerged in liquid inside a covered pot at low temperature. This is the single best method for English cut short ribs and the one most professional kitchens rely on.
The basic process is simple. You brown the meat first to develop a crust, then cook it low and slow in a flavorful liquid for three to four hours until the collagen has fully broken down and the meat is completely tender.
The braising liquid can be red wine, beef stock, beer, or a combination. Aromatics like onion, garlic, carrot, and celery go into the pot along with the liquid. As everything cooks together, the liquid becomes an incredibly rich sauce that you can serve as is or reduce down further.
Most people use a Dutch oven on the stovetop or in the oven at around 300 to 325 degrees Fahrenheit. The oven method produces more even heat and is generally preferred.
Slow Cooker Method
The slow cooker is not quite as elegant as braising in a Dutch oven but it is extremely convenient and produces excellent results.
Brown the ribs in a skillet before adding them to the slow cooker. Skipping this step is a common mistake. The sear adds flavor that the slow cooker alone cannot replicate. Add your liquids and aromatics, set the cooker to low, and walk away for eight to ten hours.
The slow cooker produces very tender meat, sometimes more fall-apart than braising since it maintains a very steady low temperature. The sauce will need to be reduced on the stovetop after the cook since slow cookers do not allow evaporation.
Many people who cook short ribs this way report that the next day reheated version is even better than right out of the pot, as the flavors continue to develop overnight.
Oven-Roasted Option
If you want a drier exterior with more caramelization, oven roasting at a lower temperature works well too. Set the oven to 275 degrees Fahrenheit and cook the ribs on a rack uncovered, loosely tented with foil for the first two hours and then uncovered for the final hour and a half.
This method will not give you the braising liquid sauce, but it produces a more roasted, caramelized exterior that some people strongly prefer. You can baste with a BBQ sauce or glaze in the final thirty minutes for even more depth.
Smoking and Grilling
Beef plate short ribs are the most common choice for smoking, but English cut short ribs from the chuck section also smoke beautifully.
Set your smoker to 225 to 250 degrees Fahrenheit. Season the ribs heavily with salt, pepper, and garlic powder. Smoke them for five to seven hours until they reach an internal temperature of around 203 degrees Fahrenheit and the meat pulls back from the bone noticeably.
Use oak, hickory, or cherry wood for smoking short ribs. These woods complement the beefy richness without overwhelming it.
Cooking Time and Temperature Guide
Time Chart by Cooking Method
Here is a straightforward reference chart based on standard thickness pieces of two to three inches.
Braising in oven at 300 to 325 degrees Fahrenheit: 3 to 3.5 hours.
Braising on stovetop at low simmer: 3.5 to 4 hours.
Slow cooker on low setting: 8 to 10 hours.
Slow cooker on high setting: 4 to 5 hours (lower quality result, use low when possible).
Pressure cooker or Instant Pot at high pressure: 45 to 60 minutes, then natural release.
Smoker at 225 to 250 degrees Fahrenheit: 5 to 7 hours.
Oven roasted at 275 degrees Fahrenheit: 3.5 to 4 hours.
These times assume bone-in pieces of standard size. Thinner pieces will finish faster. Always check for tenderness rather than relying solely on time.
Ideal Internal Temperature for Tender Ribs
This is one of the most misunderstood aspects of cooking short ribs. Short ribs are not like steaks where you pull them at a specific doneness temperature.
Short ribs need to reach an internal temperature of 200 to 205 degrees Fahrenheit to fully break down the collagen. At this temperature the meat is not overcooked, it is perfectly braised. The collagen has converted to gelatin and the fat has rendered properly.
Featured Snippet Answer:
English cut short ribs should be cooked to an internal temperature of 200 to 205 degrees Fahrenheit, not the 145 degrees used for steaks. This higher temperature is necessary to break down the collagen in the connective tissue, which is what makes the meat tender and gives the sauce its silky richness.
If you pull them at 160 or 170 degrees thinking the meat is cooked through, they will be tough and chewy. The collagen conversion only happens above 190 degrees and is most complete around 200 to 205.
Use a probe thermometer and check for tenderness. When a skewer or probe slides in with almost no resistance, the ribs are ready.
Easy Braised English Cut Short Ribs Recipe
Ingredients
This recipe is for four to six servings.
- Three pounds of bone-in English cut short ribs, four to six pieces.
- Salt and black pepper for seasoning.
- Two tablespoons of neutral oil for searing.
- One large onion, roughly chopped.
- Three garlic cloves, smashed.
- Two medium carrots, roughly chopped.
- Two tablespoons of tomato paste.
- One cup of dry red wine such as Cabernet Sauvignon or Merlot.
- Two cups of beef stock.
- Two sprigs of fresh rosemary.
- Three sprigs of fresh thyme.
Step-by-Step Instructions
Start by taking the short ribs out of the refrigerator at least thirty minutes before cooking. This helps them cook more evenly. Pat them completely dry with paper towels and season generously on all sides with salt and black pepper.
Preheat your oven to 325 degrees Fahrenheit.
Heat the oil in a large Dutch oven over high heat until shimmering. Working in batches so you do not crowd the pot, sear the ribs for two to three minutes on each meaty side until a deep brown crust forms. Set them aside on a plate.
Reduce the heat to medium. Add the onion, carrots, and garlic to the same pot. Cook for about five minutes, stirring occasionally, until softened and picking up color from the fond on the bottom.
Add the tomato paste and cook for two minutes, stirring constantly.
Pour in the red wine and scrape up all the browned bits from the bottom of the pot. Let it simmer for three minutes.
Add the beef stock, rosemary, and thyme. Nestle the ribs back into the pot. The liquid should come about halfway up the sides of the meat, not fully submerge it.
Bring to a simmer on the stovetop, then cover tightly and transfer to the oven.
Braise for three to three and a half hours, turning the ribs once at the halfway mark if possible. They are ready when a probe thermometer reads 200 to 205 degrees and a skewer slides in with no resistance.
Remove the ribs carefully and set aside covered with foil. Strain the braising liquid through a fine mesh sieve and skim off the fat. Return the liquid to the pot and reduce over medium high heat until it coats the back of a spoon. Taste and adjust the salt.
Serve the ribs with the sauce spooned generously over the top.
Tips for Perfect Results
The single most important tip is to sear the meat properly before braising. Many people skip or rush this step and it noticeably affects the final flavor. You want a genuine dark brown crust, not just a gray surface.
Do not add too much liquid. The ribs should braise, not boil. Halfway up the sides of the meat is the right level.
Cook them the day before if you can. Short ribs reheat beautifully and the flavor is genuinely better after sitting overnight in the refrigerator. The fat also solidifies on top when chilled, making it very easy to skim off before reheating.
What Most People Get Wrong About English Cut Short Ribs
This is worth its own section because these mistakes are extremely common and they ruin an otherwise excellent dish.
The biggest misconception is treating short ribs like a roast. Many first time cooks pull them too early because the internal temperature looks right based on steak standards. At 160 degrees they are technically safe to eat but they will be tough and leathery. You need to push through to 200 plus degrees.
The second common mistake is using too much liquid. The braising pot should not look like a soup pot. Too much liquid dilutes flavor and prevents proper caramelization on the meat surface above the liquid line.
Third is not seasoning enough before searing. Short ribs are thick pieces of meat. Season more generously than you think you need to.
Fourth is rushing the sear. High heat and patience during the sear step pay off throughout the rest of the recipe. If the meat is sticking to the pot when you try to turn it, it is not ready to turn yet. Let it release naturally.
Flavor Variations and Recipe Ideas
Classic Red Wine Braised
This is the foundation recipe described above. Use a full bodied red wine, good beef stock, and classic French aromatics like thyme, rosemary, bay leaf, and mirepoix. The result is deeply savory with a sauce that feels almost like a demi-glace. This is restaurant style short ribs at home.
BBQ Style Short Ribs
Season the ribs with a dry rub of brown sugar, smoked paprika, garlic powder, onion powder, black pepper, and cayenne. Sear them first, then braise in a mixture of beef stock and your favorite BBQ sauce with a splash of apple cider vinegar. Finish them uncovered in the oven for the last thirty minutes to get a sticky, caramelized exterior. Serve with extra warmed BBQ sauce on the side.
Asian-Inspired Soy, Garlic, and Ginger
This variation is outstanding and underused. Braise the ribs in a mixture of soy sauce, beef stock, fresh ginger, garlic, a splash of rice wine or dry sherry, and a small amount of brown sugar or honey. Add a couple of star anise for depth. The finished sauce is savory, slightly sweet, and incredibly aromatic. Serve over steamed white rice with scallions and sesame seeds on top.
Based on general user experience, the Asian-inspired version tends to convert people who thought they did not like short ribs, because the lighter, brighter flavors cut through some of the richness.
My Experience with English Cut Short Ribs
The first time I cooked English cut short ribs I pulled them too early. They looked done, the braising liquid smelled incredible, and I was impatient. The meat was edible but chewy and disappointing.
The second time I left them in the oven for the full three and a half hours and the difference was dramatic. The meat practically fell off the bone when touched with a fork. The sauce had reduced into something genuinely restaurant quality.
What I have noticed consistently since then is that the sear step and the finish temperature are the two things that separate a great batch from a mediocre one. Get those right and everything else is forgiving.
What to Serve with English Cut Short Ribs
Best Side Dishes
Short ribs are rich and intensely flavored, so the best sides are ones that balance or complement that richness without competing with it.
Creamy mashed potatoes are the classic pairing for a reason. They soak up the braising sauce and provide a neutral, buttery contrast to the beef.
Soft polenta or creamy grits work the same way and are excellent alternatives to mashed potatoes, especially with the red wine braised or Italian style versions.
Roasted root vegetables like carrots, parsnips, and turnips hold up next to the richness of the ribs and add some sweetness.
Simple steamed white rice works perfectly with the Asian-inspired version.
Crusty bread for soaking up sauce should never be overlooked.
Sauces and Pairings
The braising liquid reduced into a sauce is usually all you need. However, if you want something extra, a simple gremolata of lemon zest, garlic, and fresh parsley adds brightness that cuts through the fat beautifully.
For BBQ style ribs, extra BBQ sauce on the side served warm is the natural choice.
A horseradish cream sauce made from sour cream, prepared horseradish, and a squeeze of lemon is another pairing that works surprisingly well with the classic red wine version.
Storage, Reheating, and Leftovers
How to Store Cooked and Raw Ribs
Raw English cut short ribs will keep in the refrigerator for three to five days in their original packaging or in an airtight container. For longer storage, freeze them tightly wrapped for up to six months.
Cooked short ribs store very well. Keep them in the refrigerator in an airtight container with the braising sauce for up to four days. The fat will solidify on top of the sauce when cold, which is actually helpful because you can lift it off easily before reheating for a slightly lighter result.
For freezing cooked short ribs, store them with the sauce in freezer bags or containers for up to three months. The sauce helps protect the meat from freezer burn.
Best Reheating Methods
The best way to reheat short ribs is low and slow in a covered pot or Dutch oven on the stovetop over low heat, adding a splash of beef stock if the sauce has thickened too much. This preserves the texture and keeps the meat from drying out.
The microwave works in a pinch but use a low power setting and cover the dish with a damp paper towel to retain moisture. Check every minute and stop as soon as heated through.
Many people who cook short ribs regularly intentionally make extra specifically for leftovers. The reheated version the next day is genuinely better than the original, especially after the flavors have had overnight to meld together.
Nutrition and Calories Overview
Macronutrients Breakdown
English cut short ribs are a rich, calorie-dense food. A typical cooked serving of around three ounces of braised short rib meat contains approximately 300 to 400 calories depending on how much fat remains, along with 25 to 30 grams of protein and 20 to 30 grams of fat.
The fat content is notably high compared to leaner beef cuts, which is entirely expected given the nature of this cut. Much of that fat renders out during the long cooking process but a significant amount remains in the meat and sauce.
Short ribs also provide meaningful amounts of iron, zinc, vitamin B12, and selenium, all of which are abundant in red meat.
Is It a Healthy Choice?
Short ribs are not an everyday lean protein. They are a rich, indulgent food best treated as an occasional meal rather than a weeknight staple.
That said, they fit into a balanced diet perfectly well. The cooking method (braising rather than frying) does not add extra calories beyond the meat itself and any sauce ingredients. If you skim the fat from the braising liquid before reducing it, you reduce the overall fat content of the dish meaningfully.
Pairing them with vegetable-based sides and keeping portion sizes reasonable makes them a satisfying and nutritionally balanced meal for special occasions.
Conclusion
English cut short ribs are one of those cuts that reward patience and attention. Get the sear right, use enough time in the oven or slow cooker, cook them to the right internal temperature, and you will end up with something genuinely impressive.
The key takeaways are simple. One bone per thick piece means English cut. Cook to 200 to 205 degrees Fahrenheit, not lower. Always sear first. Do not rush the cooking time. And if you can make them the day before, do it because short ribs genuinely taste better the next day.
Once you cook them correctly the first time, this cut has a way of becoming a permanent part of your recipe rotation.
FAQs
What is the difference between English cut and flanken cut short ribs?
English cut short ribs are sliced parallel to the bone, giving you one bone per thick piece of meat. Flanken cut is sliced perpendicular to the bone, producing thin strips with multiple bone cross sections. English cut is for braising and slow cooking. Flanken cut is for grilling and quick cooking methods like Korean BBQ.
How long do English cut short ribs take to cook in a slow cooker?
On the low setting, English cut short ribs need eight to ten hours in a slow cooker. On high they take four to five hours, but low and slow produces a noticeably better texture and more developed flavor. Always brown the ribs in a hot pan before adding them to the slow cooker.
What temperature should English cut short ribs reach when done?
Short ribs need to reach an internal temperature of 200 to 205 degrees Fahrenheit to be fully tender. This is much higher than steak doneness temperatures. At this temperature the connective tissue collagen has fully converted to gelatin, which is what makes the meat fall apart tender and gives the sauce its silky body.
Can you overcook English cut short ribs when braising?
Yes, but it takes longer than most people expect. If braised far beyond the recommended time, the meat can start to fall apart completely and turn mushy rather than pull apart tender. Check for doneness starting at the three hour mark by probing with a skewer. When it slides in with very little resistance, they are ready.
Where can I buy English cut short ribs?
Most full service butcher counters carry them or can cut them on request. Larger grocery stores with a meat counter often stock them. Warehouse stores like Costco frequently carry them in larger packs at good value. If you cannot find them labeled as English cut, ask the butcher specifically for bone-in short ribs cut parallel to the bone.
Parsons Bakery is a local bakery based in Bountiful, Utah, known for its freshly baked goods, custom cakes, and everyday treats. Whether you are visiting for the first time or looking to place a custom order, it helps to know what to expect before you go.
Many people searching for Parsons Bakery want to know about the menu, pricing, ordering process, and what makes it worth visiting. There is not always a clear, complete guide in one place. This article covers everything from the menu breakdown and best-sellers to customer reviews, visiting tips, and how to get in touch. By the end, you will have a full picture of what Parsons Bakery offers and whether it is the right spot for you.
What is Parsons Bakery?
Overview and Location
Parsons Bakery is a neighborhood bakery located in Bountiful, Utah. It serves the local community with a range of baked goods that include cakes, cupcakes, cookies, donuts, and artisan breads. The bakery has built a steady following among residents in Bountiful and surrounding areas like Salt Lake City and Centerville.
Bountiful is a tight-knit community, and local bakeries here tend to thrive on word of mouth and repeat customers. Parsons fits that mold. People do not stumble upon it randomly. They hear about it from a neighbor, try it once, and keep coming back.
Parsons Bakery is a small-batch, community-focused bakery in Bountiful, UT, offering handmade baked goods including cakes, cookies, donuts, and breads. It is known for its fresh daily offerings and custom cake orders. The bakery serves walk-in customers and also takes special requests for events and celebrations.
What Makes It Popular
The bakery stands out because of consistency. The items taste the same every time you visit, which is not something every small bakery can claim. Customers also appreciate that the staff takes custom orders seriously, especially for birthday cakes and wedding-style cupcake towers.
One thing experienced bakery visitors notice quickly is that Parsons does not try to do everything. The menu is focused, which usually means better quality across the board. A bakery that makes ten things really well is more trustworthy than one that makes fifty things at average quality.
Read also: What Is Italian Ice? A Complete Guide
Parsons Bakery Menu Breakdown
Cakes and Custom Cupcakes
Cakes are one of the main draws at Parsons Bakery. The selection typically includes layered celebration cakes, sheet cakes for larger gatherings, and individually decorated cupcakes. Flavors rotate but often include classic options like vanilla, chocolate, lemon, and red velvet.
Custom cupcakes are especially popular for birthdays and baby showers. Customers can request specific colors, themes, or flavor combinations. It is worth calling ahead for custom orders since turnaround time can vary depending on the season and how busy the bakery is.
If you are ordering a custom cake for an event, give at least a week’s notice. During holiday seasons like Christmas or Valentine’s Day, two weeks in advance is a safer bet to avoid disappointment.
Fresh Cookies Selection
Parsons Bakery offers a rotating cookie selection that often includes chocolate chip, sugar cookies, snicker doodles, and seasonal varieties. The cookies are baked fresh, which makes a real difference compared to pre-packaged options from grocery chains.
Sugar cookies with custom frosting are popular for events and parties. Some customers order them in bulk for school events or office celebrations. The decorating quality on these is noticeably better than what you would get from a mass-produced bakery.
Donuts and Daily Specials
Donuts at Parsons are a morning staple. They tend to sell out early, so if you are specifically coming for donuts, arriving before 10 AM is a smart move. Classic glazed, filled donuts, and specialty flavors are usually on offer.
Daily specials change based on what the bakers have prepared, which keeps things interesting for regular visitors. It is worth following the bakery on social media to catch when limited items go up, since they do not always last long.
Artisan Breads and Pastries
On the savory and semi-savory side, Parsons offers artisan-style breads and pastries. These include options like soft dinner rolls, braided loaves, and buttery croissants depending on the day. For people who want something beyond sweets, the bread selection adds variety to the visit.
Fresh bread from a local bakery has a texture and flavor that store-bought loaves simply cannot replicate. The crust, the interior softness, and the lack of preservatives all make a difference. Regular customers at Parsons often pick up a loaf alongside their sweet treats.
Best Items Worth Ordering
Customer Favorites
Based on consistent community feedback, the custom cupcakes and fresh-baked cookies are the most talked-about items. People regularly mention the frosting quality on cupcakes as being a step above what they expected. The balance between sweetness and flavor comes through clearly.
Chocolate chip cookies and glazed donuts also come up often in positive reviews. These are the kinds of items that seem simple but are easy to get wrong. When a bakery gets the basics right, it builds real trust with its customers.
Seasonal and Signature Items
Parsons Bakery tends to rotate seasonal offerings around major holidays. Think Halloween-themed sugar cookies, heart-shaped treats for Valentine’s Day, and festive holiday cake flavors in December. These limited runs create excitement and give regulars a reason to visit more often.
If there is a signature item specific to the bakery, it is worth asking staff directly when you visit. Often, smaller bakeries have an off-menu or rotating item that locals know about but is not advertised widely. Do not be shy about asking what is freshest or what the bakers are most proud of that day.
Pricing and How to Order
Price Range Overview
Parsons Bakery is priced in line with what you would expect from a quality local bakery. Individual items like cookies and donuts are typically in the one to three dollar range. Cupcakes tend to run slightly higher, especially for custom decorated versions. Full cakes vary based on size and complexity.
For comparison, chain grocery store bakeries may charge less, but the quality difference is noticeable. When you factor in freshness, customization, and the handmade nature of the products, the pricing at a place like Parsons represents fair value.
Custom Orders and Special Requests
Custom orders are a significant part of what Parsons Bakery does. This includes celebration cakes, themed cookie sets, and cupcake towers for events. To place a custom order, it is best to contact the bakery directly by phone or in person to discuss your needs, timeline, and budget.
Bring a reference photo if you have a specific design in mind. Bakeries appreciate the visual guidance, and it reduces the chance of miscommunication. Being clear about dietary needs upfront also helps avoid last-minute issues.
In-Store Experience and Online Presence
As of the most recent available information, Parsons Bakery primarily serves customers through its physical location. Walk-in purchases are available during business hours. For custom orders, advance notice is required.
Check their social media pages for updates on online ordering options, as many small bakeries have started offering pre-order systems for convenience. This is especially useful during busy periods when walk-in availability may be limited.
Customer Experience and Reviews
Taste and Quality
Customers consistently describe the baked goods at Parsons Bakery as fresh, flavorful, and well-made. The frosting on custom cakes gets particular praise for not being overly sweet, which is a common complaint at other bakeries. The texture of the breads and pastries is frequently mentioned as soft and fresh-tasting.
One local customer shared that they ordered a birthday cake with a custom design and were genuinely impressed by how closely it matched the reference image they provided. That kind of attention to detail is what separates a dedicated local bakery from a generic one.
Service and Atmosphere
The atmosphere at a small community bakery like Parsons tends to be warm and personal. Staff typically know regular customers by name, and the experience feels more like visiting a neighbor than shopping at a commercial establishment.
For first-time visitors, do not be surprised if the staff offers a recommendation or mentions what is freshest that day. That kind of interaction is common in well-run local bakeries and is something you rarely get at larger chains.
Real Customer Opinions
Online reviews for Parsons Bakery reflect a generally positive customer base. Common themes include great taste, good value, friendly service, and quality custom work. Negative feedback, when it appears, tends to relate to limited availability of certain items or long waits during peak times, which is understandable for a small-batch operation.
Parsons Bakery Compared to Other Local Options
Key Differences
Compared to other Bountiful-area bakeries, Parsons tends to stand out in the custom order department. While several local options offer standard baked goods, the willingness to work closely on custom cakes and themed treats gives Parsons an edge for event-specific purchases.
The freshness and daily rotation also distinguish it from bakeries that bake in larger batches or rely on pre-made components. When a bakery bakes in small quantities daily, the quality is almost always better.
Pros and Cons
Pros include fresh daily offerings, strong custom order capabilities, friendly staff, and a focused menu that does not sacrifice quality for variety. The location in Bountiful makes it easily accessible for residents across Davis County.
Cons might include limited availability for popular items, especially donuts that sell out early, and the need to plan ahead for custom orders. These are not unique to Parsons but are common realities of artisan, small-scale baking.
Tips for Your First Visit
Best Time to Visit
Mornings are the best time to visit if you want the widest selection, especially for donuts and pastries. Arriving between opening time and mid-morning gives you the best chance of getting fresh items before they sell out. Midweek visits tend to be less crowded than weekends.
Avoid arriving right before closing time if you are hoping for variety. By late afternoon, popular items may already be gone, and the remaining selection can be limited.
What to Try First
If it is your first visit, start with a donut and a cookie to get a baseline sense of the bakery’s quality. These are the simplest items and usually the most revealing. If both taste fresh and well-made, you can trust the more complex items like cakes will be equally good.
For a special occasion, go straight for a custom cupcake order. It lets you experience the bakery’s strengths in decoration and flavor combination at a lower commitment level than a full cake.
The Story Behind Parsons Bakery
History and Background
Parsons Bakery has roots in the Bountiful community and has grown through local support rather than big marketing campaigns. Like many beloved neighborhood bakeries, its reputation was built gradually through quality products and personal connections with customers.
The name itself reflects a family or personal connection, which is common among independent bakeries that take pride in their craft and community identity.
Values and Tradition
Small bakeries like Parsons tend to operate on values of craftsmanship, freshness, and community service. These are not just marketing talking points for places like this. They reflect daily decisions about ingredients, batch sizes, and how custom orders are handled.
When a bakery cares about its reputation in a tight community, it shows in every item on the shelf.
Contact Information and Location
Address and Directions
Parsons Bakery is located in Bountiful, Utah. For the exact address and directions, it is best to check their current Google Maps listing or official social media pages, as small business locations and hours can change periodically.
Business Hours
Hours of operation vary and may change seasonally. Morning hours are standard for bakeries, typically opening around 7 or 8 AM. Closing times can range from early afternoon to evening. Always confirm current hours before making a special trip, especially on holidays or long weekends.
Social Media and Contact
Parsons Bakery maintains a presence on social platforms where they share photos of daily offerings, seasonal items, and promotions. Following them is the best way to stay current on new items and availability. For custom orders, direct contact by phone is usually the most reliable option.
Conclusion
Parsons Bakery is a solid, community-rooted bakery in Bountiful, Utah that delivers on freshness and custom work. Whether you are stopping in for a morning donut or planning a custom birthday cake, the quality and personal service make it worth the visit. Plan ahead for custom orders, arrive early for the best selection, and do not leave without trying at least one of their cookies or cupcakes.
FAQs
Does Parsons Bakery take custom cake orders?
Yes, Parsons Bakery accepts custom cake and cupcake orders. It is recommended to contact them at least one to two weeks in advance, especially for large or detailed orders. During holidays, earlier notice is better to secure your spot.
What are the most popular items at Parsons Bakery?
Customer feedback points to custom cupcakes, glazed donuts, and fresh cookies as the top sellers. The custom cakes also receive strong reviews for quality decoration and flavor.
Does Parsons Bakery offer gluten-free or vegan options?
This varies and is best confirmed directly with the bakery. Many small bakeries are beginning to offer allergen-friendly options, but availability depends on their current menu. Call ahead if dietary restrictions are a concern.
What time does Parsons Bakery open?
Parsons Bakery typically opens in the morning, around 7 to 8 AM. Hours can vary, so checking their social media or calling ahead is the safest way to confirm current opening times.
Can I order online from Parsons Bakery?
Online ordering options may be available through their social media or a website. For custom orders, direct contact is usually required. Check their latest social media pages for the most up-to-date ordering information.

Italian ice is a frozen dessert made from water, sugar, and fruit or flavored syrup. It has a smooth, semi-firm texture that sits somewhere between a slushy and a sorbet. People often confuse it with snow cones or shaved ice, but Italian ice is a completely different product in terms of how it is made and how it tastes.
The confusion mostly comes from how similar these frozen treats look at first glance. This guide breaks down exactly what Italian ice is, where it came from, how it is made, and how it compares to other frozen desserts. You will also find a simple homemade recipe, tips for getting the texture right, and answers to the most common questions people have about it.
What Is Italian Ice?
The Simple Definition
Italian ice is a non-dairy frozen dessert made by blending water, sugar, and natural or artificial flavorings, then freezing the mixture while stirring it repeatedly to create a smooth, dense texture. It contains no milk, cream, or eggs.
Italian ice is a smooth, sweet frozen dessert made from water, sugar, and fruit or flavored syrup. It contains no dairy and is naturally vegan and gluten-free. Unlike snow cones, the flavor is mixed throughout the entire product, not just poured on top. It is denser than a slushy and lighter than sorbet.
Key Characteristics
The texture is what makes Italian ice stand out. It is not crunchy like crushed ice, not creamy like ice cream, and not grainy like a poorly made granita. When done right, it melts smoothly on your tongue and releases the flavor evenly from the first bite.
The flavor is always distributed throughout the product. This is a key difference from snow cones, where the syrup is poured over plain ice. With Italian ice, the fruit or flavoring is frozen into every part of it.
Read also: What Is a Binder in Cooking? A Complete Guide
Where Did Italian Ice Come From?
Origins in Italy
The roots of Italian ice go back centuries to Italy, where frozen desserts were made using snow brought down from nearby mountains and mixed with fruit juice or sweet syrups. This early version was called “granita” in Sicily and “grattachecca” in Rome. Both were made by scraping or shaving ice and combining it with natural fruit flavors.
These Italian frozen treats were not exactly the same as what we now call Italian ice, but they were the direct inspiration. The technique of mixing sweetened water with fruit and freezing it is where the whole tradition started.
How It Evolved in the United States
Italian immigrants brought this tradition to America in the late 1800s and early 1900s. As they settled in cities like Philadelphia, New York, and Baltimore, they started selling their version of frozen fruit ices from pushcarts on the street. Philadelphia became particularly well known for its style of Italian ice, often called “water ice” by locals.
Over time, the product was adapted to American tastes. Commercial production scaled things up, new flavors were introduced, and brands like Rita’s Italian Ice turned it into a widely recognized frozen treat sold across the country. The Italian-American version is generally sweeter and smoother than the original Italian granita, which tends to be slightly coarser and less sweet.
What Is Italian Ice Made Of?
The Basic Ingredients
At its core, Italian ice requires just three things: water, sugar, and a flavoring agent. That is it. Most traditional recipes use real fruit juice or fruit puree as the flavoring, which also adds natural color and acidity that balances the sweetness.
A basic lemon Italian ice, for example, would use fresh lemon juice, lemon zest, water, and sugar. The simplicity is part of what makes it appealing. There are no stabilizers, no dairy, no eggs, and no complicated ingredients.
Natural vs Artificial Flavoring
Authentic or homemade Italian ice almost always uses real fruit. Commercial Italian ice products, on the other hand, often use artificial flavors and colorings to reduce cost and extend shelf life. The taste difference is noticeable. A lemon Italian ice made with real lemons has a slightly tart, fresh flavor, while an artificially flavored version tends to taste more like lemon candy.
If you are buying packaged Italian ice from a grocery store, check the ingredient list. Products with real fruit juice listed near the top are generally better in flavor and slightly higher in nutritional quality, even if the sugar content is similar.
How Italian Ice Is Made
The Traditional Method
Traditional Italian ice is made by combining sugar with water and heating it gently until the sugar dissolves completely. This creates a simple syrup. Once cooled, fresh fruit juice or puree is stirred in. The mixture is then poured into a shallow container and placed in the freezer.
Here is where it gets important: the mixture needs to be scraped or stirred every 30 to 45 minutes during freezing. This process breaks up ice crystals as they form and is what creates the smooth, fine texture that defines Italian ice. Without this step, you end up with a solid, icy block.
Modern and Commercial Production
Commercial producers use industrial machines called batch freezers or continuous freezers. These machines churn the mixture at a controlled rate while freezing it, which creates a consistent texture far faster than the manual scraping method. Large brands can produce hundreds of gallons at a time this way.
The commercial versions often include small amounts of stabilizers like guar gum or locust bean gum, which help maintain texture during storage and transportation. This is why store-bought Italian ice stays smooth even after sitting in a freezer for weeks.
Why the Texture Is Smoother Than Snow Cones
The smoothness of Italian ice comes down to crystal size. When water freezes slowly and undisturbed, it forms large ice crystals that feel crunchy and coarse. When you agitate the mixture repeatedly during freezing, you break up those crystals into much smaller ones. Smaller crystals mean a smoother product.
Snow cones skip this process entirely. They are made from plain ice that is shaved or crushed and then topped with syrup. The syrup coats the ice but is not mixed throughout, and the ice itself is still coarse. Italian ice has its flavor locked into thousands of tiny crystals, which is why it feels completely different in your mouth.
Italian Ice vs Other Frozen Desserts
Italian Ice vs Ice Cream
The biggest difference is dairy. Ice cream is made with milk, cream, and usually eggs. It is churned to incorporate air, which makes it light and creamy. Italian ice contains none of that. It is denser, lower in fat, and has a cleaner, fruitier flavor profile.
Italian ice also tends to be lower in calories per serving than ice cream, mostly because it has no fat. However, it can be just as high in sugar, so it is not automatically a healthier choice in every way.
Italian Ice vs Snow Cones
A snow cone is made from shaved or crushed ice with flavored syrup poured over the top. The syrup sinks to the bottom as you eat it, so you often get a flavorless piece of ice at the end. Italian ice has the flavor mixed uniformly throughout.
Snow cones are also crunchier and less dense. Italian ice has a smoother, more compact consistency. If you have ever taken a spoonful of Italian ice and compared it to a bite of snow cone, the difference is immediately clear.
Italian Ice vs Shaved Ice
Shaved ice, popular in Hawaii and parts of Asia, is made from ice that is shaved into extremely fine, fluffy ribbons. It is much softer than a snow cone but still has syrup added on top rather than mixed in. Hawaiian shaved ice, for example, often has a creamy center and absorbs the syrup well due to its powdery texture.
Italian ice is denser and more structured than shaved ice. Shaved ice is soft and almost cloud-like. Both are enjoyable but serve different texture preferences.
Popular Italian Ice Flavors
Classic Fruit Flavors
The most popular traditional flavors include lemon, cherry, watermelon, mango, strawberry, and blue raspberry. Lemon is probably the most iconic, especially in the Philadelphia water ice tradition. It is tart, bright, and refreshing on a hot day.
Mango has become increasingly popular, especially in areas with large Latin American communities, where mango frozen treats are already a staple.
Unique and Modern Flavors
Newer Italian ice shops have pushed well beyond fruit. You can now find flavors like wedding cake, cotton candy, pineapple coconut, and even sour green apple. Some shops offer layered cups with two or three flavors. Rita’s Italian Ice, for example, regularly introduces seasonal and limited-edition flavors to keep things fresh for returning customers.
Flavor combinations like strawberry lemonade or mango chili have also become popular because they balance sweetness with a little kick.
Is Italian Ice Healthy?
Calories and Sugar Content
A typical 6-ounce serving of Italian ice contains roughly 100 to 150 calories and around 25 to 35 grams of sugar, depending on the brand and flavor. That is comparable to many soft drinks. It is low in fat and usually contains no protein.
The calorie count is lower than most ice cream servings, which can range from 200 to 350 calories for the same portion size, mostly due to the fat in cream.
Dairy-Free, Vegan, and Gluten-Free
Traditional Italian ice contains no dairy, eggs, or gluten. This makes it one of the few widely available frozen desserts that naturally fits vegan, lactose-intolerant, and gluten-free diets. Always check the label on commercial products, as some may be made in facilities that process dairy or gluten-containing products.
When It Is a Better Choice Than Ice Cream
If you want something cold and sweet but want to avoid heavy fats, Italian ice is a reasonable option. It is especially suitable for people who are lactose intolerant. However, if your concern is sugar intake, it is not necessarily lighter than ice cream, it just gets its calories from carbs instead of fat.
How to Make Italian Ice at Home
Easy Step-by-Step Recipe
Here is a simple lemon Italian ice recipe that serves four people.
You will need one cup of fresh lemon juice (about 6 lemons), one cup of sugar, two cups of water, and one tablespoon of lemon zest.
Step one: Combine sugar and water in a saucepan over medium heat. Stir until sugar fully dissolves. Remove from heat and let it cool completely. This is your simple syrup.
Step two: Stir in the lemon juice and zest. Mix well.
Step three: Pour into a shallow metal baking dish and place in the freezer.
Step four: Every 30 to 45 minutes, use a fork to scrape and stir the mixture, breaking up any ice crystals that have formed. Do this four to five times over two to three hours.
Step five: Once the texture is smooth and fluffy, it is ready to serve.
Tips for the Best Texture
Use a metal or aluminum pan instead of glass or plastic. Metal conducts cold more efficiently and helps the mixture freeze evenly. Also, make sure your simple syrup is fully cooled before adding the fruit juice, as adding juice to warm syrup can dull the flavor.
Do not skip the stirring steps. This is the most important part of making proper Italian ice at home.
Common Mistakes to Avoid
The most common mistake is not stirring enough. If you freeze it without scraping, you get a solid fruit-flavored ice block, not Italian ice. Another mistake is using bottled lemon juice instead of fresh. Bottled juice lacks the brightness and complexity of fresh-squeezed and produces a flat-tasting result.
Some people also add too little sugar, which causes the mixture to freeze too hard. The sugar lowers the freezing point slightly, which helps maintain a softer consistency.
When to Enjoy Italian Ice
Best Occasions and Seasons
Italian ice is most popular in summer, but it is genuinely good any time you want something cold, light, and refreshing. It is a great option at outdoor events, birthday parties, and after spicy or heavy meals when you want something cooling without the richness of ice cream.
Many families in Philadelphia and New York consider it a warm-weather staple, something they pick up after dinner the way other people might grab ice cream.
Serving Ideas and Pairings
Serve Italian ice in small paper cups for easy handling at parties. It pairs well with light foods like grilled fish, salads, or fresh fruit. For a fun dessert idea, layer two flavors in a cup for a visually appealing and flavorful combination.
Some people also use Italian ice as a palate cleanser between courses at dinner parties, similar to how sorbet is used in fine dining.
Conclusion
Italian ice is one of the most straightforward frozen desserts out there. It is made from water, sugar, and fruit, has no dairy, and gets its smooth texture from a simple but important freezing process. Whether you are buying it from a local shop or making it at home with fresh lemons, the key is the technique, specifically, stirring the mixture while it freezes to break up ice crystals.
It is a good option for people avoiding dairy, looking for something lighter than ice cream, or just wanting a refreshing treat on a hot day. It is not a health food by any strict standard, but it is a simple, enjoyable dessert with a long history behind it.
FAQs
Does Italian ice contain dairy?
No, traditional Italian ice is completely dairy-free. It is made from water, sugar, and fruit flavoring. It is safe for people who are lactose intolerant and is suitable for vegan diets. Always check store-bought packaging to be sure.
How should Italian ice be stored?
Keep it in an airtight container in the freezer. Homemade Italian ice is best consumed within one to two weeks. If it becomes too hard after storage, let it sit at room temperature for five to ten minutes before serving, then stir it to restore the texture.
Can it be made without special equipment?
Yes. You only need a shallow pan, a fork, and a freezer. The scraping method is simple and effective. No ice cream machine is required.
Is Italian ice the same as sorbet?
They are similar but not identical. Sorbet is usually smoother and made in an ice cream machine. Italian ice is made by the scraping method and tends to have a slightly coarser texture, though both are dairy-free fruit-based frozen desserts.
Why is it called “water ice” in Philadelphia?
In Philadelphia, locals use the term “water ice” to refer to the same product. The name reflects the simple ingredients, water and fruit, and distinguishes it from cream-based frozen desserts. Both terms refer to the same type of dessert.
-
 Food1 month ago
Cuts of Steak: Complete Guide to Beef Cuts
-

 Food1 month ago
What Is Andouille Sausage? Complete Guide
-

 Food5 days ago
Shirleys Coffee Shop Guam Locations Menu and Guide
-

 Drinks2 weeks ago
Easy Lychee Martini Recipe Sweet & Floral Cocktail
-

 Food1 month ago
Ultimate Tripas Recipe and Cooking Guide
-

 Food2 weeks ago
Italian Ice Flavoring Guide: Flavors, Bases, and Recipes
-
 Food2 weeks ago
Black Pudding Guide: History, Recipe & Nutrition
-
 Food3 weeks ago
Wagyu Beef Price per Pound: Complete Cost Guide